6 7
CHAIN SAW TERMINOLOGY
Grounded tools require a three wire ex-
tension cord. Double insulated tools can
use either a two or three wire extension
cord. As the distance from the supply out-
let increases, you must use a heavier
gauge extension cord. Using extension
cords with inadequately sized wire causes
a serious drop in voltage, resulting in loss
of power and possible tool damage. Refer
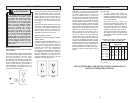
to the table shown to determine the re-
quired minimum wire size.
The smaller the gauge number of the wire,
the greater the capacity of the cord. For
example, a 14 gauge cord can carry a
higher current than a 16 gauge cord. When
using more than one extension cord to make
up the total length, be sure each cord con-
tains at least the minimum wire size re-
quired. If you are using one extension cord
for more than one tool, add the nameplate
amperes and use the sum to determine the
required minimum wire size.
Guidelines for Using Extension Cords
If you are using an extension cord out-
doors, be sure it is marked with the
suffix W-A (W in Canada) to indi-
cate that it is acceptable for outdoor
use.
Be sure your extension cord is prop-
erly wired and in good electrical
condition. Always replace a damaged
extension cord or have it repaired by a
qualified person before using it.
Protect your extension cords from
sharp objects, excessive heat and
damp or wet areas.
READ AND SAVE ALL INSTRUCTIONS FOR FUTURE USE.
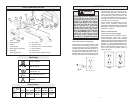
Recommended Minimum Wire
Gauge for Extension Cords*
Extension Cord Length
* Based on limiting the line voltage drop to
five volts at 150% of the rated amperes.
Nameplate
Amperes
0 - 2.0
2.1 - 3.4
3.5 - 5.0
5.1 - 7.0
7.1 - 12.0
12.1 - 16.0
16.1 - 20.0
25'
18
18
18
18
16
14
12
75'
18
18
16
14
12
10
100'
18
16
14
12
10
150'
16
14
12
12
50'
18
18
18
16
14
12
10
EXTENSION CORDS
Bucking
The process of cross cutting a felled tree
or log into lengths.
Chain Brake
A device used to stop the chain saw.
Chain Saw Powerhead
A chain saw without the saw chain and
guide bar.
Clutch
A mechanism for connecting and discon-
necting a driven member to and from a ro-
tating source of power.
Drive Sprocket or Sprocket
The toothed part that drives the saw chain.
Felling
The process of cutting down a tree.
Felling Back Cut
The final cut in a tree felling operation made
on the opposite side of the tree from the
notching undercut.
Front Handle
The support handle located at or toward
the front of the chain saw.
Front Handle Guard
A structural barrier between the front
handle of a chain saw and the guide bar,
typically located close to the hand position
on the front handle and sometimes em-
ployed as an activating lever for a chain
brake.
Guide Bar
A solid railed structure that supports and
guides the saw chain.
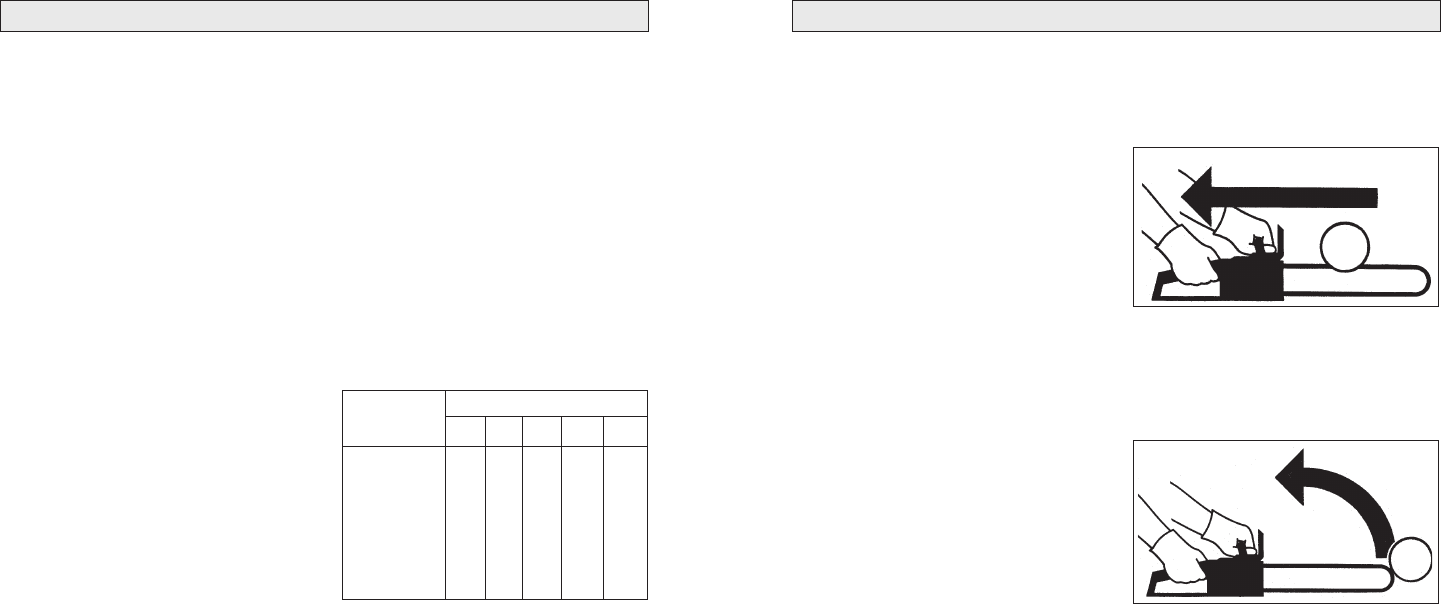
Kickback
The backward or upward motion, or both
of the guide bar occurring when the saw
chain near the nose of the top area of the
guide bar contacts any object such as a
log or branch, or when the wood closes in
and pinches the saw chain in the cut.
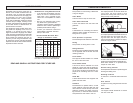
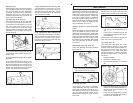
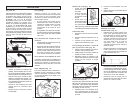
Kickback, Pinch (Fig. 4)
The rapid push back of the saw which can
occur when the wood closes in and
pinches the moving saw chain in the cut
along the top of the guide bar.
Low-Kickback Chain
A chain that complies with the kickback
performance requirements of ANSI B175.1-
2000 when tested on a representative
sample of chain saws.
Normal Cutting Position
Those positions assumed in performing the
bucking and felling cuts.
Notching Undercut
A notch cut in a tree that directs the trees
fall.
Oiler Control
A system for oiling the guide bar and saw
chain.
Rear Handle
The support handle located at or toward
the rear of the saw.
Fig. 4
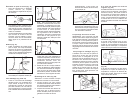
Kickback, Rotational (Fig. 5)
The rapid upward and backward motion of
the saw which can occur when the mov-
ing saw chain near the upper portion of
the tip of the guide bar contacts an object,
such as a log or branch.
Fig. 5


