18
Observe a Star using the Automatic Tracking Feature
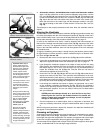
In this example, Autostar's Arrow keys are used to find a star, and then Autostar's
tracking capability automatically keeps the star centered in your telescope's eyepiece.
EC handbox users, see
APPENDIX D, page 58, for information about tracking with the
EC handbox.
1. If you have activated the Arrow keys and completed setting the telescope in the
polar home position, Autostar's display now reads "Align: Easy."
Go to Step 2.
If you have not used Autostar yet or have just plugged it into the HBX port,
per-
form the procedures described in
ACTIVATE THE ARROW KEYS, page 16 and SET-
TING THE POLAR HOME POSITION, page 17. Then go to Step 2 of this procedure.
If you have been using Autostar to perform other functions and the display does
not read "Align: Easy," follow these steps:
a. Press MODE (
3, Fig. 2) repeatedly until "Select Item: Object" displays.
b. Press the Scroll Up key (
7, Fig. 2) once. "Select Item: Setup" displays.
c. Press ENTER (
2, Fig. 2). "Setup: Align" displays. Go to Step 3.
2. Press MODE (
3, Fig. 2). "Setup: Align" displays.
3. Press the Scroll Down key repeatedly until "Setup: Targets" displays. Press
ENTER (
2, Fig. 2).
4. "Targets: Terrestrial" displays. Press one of the Scroll keys once (
7, Fig. 2).
"Targets: Astronomical" now displays.
5. Use the Arrow keys (
5, Fig. 2) to locate a bright star in the night sky. Use the
viewfinder to help line up on the star. You may choose any unobstructed, bright
star for the purposes of this example. Use Autostar's Arrow keys to center the star
in the eyepiece. Once the star is centered, press ENTER to select
"Astronomical." The telescope's tracking motors then engage. It may take the
tracking motors several seconds to begin tracking. When they do, it may be nec-
essary to once again center the star in the eyepiece. The tracking motors will
then keep any star you choose in the center of the eyepiece.
6. Press and hold the ENTER key for a few seconds and then release to stop track-
ing. You may also stop tracking by choosing "Terrestrial" in the Targets menu.
Using Autostar's GO TO Capabilities (Autostar Models Only)
Before you can use Autostar's GO TO capabilities, you must first:
• Learn how Autostar's keys move through the menus
• Initialize Autostar
• Place the telescope in the polar home position, if you have not already done so
(see
SETTING THE POLAR HOME POSITION, page 17)
• Select "Align: Easy" from Autostar's menus
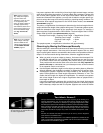
Which One’s the Alignment Star?
If Autostar has chosen an alignment star with which you are unfamiliar, how can
you be sure if the star in your eyepiece is really the alignment star?
The rule of thumb is that an alignment star is usually the brightest star in that
area of the sky. If you perform a GO TO to an alignment star and you're not sure
if you have located the alignment star or it isn't in the eyepiece, look through your
viewfinder. When you view an alignment star in the viewfinder, it stands out dra-
matically from the rest of the stars in that portion of the sky. The viewfinder will
help you locate a star more quickly than the eyepiece, because it has a much
wider field of view than the eyepiece. Using Autostar, set the slew speed to 6 or
higher and use the Arrow keys to center the alignment star in the viewfinder. If
your viewfinder has been aligned with the telescope, the alignment star should
now be in the eyepiece. Set the slew speed to 4 or less and center the star in
the eyepiece. Also see the "Spiral Search" tip on page 21.
If you have an obstruction, such as a tree or a building blocking your view of the
alignment star, or if you have any doubts at all about the star that has been cho-
sen, no problem. Just press the Scroll Down key and Autostar will find another
star to align upon.
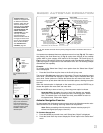
Important Note: While
performing the automatic
tracking procedure, you
may use the Arrow keys
to move the telescope or
you may also loosen the
telescope locks (
17 and
33, Fig. 1d) and move
the optical tube manually
to locate another object
in the sky. The tracking
function will continue to
be operational and the
telescope will track the
new object.
Tip:
You can change the tele-
scope's slew rate while
centering an object in the
eyepiece. See SLEW
SPEEDS
, page 16 for
more information.
LXD75 TIPS


