13
Section 2 Operating Instructions
7/14/08
RC45180 & RCM45180 Rotary Cutter 312-382M
Land Pride
Table of Contents
This cutter was designed to cut grass and medium to
heavy brush in pastures, right-of-ways, and certain ditch/
terrace areas. This cutter is also useful for heavy row crop
cutting. Avoid areas where small trees or brush diameters
exceed 2". Do not attempt to operate this cutter in areas
where rocks, steel, glass, concrete, wire, or other hard,
foreign objects may be present.
!
WARNING!
Do not operate this cutter under any terrain conditions where
the wing angle exceeds 45˚ up. Ensure that the wing wheels are
in continuous ground contact at all times. Use the float position
of your tractors hydraulic system to provide automatic wing
float position for varying terrain conditions.
Transporting
!
DANGER!
Rotary Cutters have the ability to discharge objects at high
speeds; do not operate this cutter along highways, roadways or
other areas where people may be present unless approved
guarding has been installed and properly maintained. Factory
approved guarding includes front and rear safety chain, deflec-
tor skirts or other shields. Contact your dealer or call Great
Plains Manufacturing, Inc. for the name of your nearest factory
authorized dealer.
!
CAUTION!
When traveling on public roads whether at night or during the
day, use accessory light and devices for adequate warning to
operators of other vehicles. Comply with all federal, state and
local laws.
!
CAUTION!
Always disengage tractor PTO before transporting cutter to
avoid injury from thrown objects or blade contact.
1. Select a safe ground travel speed when transporting
from one area to another. When traveling on road-
ways, transport in such a way that faster moving vehi-
cles may pass you safely.
2. Reduce tractor ground speed when turning. Leave
enough clearance so the cutter does not contact ob-
stacles such as buildings, trees or fences.
3. When traveling over rough or hilly terrain, shift tractor
to a lower gear.
4. Raise cutter to transport position using the hydraulic
lift or rachet jack. Careful: When raising to transport
position, be certain that PTO shaft does not contact
tractor or cutter tongue.
5. Raise both wings to 85˚ vertical position. The auto-
matic wing latches should engage. Check to be sure
they are fully latched.
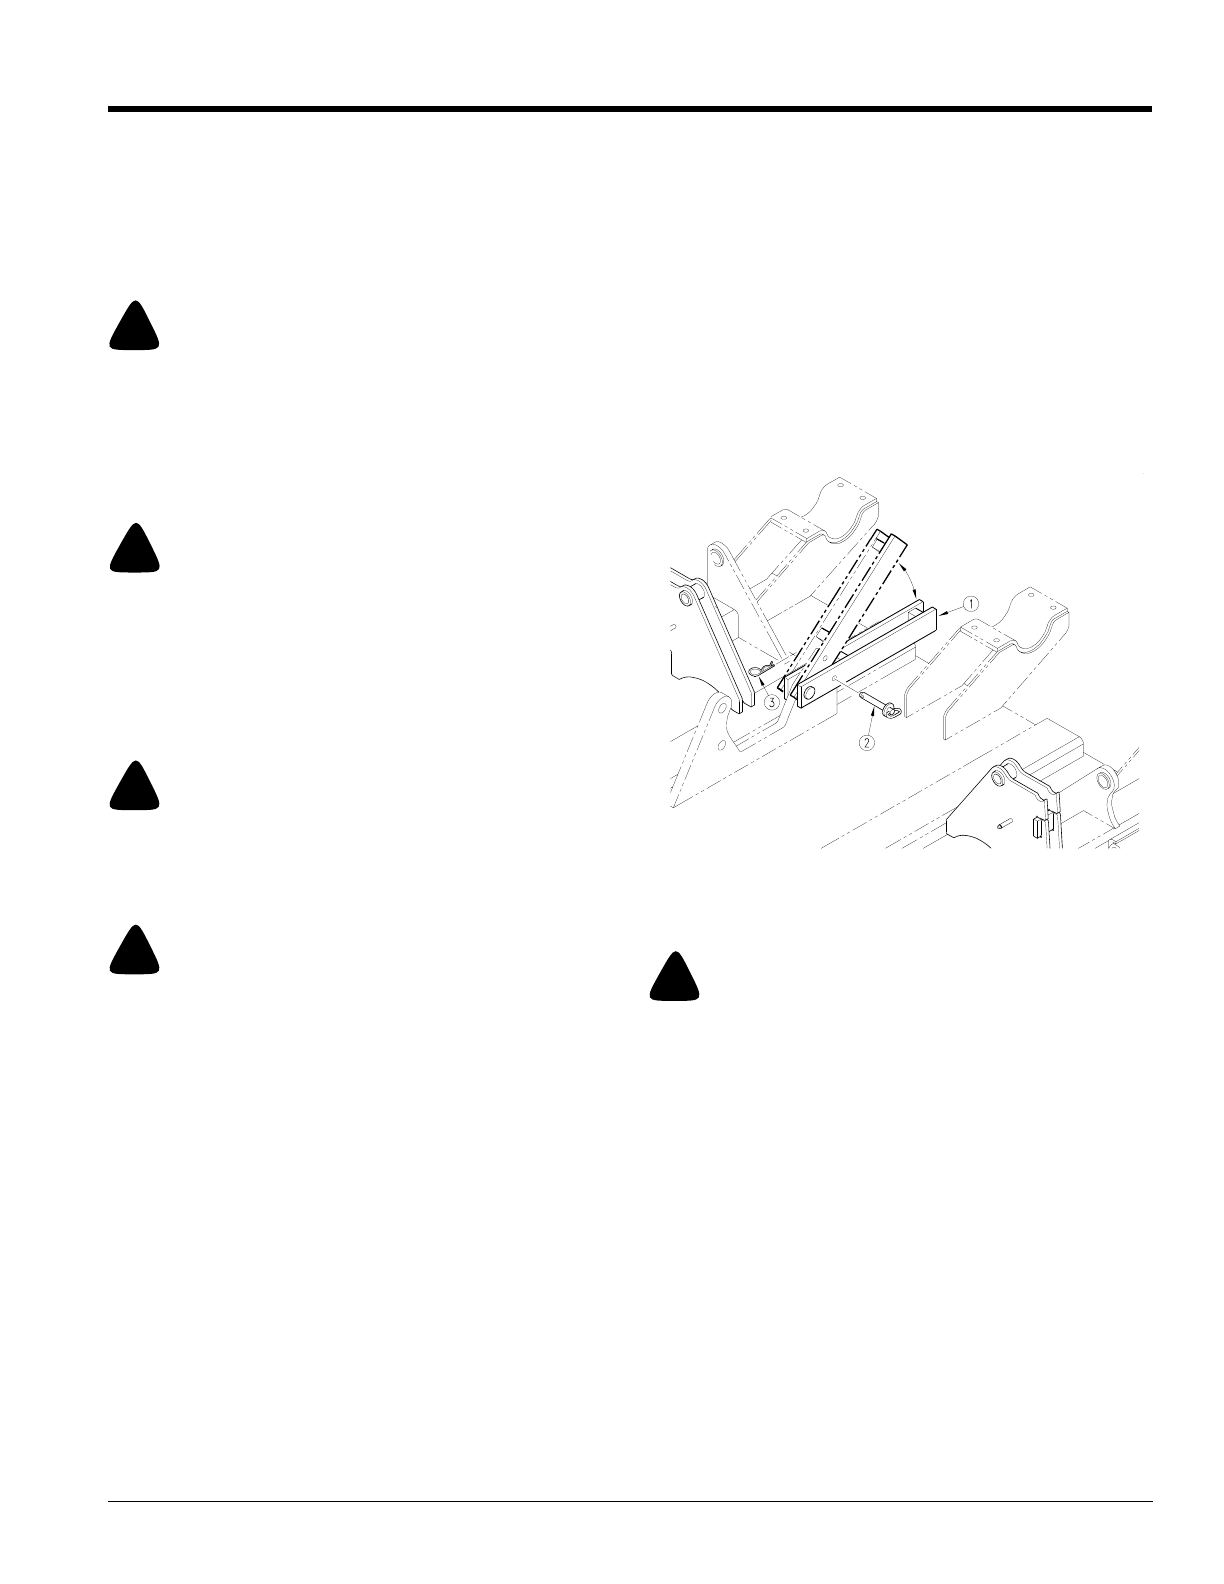
Refer to Figure 2-3:
6. Engage transport lock (#1) by removing lock pin (#2)
and rotating transport lock to 45˚ position. Insert lock
pin through detent notch and secure with hair pin cot-
ter (#3).
7. Slowly lower the cutter until transport lug of axle weld-
ment contacts transport lock block.
8. Reduce tractor ground speed when turning; be sure
tractor wheel does not contact cutter when turning.
Leave clearance so cutter does not contact obstacles
such as buildings, trees or fences.
9. The cutter should be transported no faster than 15
mph when equipped with laminated or solid tires,
and 30 mph when equipped with pneumatic tires.
!
CAUTION!
The cutter is 8’ 9" wide and care should be taken when encoun-
tering oncoming traffic and roadside obstructions.
Parking
The following steps should be done when preparing to
store the cutter or unhitch it from the tractor. See also
“Storage”, on page 18 for additional information on long
term storage of your cutter.
1. Park the cutter on a level, solid area.
2. Shut off tractor engine and engage parking brake.
3. Install jack & crank up the jack until it is supporting the
unit.
4. Unhitch from tractor.
Transport Link Operation
Figure 2-3
13885
