6
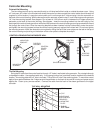
SHUT OFF VALVE
WATER SUPPLY (3/8" COPPER TUBING)
Water Supply
Consult local authorities for plumbing code require-
ments in your area. Connect house cold water supply to
steam generator supply tubing.
IMPORTANT: Jacuzzi Whirlpool Bath does not
warrant connections of water supply fittings and
piping or drain systems. Nor is it responsible for
damage to the shower base which occurs during
any installation procedure.
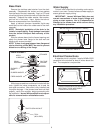
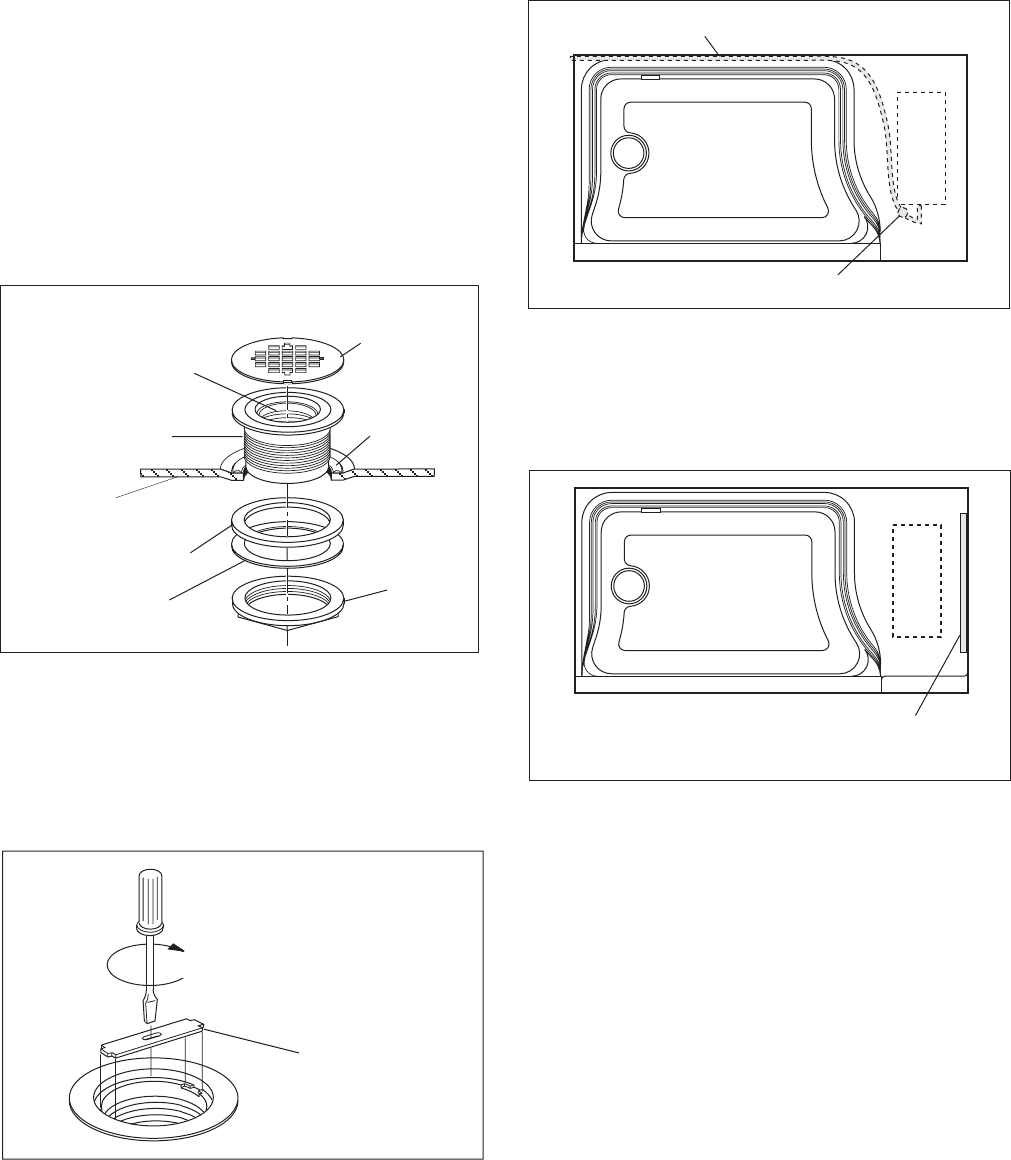
Base Drain
Remove the stainless steel strainer from the drain
assembly. Disassemble the locknut and two gaskets
from the back of the drain assembly. Apply a 1/4" bead
of caulking (silicone) to the drain hole and insert the drain
assembly. Replace the rubber washer, fiber washer,
and lock nut in that order. Hand tighten the locknut.
Remove excess sealant from finished side.
Apply a lubricant (common household liquid soap
works well) to the inside of the rubber seal of the drain
assembly.
NOTE: Watertight installation of the drain is the
installer's responsibility. Drain leakage is excluded
from the Jacuzzi Whirlpool Bath warranty of this
product.
Slide the shower base into the framed opening and
attach the shower base flange to the stud wall and
blocking with screws provided.
NOTE: If there is any gap between base flange and
stud or blocking, shims MUST be used to prevent
distortion or cracking of the flange.
STRAINER
DRAIN
ASSEMBLY
SILICONE
SEALANT
SHOWER
BASE
RUBBER WASHER
FIBER WASHER
NUT
APPLY
LUBRICANT
DRAIN ASSEMBLY
With a large screwdriver and the tool included with the
drain, tighten the inside compression nut to seal the
drain pipe connection. After drain is fully installed, test
for proper drainage. If the shower base does not drain
properly, rectify this condition before proceeding with
the installation. Jacuzzi Whirlpool Bath is not respon-
sible for removal and/or reinstallation costs.
TIGHTEN SEALING NUT
TOOL
(INCLUDED)
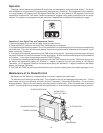
Electrical Connections
A separate circuit is required. Install a NEMA 6-50R
receptacle to the studwall at least 4 inches above the
floor. The receptacle is not provided.
LOCATE RECEPTACLE IN THIS AREA.
RECPTACLE TO BE ACCESSIBLE
FROM SERVICE ACCESS


