


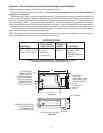
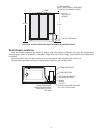
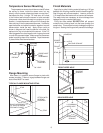
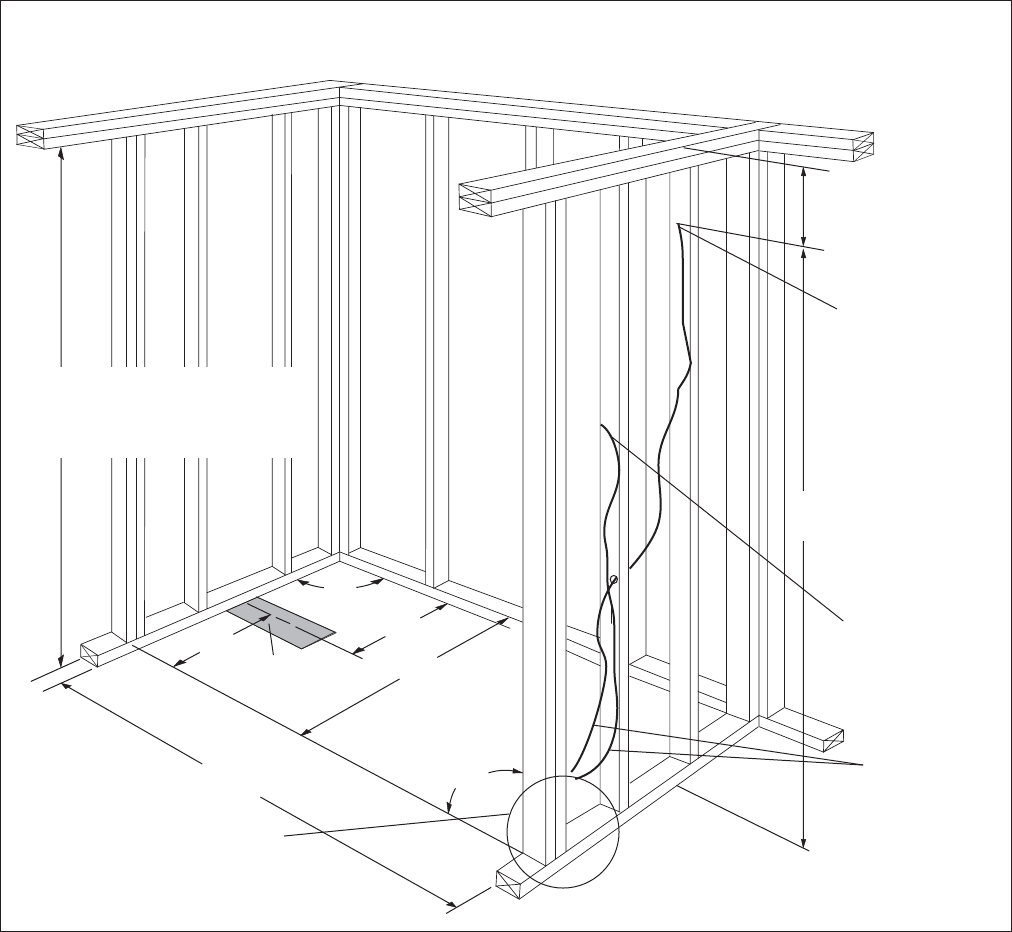
10-1/2" x 5"
DRAIN CUT-OUT
15-3/8"
33-1/4"
60-1/4"
FRONT OF DOUBLE STUDS
SUB-FLOOR
90º
90º
MINIMUM 6"
FROM FINISHED
CEILING
OR BOTTOM OF
OPTIONAL DOME
TO
TEMPERATURE
SENSOR
LOCATION
FROM STEAM
GENERATOR
MAXIMUM 7'
FROM FLOOR
TO DIGITAL
CONTROLLER
LOCATION
FRAMING AND ROUGH-IN DETAILS
(FOR LEFT HAND UNIT)
17-7/8"
AREA FOR DRAIN OF STEAM
GENERATOR WITH MANUAL OR
OPTIONAL AUTOMATIC VALVE.
EXACT LOCATION TO BE
DETERMINED BY INSTALLER
HEIGHT OF UNIT WITH
JACUZZI WHIRLPOOL BATH
STEAM ENCLOSURE: 83-3/8" ±1/4".
WITH DOME ADD 2" ±1/4"
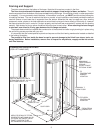
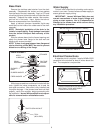
Framing and Support
The drain extends below the bottom of the base. Note that this requires a cutout in the floor.
The floor structure beneath the base must be able to support a total weight of base, and bather. The unit
must be supported from the bottom of the base and not from the tile flange. If the subfloor is level, no other preparation
is necessary. You can proceed to install the base. If the subfloor is not level, you MUST level the entire surface prior
to installing the base. The use of materials that shim or provide a level installation are allowed provided the method
used will ensure a level base that is supported from the bottom. Materials that may be used are a floor leveling
compound, mortar, plaster or minimal expansion structural foam having a minimum density of 5 lbs/cubic ft.; however
the base must remain level in order for it to drain properly and the foam feet must make full contact with the leveling
material. Both sides of a joint or splice of subfloor should be level to each other. When attaching the base flanges
to stud wall, use shims to fill any gaps between the tile flange and studs.
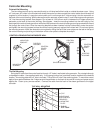
The shower base should be installed after construction of the studwall and after rough plumbing is in place using
the self drilling screws provided with your unit.
It is important that the framed pocket be plumb and square and that the framing members be located as detailed
in the framing illustration.
The protective film liner inside the base is used to prevent damage to the finish from shoes, tools, etc.
during installation. Before installation, remove liner to inspect for any defects, reapply and do not remove
until final cleanup.
3