


8
10
16
E
F
i
J
12
12
B
DE
EN
NL
IT
ES
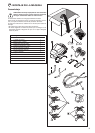
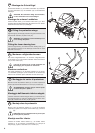
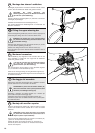
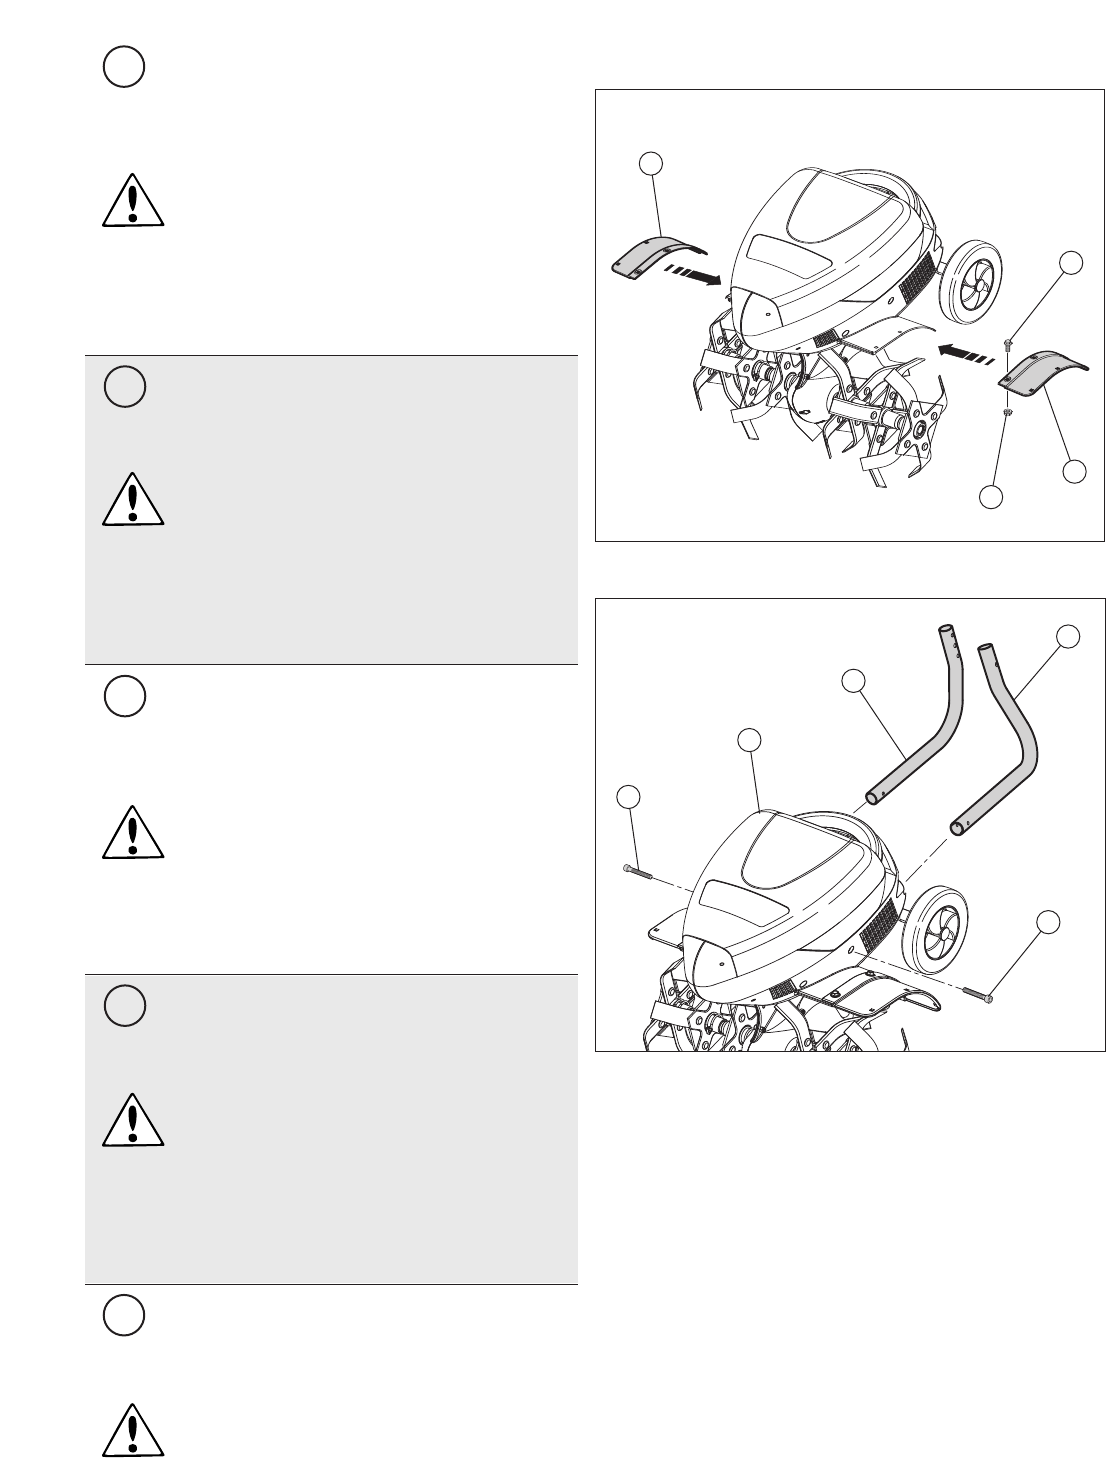
Rechtes Schutzblech (F) und linkes Schutzblech (E) einsetzen
und mit 6 Schrauben (10) und 6 Muttern (16) auf der Maschine
befestigen.
ACHTUNG: Die Schrauben mäßig stark festziehen,
um den Kunststoff nicht zu beschädigen!
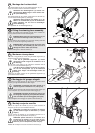
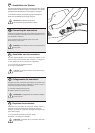
Montage der unteren Lenkholme
Unteren rechten Holm (i) und unteren linken Holm (J) in ihren
jeweiligen Sitz am Maschinenkörper (B) einführen und von beiden
Seiten mit einer Schraube (12) befestigen.
Montage der Schutzflügel
Fitting the protection wings
Fight the right (F) and left (E) protection wings and fix them on the
machine with 6 screws (10) and 6 nuts (16).
WARNING: Only tighten the bolts moderately so as
not to damage the plastic.
Fitting the lower steering bars
Insert the right-hand (I) and left-hand lower steering bars (J) in
their respective housings on the block (B) and fix them on each
side with a screw (12).
Montaggio dei carter di protezione
Montare il carter di protezione destro (F) e il carter di protezione
sinistro (E);
fissar
li sulla macchina con 6 viti (10) e 6 dadi (16).
A
TTENZIONE Non string
ere tr
oppo i b
ulloni:
possi
-
bili danni alle parti in plastica.
Montaggio dell’elemento inferiore stegola
Introdurre l’elemento inferiore stegola destro (i) e l’elemento infe-
r
iore stegola sinistro (J) nelle loro r
ispettiv
e sedi sul b
locco mac
-
china (B), e fissarli con una vite (12) da ogni lato.
Monteren veiligheidsschermen
Het rechter veiligheidsscherm F en het linker veiligheidsscherm
(E) monteren en ze op de machine vastzetten met de 6 schroeven
(10) en de 6 moeren (16).
! LET OP, de bouten niet al te strak aandraaien om
beschadiging van het plastic te voorkomen.
Monteren onderstuur
Het rechter onderstuur (i) en het linker onderstuur (J) in de hier-
voor bestemde openingen op het motorblok van de machine (B)
steken en ze aan beide zijden vastzetten met een schroef (12).
Montaje alas de protección
Montar el ala de protección derecha (F) y el ala de protección
izquierda (E), fijarlas en la máquina con 6 tornillos (10) y 6 tuercas
(16).
A
TENCIÓN:
apretar moderadamente los pernos para
no estr
opear los plásticos.
Montaje manillar inferior
Introducir el manillar inf
er
ior derecho (i) y el manillar inf
er
ior
izquierdo (J) en su respectivo compartimiento en el bloque de
máquina (B), y fijarlos a cada lado con un tornillo (12).