44 – English
NOTE!
If a new piston or cylinder has been fitted
the saw must be run for the first 3–4
hours with carburettor adjusted to the
factory settings.
Piston and cylinder – refitting 340, 345
1-5
See Piston and cylinder 346XP, 350, 351, 353 –
Refitting points 1-5.
6
Apply silicone adhesive/sealing compound (03-
7062) to the crankcase’s contact surfaces with the
cylinder.
Carefully slide the cylinder down over the piston
towards the big end bearing.
Note!
Work is facilitated if the crankshaft complete with
bearing and piston is released from the crankcase
and the piston is pushed into the cylinder. The unit
is then refitted in the crankcase.
7
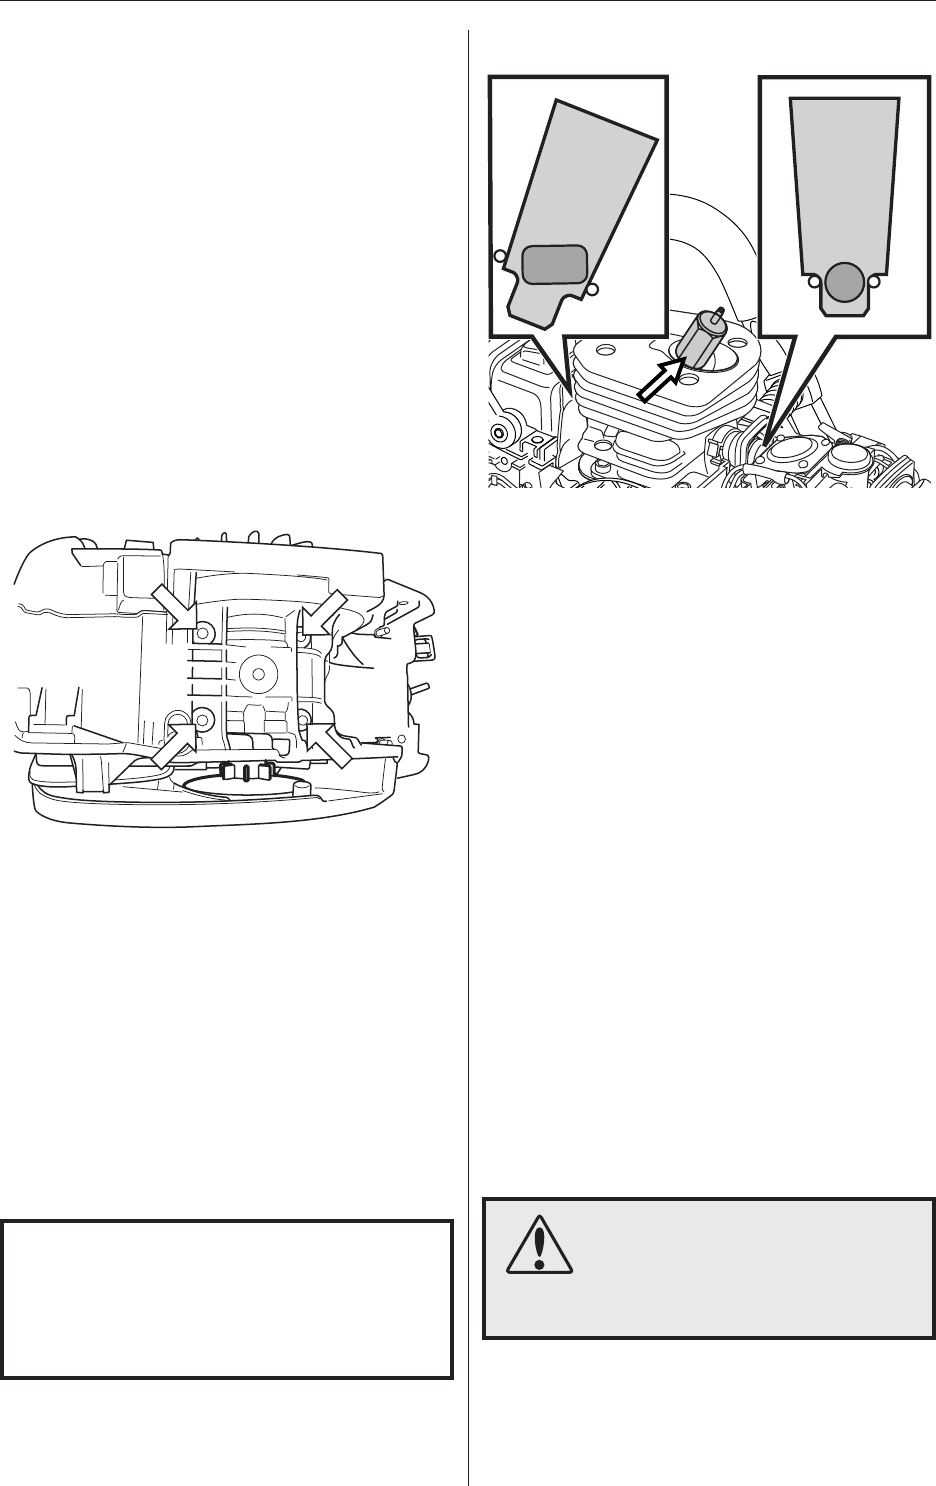
Fit the cylinder bolts, tightening crosswise to a
torque of 13–15 Nm.
8
Pressure test the cylinder.
9
Refit:
• spark plug, tighten to a torque of 15 Nm
• carburettor, see “Carburettor – refitting”,
• silencer, tighten to a torque of 8–10 Nm
• cylinder cover
• Loosen the carburettor bolts so that the carbu-
rettor can be moved back about 4 mm. Insert
cover plate 502 54 11-02 between the carburet-
tor and the carburettor flange. Tighten the
carburettor bolts to a torque of 1–1.5 Nm.
• Loosen the silencer bolts so that the silencer
can be moved back about 4 mm. Insert cover
plate 502 54 11-02 between the silencer and the
exhaust flange on the cylinder flange. Tighten
the silencer bolts to a torque of 8–10 Nm.
• Unscrew and remove the spark plug. Screw in
pressure test nipple 503 84 40-02. Connect tool
502 50 38-01 to the nipple. The decompression
valve must be closed. The decompression valve
must be closed. To check the decompression
valve itself, see “Decompression valve – pres-
sure testing”.
• Pump up the pressure to 80 kPa (0.8 bar).
• Wait 30 seconds.
• The pressure should not be less than 60 kPa
(0.6 bar).
• Remove the cover plates from the silencer and
carburettor, tighten the bolts to the specified
torque. Remove the pressure test nipple 503 84
40-02 and refit the spark plug.
WARNING!
After pressure testing the cylin-
der, check that the inlet manifold
is seated correctly, otherwise the
saw may be damaged.
Cylinder – pressure testing
Repair instructions


