English – 33
Repair instructions
Carburettor – pressure testing
Pressure testing should be carried out with the
carburettor fully assembled. Testing should always
be carried out after the carburettor has been
repaired, but can also be performed for trouble-
shooting before dismantling.
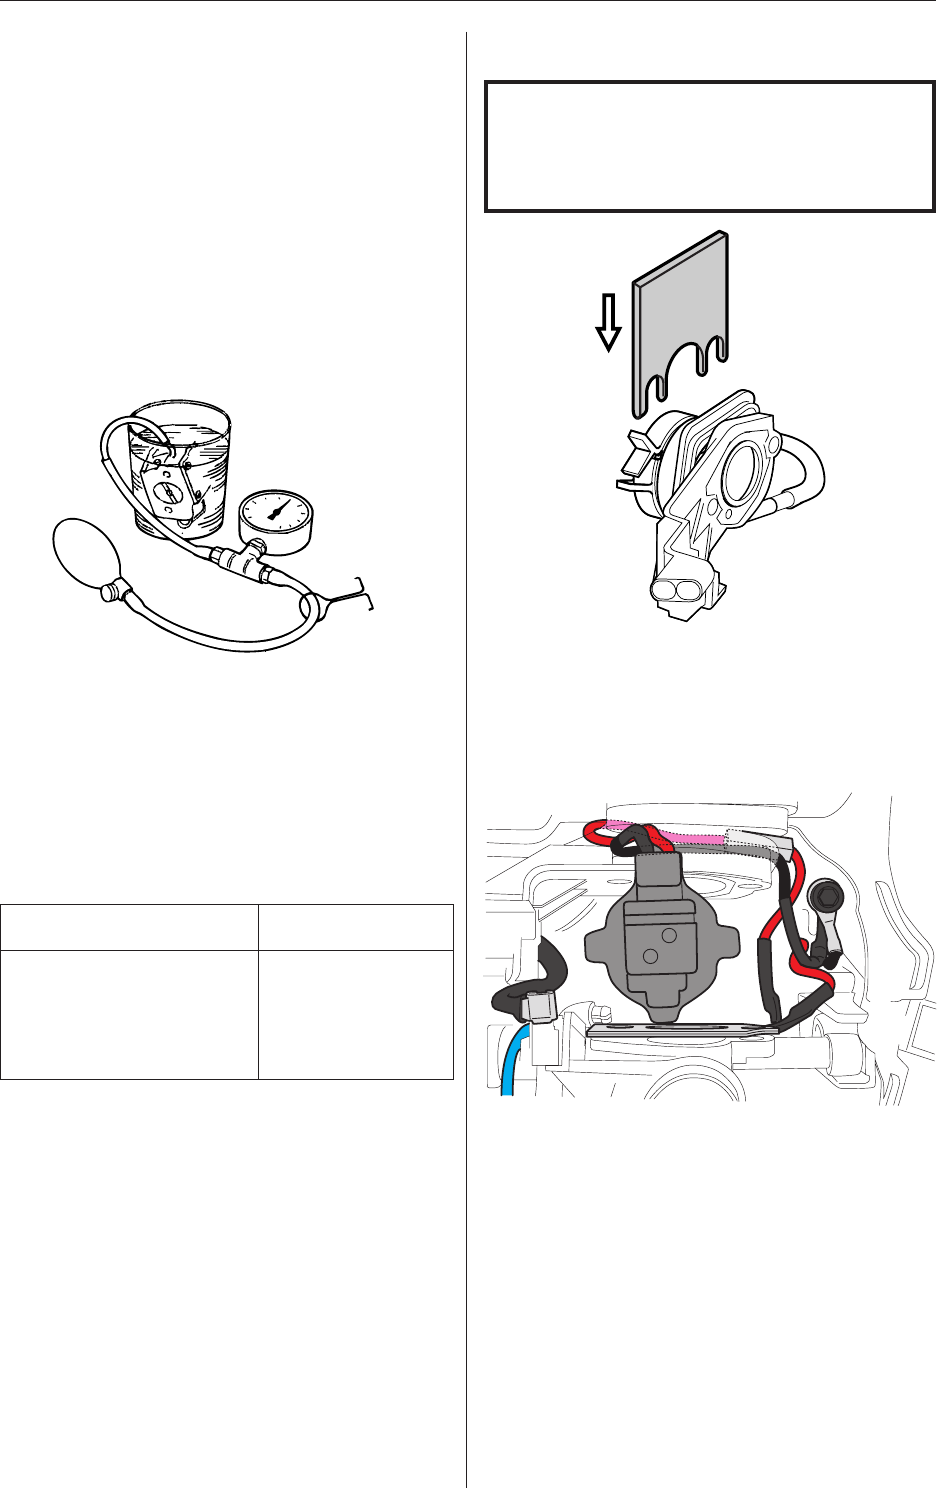
Carry out the test as follows:
• Screw in the high and low speed jet screws and
back them off one turn.
• Connect pressure tester 502 50 38-01 to the
carburettor fuel inlet.
• Lower the carburettor into a beaker of water.
• Pump up the pressure to 50 kPa (0.5 bar) and
clamp the pump tube.
• There should be no leakage. If leakage occurs,
refer to the table below.
Leakage Fault lies in
Diffuser jets Needle valve
In impulse tube Pump diaphragm
Ventilation hole above
metering unit Control diaphragm
Fit stop plate 502 54 17-01 between the carburet-
tor flange and the insulating plate.
On saws with a carburettor heater
346XPG, 351G, 353G
Carburettor – refitting
NOTE!
Cleanliness is very important when reas-
sembling the carburettor. Tiny particles of
dirt can cause operating problems.
1
Insert the heating element between the air filter
connection and carburettor as well as above the
carburettor. Route the cable as illustrated above.
Tighten the bracket above the carburettor with the
two bolts.
Connect the cables to the carburettor heater.


