English – 39
5
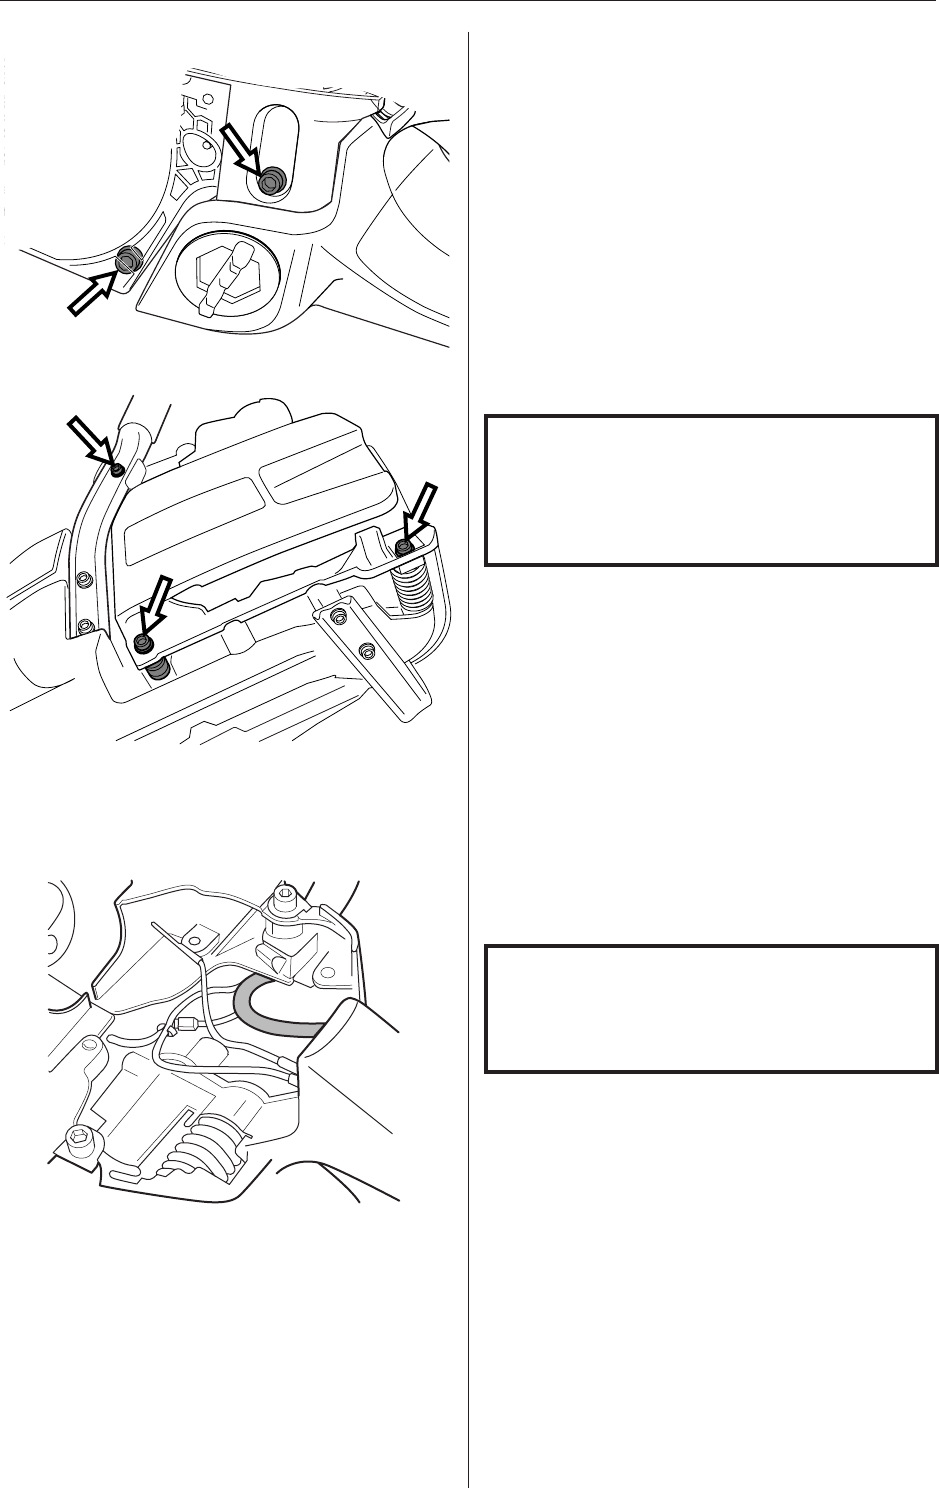
Unscrew both stops and the three vibration damp-
ing springs from the flywheel side and clutch side
of the engine.
6
Disconnect and remove the fuel hose from the
crankcase.
Repair instructions
Cleaning and inspection
Carefully check that:
• there are no leaks from the fuel tank
• there are no leaks from the tank filler cap
• the fuel hose is undamaged and free from wear
• the fuel filter is not clogged
• the tank vent is not blocked or leaking
• the vibration damping springs and stops are not
damaged
Replacing the fuel hose
1
Before replacing the fuel hose, measure the length
of hose between the crankcase and carburettor
and between the tank and crankcase. The correct
hose length between the tank and crankcase is 43
mm (1.69 inches). The correct hose length be-
tween the crankcase and carburettor is 53 mm
(2.09 inches).
2
Remove the fuel hose from the fuel tank using tool
502 50 83-01. Trim off 5 mm (0.20 inches) from the
mitred end of the hose. Fit the fuel filter and
reinsert the hose in the tank.
NOTE!
Do not use knurled pliers to disconnect or
reconnect the fuel hose. This could
damage the hose.
Replacing the fuel filter
1
First remove the old fuel filter from the tank unit
using special tool 502 50 83-01.
2
Pull the fuel hose out of the tank and pull off the
filter.
3
Fit the new fuel filter and feed the fuel hose back
into position.
NOTE!
Do not use knurled pliers to disconnect or
reconnect the fuel hose. This could
damage the hose and lead to leakage or
fracture.


