


6
3. Remove the left side service cover and check the oil level
by removing the oil filler cap. The oil level should be to the
bottom of the threads on the oil fill pipe. If oil is needed, see
the section “ADDING ENGINE OIL”.
4. Replace and secure the left side service cover.
5. Make sure there are no electrical devices connected to the
generator.
6. The National Electric Code (NEC) requires the frame and
external electrically conductive parts of the generator be
properly connected to an approved earth ground. Proper
grounding of the generator will prevent electrical shock in
the event of a ground fault condition in the generator or in
connected electrical devices. Proper grounding also helps
dissipate static electricity, which often builds up in unguarded
devices.
7. Local electrical codes may also require proper grounding of
the generator.
Starting the generator with accessories
connected to the 120 VAC outlets will
damage the generator and the connected
accessories.
STARTING THE GENERATOR
Once the fuel and oil levels have been checked and it has been
verified there are no electrical devices connected, the generator
may be started. Turn the EcoMode Switch OFF (O).
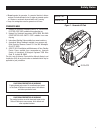
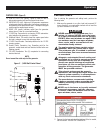
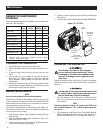
1. Open the fuel valve (Figure 4), located below the starter rope
pull, by turning to the valve 90° counter-clockwise to the “ON”
(I) position.
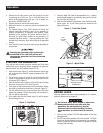
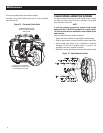
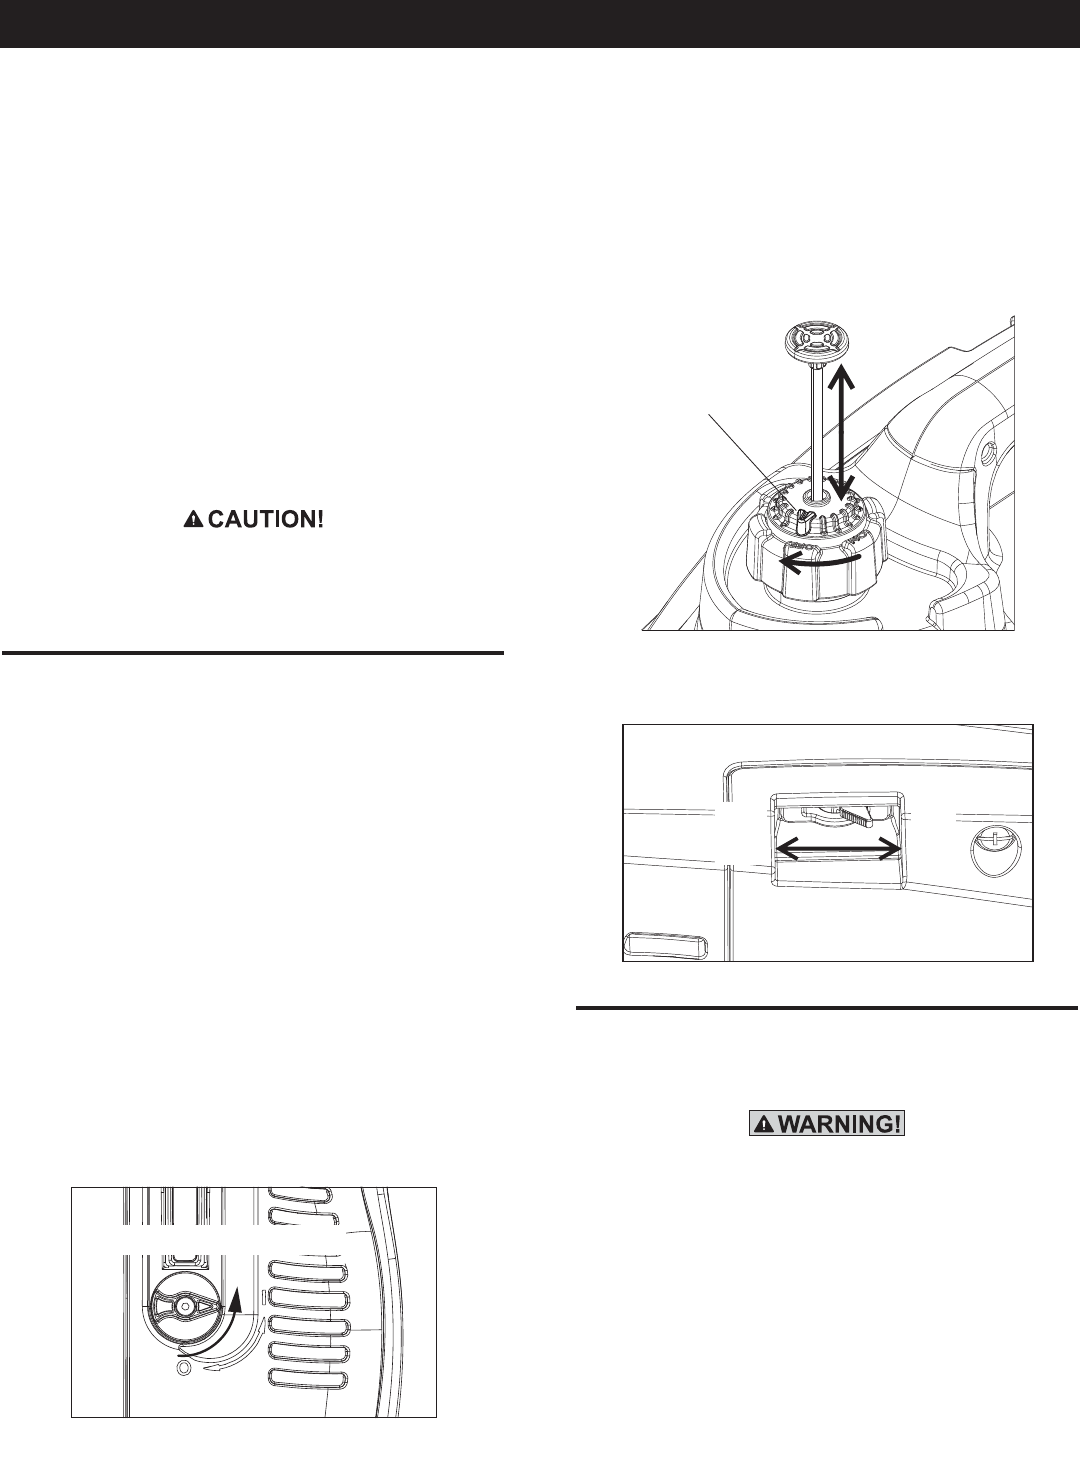
2. Pull up on the center of the fuel fill cap and prime the fuel
system by depressing the plunger up to five (5) times with the
vent closed (OFF) (Figure 5).
3. Open the fuel tank vent on the top of the fuel fill cap by turning
the center portion to the “ON” mark (Figure 5).
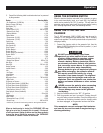
4. If the engine is cold or has not been run for some time, engage
the choke by pushing the choke lever to the right (Figure 6).
5. Grip the handle for the pull starter and brace your other hand
against the generator. Pull the rope slowly until resistance is
felt, then pull the rope rapidly.
6. If the engine does not start, repeat steps 2-5 until the engine
fires and begins to run.
Figure 4 - Fuel Valve
TURNING THE FUEL ON
7. Carefully adjust the choke to approximately the ½ position
until the engine begins to run smoothly, then push the lever all
the way to the left (Figure 6).
8. Make sure the bottom of the generator is not blocked by sand,
leaves, grass, etc. as the cooling vents are located on the
bottom of the unit.
Figure 5 - Prime Fuel System
FUEL
SYSTEM
VENT
PLUNGER
VENT
Figure 6 - Adjust Choke
ENGINE CHOKE
OPERATION
ON
I
OFF
O
ADDING LOADS
Once the generator has been running smoothly for 2-3 minutes,
electrical devices can be plugged in.
Do not use worn, bare, frayed or otherwise
damaged electrical cord sets with the
generator. Do not handle any kind of
electrical device while standing in water,
while barefoot, or while hands or feet are
wet.
1. There are two grounded 120 VAC duplex outlets on the front
of the generator.
2. DO NOT overload the generator; if the red “overload” LED lights
up and the devices attached to the generator stop operating,
stop the engine and reduce the load to the generator. Restart
and apply reduced loads.
Operation