SKU 95014 For technical questions, please call 1-800-444-3353 PAGE 9
OPERATING INSTRUCTIONS
Abrasive Selection:
1. The type of
media
chosen will greatly influence the amount of time needed to
clean a particular surface area.
2. Sandblasting media include silicon carbide, glass bead, walnut shell, brass bead,
and alumina.
3. If you decide to reuse media, remember, it does wear out. The sharp edges
become rounder and are less effective. At that point you should replace the tank
of media you are using.
To Load Media Into The Tank:
1. WARNING! Never service the Pressurized Abrasive Blaster or disassemble
with the air hose attached. Always release any built-up air even after
disconnecting the hose.
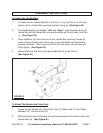
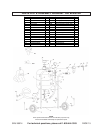
Blast Gun. Then, firmly tighten the Hose Clamp (23). (See Figure C.)
5. Slide the other end of the Abrasive Hose (24) onto the Abrasive Outlet Manifold
(22). Then firmly tighten the Hose Clamp (23). (See Figure C.)
2. WARNING! Always wear ANSI approved safety impact eye glasses under a
full face shield, a respirator, and heavy duty work gloves when operating the
Pressurized Abrasive Blaster. Also, wear heavy duty work boots, long trousers,
and long sleeve shirt.
3. Make sure the media used is dry to avoid clogging the Abrasive Control Valve
(18B), Abrasive Outlet Manifold (22), or Abrasive Hose (24).
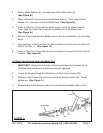
4. Turn the Air Supply Valve (18) to the “OFF” position.
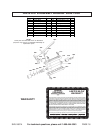
(See Figure D, next page.)
5. Check the Pressure Gauge (15) to make sure it reads “0” pressure.
(See Figure D.)
6. Unscrew and remove the Tank Filler Cap (12). Insert the accessory Funnel (29)
into the Tank (1) opening. Then pour the media into the Tank, making sure to
pour enough into the Tank to do the job at hand. Then, replace the Tank Filler
Cap. NOTE: If this is a large job, fill the Tank only 3/4 full and reload as needed
to finish the job. (See Figure D.)


