


Page 12SKU 93920
For technical questions, please call 1-800-444-3353.
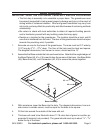
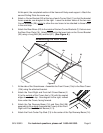
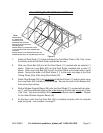
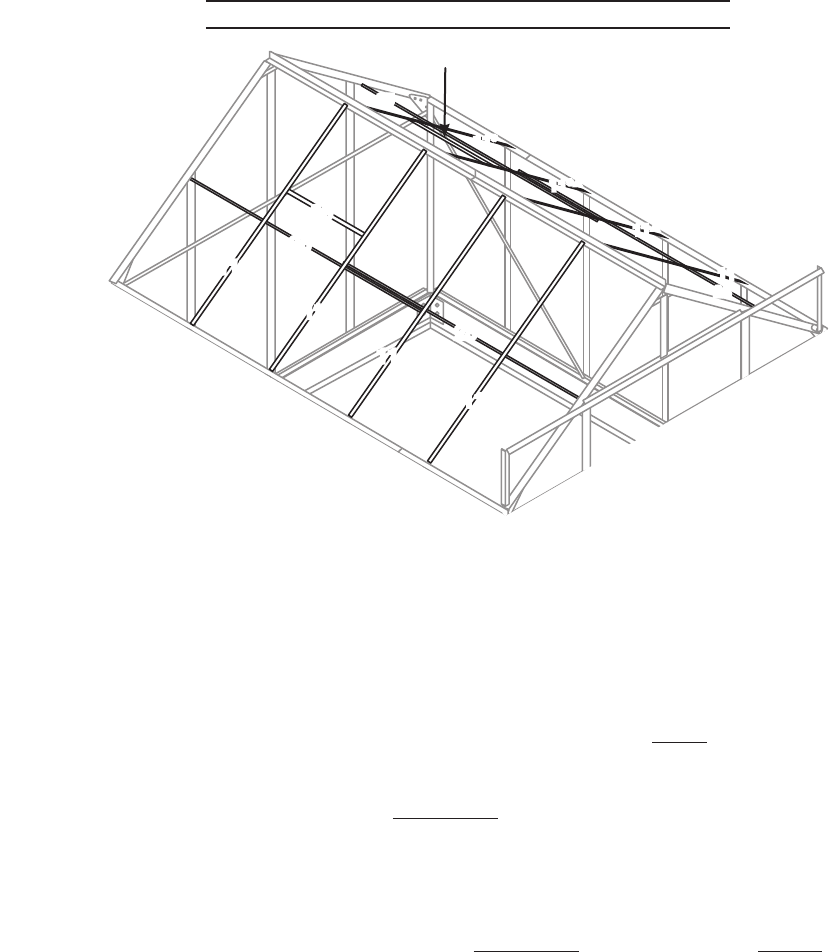
Assembling the Roof Studs and Braces
Figure D
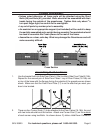
11*
11*^
11^
11
25
25
36
11*
11*^
11^
11
25
25
36
Note:
All Roof Studs
(11) marked with
an asterisk (*) are
assembled with one Short
Bolt (59) in the slot above the
Long Bolt(s) (60).
All Roof Studs (11) marked with a caret
(^) are assembled with two Long Bolts (60)
in the slot.
All Roof Studs (11) not marked with a caret are
assembled with only one Long Bolt (60) in the Slot.
Attach all Roof Studs (11) to the outside of the Front/Rear Crown (15a, 15b). Leave
the bottom ends of the Roof Studs unattached for now.
Slide one Short Bolt (59) into all the Roof Studs (11) marked with an asterisk (*)
above. Slide two Long Bolts (60) into the Roof Studs indicated with a caret (^)
above. Slide one Long Bolt (60) into all the Roof Studs not marked with a caret
above. Secure the ends of all Roof Studs (11) to the outer top edge of the Side
Ceiling Plates (20a, 20b) using Short Bolts (59).
Attach Roof Braces (25) to the underside of the Roof Studs (11) side-by-side, using
the Long Bolts (60) included in the last step. Secure the ends of the Braces first,
then secure the centers.
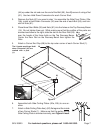
Slide a Window Support Beam (36) onto two Roof Studs (11) marked with an aster-
isk (*), with the predrilled holes on the underside and the flat side facing the Crown
(15a, 15b). Use the extra Bolts (59) to secure the Beam loosely in place. Repeat
for the other Window Support Beam (36).
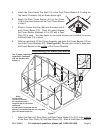
At this time, verify that the Door Rail (28) is oriented correctly, with the rounded
edge facing up – see number 4 on page 7.
1.
2.
3.
4.
5.