


SKU 93889 For technical questions, please call 1-800-444-3353 PAGE 11
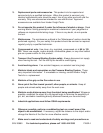
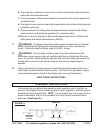
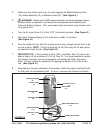
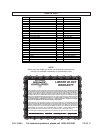
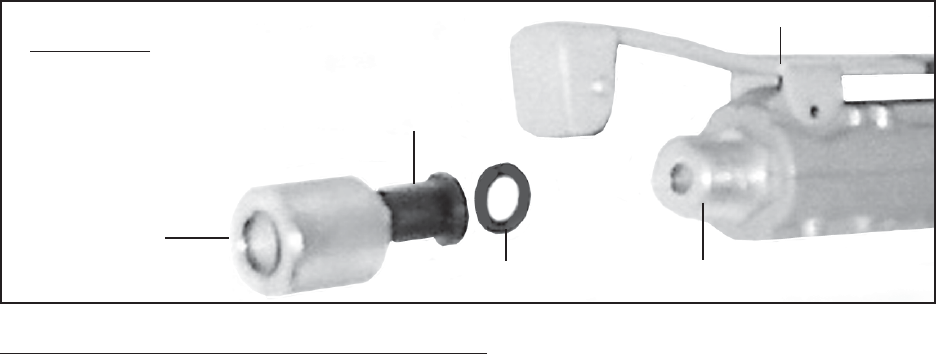
Cover (43). Position the Nozzle Gasket (41) against the Pipe Adapter (40).
Position the proper Nozzle against the Nozzle Gasket. Then screw the Nozzle
Cover back onto the Pipe Adapter to secure the Nozzle Gasket and Nozzle in
place. (See Figure H.)
FIGURE H
NOZZLE GASKET
(41)
PIPE ADAPTER
(40)
NOZZLE
(42, 42A)
NOZZLE COVER
(43)
SANDBLASTING GUN
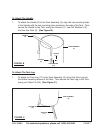
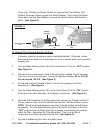
4. Pull up and hold theT-Handle w/Seal (1) to seal the opening in the Tank
Assembly (3). (See Figure I.)
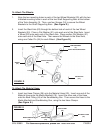
5. Turn the Media Metering Valve (18) and Air Input Valve (14) to the “ON” position.
At this point, the Tank Assembly (3) will begin to pressurize. (See Figure G.)
6. Once the Tank Assembly (3) is fully pressurized, release the T-Handle w/Seal (1).
The air pressure within the Tank should now hold the T-Handle w/Seal in place.
NOTE: Should an air leak develop around the T-Handle w/Seal, shut off the air
compressor. Turn the Media Metering Valve (18) and Air Input Valve (14) to the
“OFF” position. Use the Safety Valve (6) to release any remaining air pressure
within the Tank. Reposition the T-Handle w/Seal. Then, turn on the air
compressor and resume pressurizing the Tank. (See Figure G.)
7. Grip the Sandblasting Gun firmly with both hands.
To Operate The Pressure Blasting System:
1. If possible, place the workpiece inside a sandblast cabinet. Otherwise, isolate
the workpiece to make sure no damage can occur to nearby walls, tools, personal
property, etc.
2. Turn the Media Metering Valve (18) and Air Input Valve (14) to the “OFF” position.
(See Figure G.)
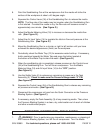
3. Connect the air compressor’s hose to the previously installed Quick Connector.
Then turn on the air compressor, and set its regulator between 65 to 125 PSI.
Do not exceed 125 PSI. (See Figure F.)