


Maintenance
26 OneWASH™ Power Washer
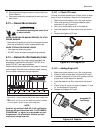
10. Start engine following instructions “How to Start Your
Power Washer”.
11. Test power washer by operating with each quick con-
nect nozzle.
6.13 — ENGINE MAINTENANCE
Unintentional sparking can result in fire
or electric shock.
WHEN ADJUSTING OR MAKING REPAIRS TO YOUR
POWER WASHER
• Disconnect the spark plug wire from the spark plug and
place the wire where it cannot contact spark plug.
WHEN TESTING FOR ENGINE SPARK
• Use approved spark plug tester.
• DO NOT check for spark with spark plug removed.
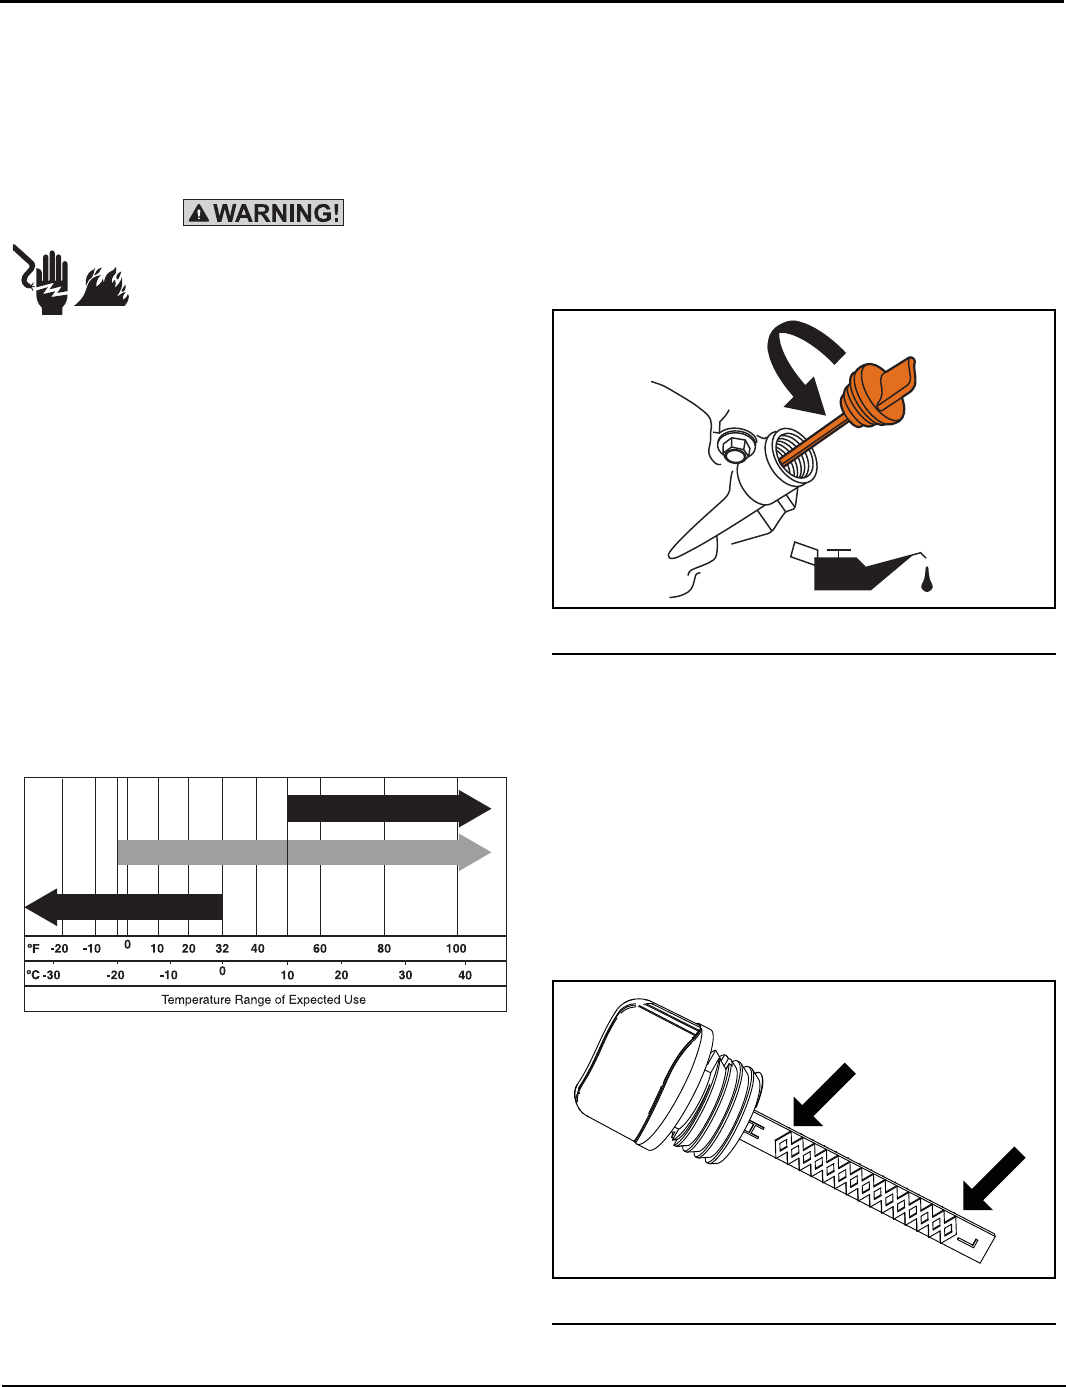
6.14 — ENGINE OIL RECOMMENDATIONS
We recommend the use of high-quality detergent oils
acceptable if classified for service SF, SG, SH, SJ or
higher. DO NOT use special additives.
Outdoor temperatures determine the proper oil viscosity
for the engine. Use the chart to select the best viscosity
for the outdoor temperature range expected.
* Below 50°F (10°C) the use of SAE 30 will result in hard start-
ing.
** Above 80°F (27°C) the use of 10W30 may cause increased
oil consumption. Check oil level more frequently.
NOTE:
Synthetic oil meeting ILSAC GF-2, API certification
mark and API service symbol with “SJ/CF ENERGY
CONSERVING” or higher, is an acceptable oil at all
temperatures. Use of synthetic oil does not alter
required oil change intervals.
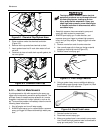
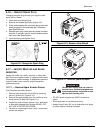
6.14.1 — Check Oil Level
Oil level should be checked prior to each use or at least
every 8 hours of operation. Keep oil level maintained.
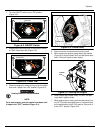
1. Make sure power washer is on a flat, level surface.
2. Clean area around oil fill and wipe dipstick clean
remove oil fill cap (Figure 6-5).
3. Verify oil is at the proper level on the dipstick.
4. Insert the dipstick into filler neck but do not screw it
in.
5. Replace and tighten oil fill cap.
Figure 6-5. Fill Engine Oil
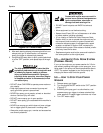
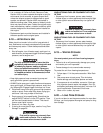
6.14.2 — Adding Engine Oil
1. Make sure power washer is on a flat, level surface.
2. Check oil level as described in Checking Oil Level.
3. If needed, slowly pour oil into oil fill opening until the
proper level on the dipstick is reached.
4. Insert the dipstick into filler neck but do not screw it
in.
5. If level is low, fill until the oil level is between “L” and
“H” on the dipstick (Figure 6-6).
6. Replace and tighten oil fill cap.
Figure 6-6. Dipstick
SAE 30*
SAE 30*
10W-30**
10W-30**
5W-30
5W-30
Acceptable Oil
Level Range