10
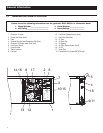
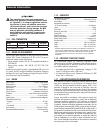
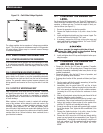
Figure 2.4 – Solid State Voltage Regulator
The voltage regulator also incorporates a “voltage surge protection
circuit.” This circuit prevents troublesome surges in the generator
AC output voltage. Voltage surge is a common cause of damage
to electronic equipment.
2.10 ADDITIONAL INFORMATION
2.10.1 ATTENTION REQUIRED AFTER SUBMERSION
If the recreational vehicle generator has been submerged in water,
it be started and operated. Following any submersion in water,
have an Authorized Service Dealer thoroughly clean and dry the
generator.
2.10.2 OPERATION IN HIGH GRASS OR BRUSH
Never operate the generator while the vehicle is parked over high
grass, weeds, brush, leaves or any other combustible substance.
Such materials can ignite and burn from the heat of the exhaust
system. The generator exhaust system becomes extremely hot
during operation and remains hot for a long time after it has shut
down.
2.10.3 EFFECTS OF MOISTURE AND DIRT
Keep the generator set as clean and dry as possible. Protect the
unit against excessive dust, dirt, corrosive vapors, road splash,
etc. Permitting dirt and moisture to accumulate on generator
windings will have an adverse effect on the insulation resistance
of those windings.
When moisture is allowed to remain in contact with windings,
some of the moisture will be retained in voids and cracks in the
insulation. This causes a reduced insulation resistance and will
eventually cause problems. Dirt will make the problem worse,
since dirt tends to hold moisture in contact with windings. Salt (as
from sea air) also will worsen the problem since it tends to absorb
moisture from the air. Salt and moisture, when combined, form a
good electrical conductor.
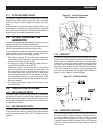
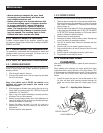
3.1 CHECKING THE ENGINE OIL
LEVEL
For oil capacities and requirements, see “Engine Oil Requirements”.
Check the engine crankcase oil level at least every eight hours of
operation, or before each use. To check the engine oil level, pro-
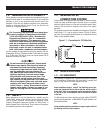
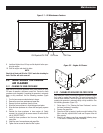
ceed as follows (see Figure 3.1):
1. Be sure the generator is as level as possible.
2. Remove the dipstick and wipe it dry with a clean, lint-free
cloth.
3. Install and tighten the dipstick cap; then, remove it again. The
oil level should be at the dipstick “Full” mark.
4. If necessary, remove the oil fill cap on the rocker cover and
slowly add oil until it reaches the dipstick “Full” mark. DO NOT
FILL ABOVE THE “FULL” MARK.
n
Never operate the engine with the oil level
below the “Add” mark on the dipstick. Doing
this could damage the engine.
5. Install and tighten the oil fill cap and the dipstick before oper-
ating the engine.
3.2 CHANGING THE ENGINE OIL
AND/OR OIL FILTER
Change the after the first 25 hours of operation. Thereafter, •
change the oil every 100 operating hours. Change the oil more
frequently if operating consistently under heavy load or at high
ambient temperatures.
Change the engine after the first 25 hours of operation, and •
every 100 operating hours thereafter.
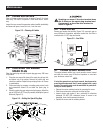
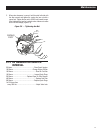
To change the oil and/or oil filter, proceed as follows (see Figure •
3.1):
1. Run the engine until it is thoroughly warmed up (at least five
minutes) then shut OFF the engine.
2. Immediately after the engine shuts OFF, pull the oil drain
cover free of the base. Remove the plug from the tube with a
5/16” allen wrench and drain the oil into a suitable container.
Loosening the oil fill cap will allow the crankcase to drain
faster.
3. After the oil has drained, replace the plug onto the end of the oil
drain tube. Retain the cover in the base.
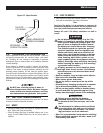
4. With the oil drained, remove the old oil filter by turning it coun-
terclockwise. Place a towel underneath to catch excess oil.
5. Apply a light coating of clean engine oil to the gasket of the
new filter. Fill the filter until saturated with clean oil.
6. Screw the new filter on by hand until its gasket lightly contacts
the oil filter adapter. Then, tighten the filter an additional 3/4 to
one turn.
7. Remove the dipstick and wipe it dry with a clean, lint-free
cloth. This will be used later to check the oil level.
8. Remove the oil fill cap on the oil fill tube and slowly add the
proper type and amount of recommended oil (see “Engine Oil
Requirements”). Periodically use the dipstick to check the oil
level and continue to fill the crankcase until the oil reaches
the dipstick “Full” mark. DO NOT FILL ABOVE THE “FULL”
MARK.
Maintenance


