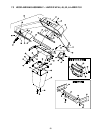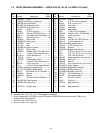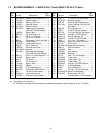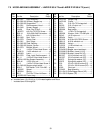
19
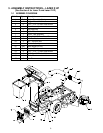
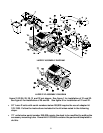
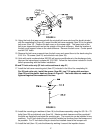
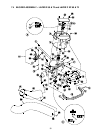
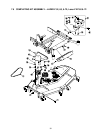
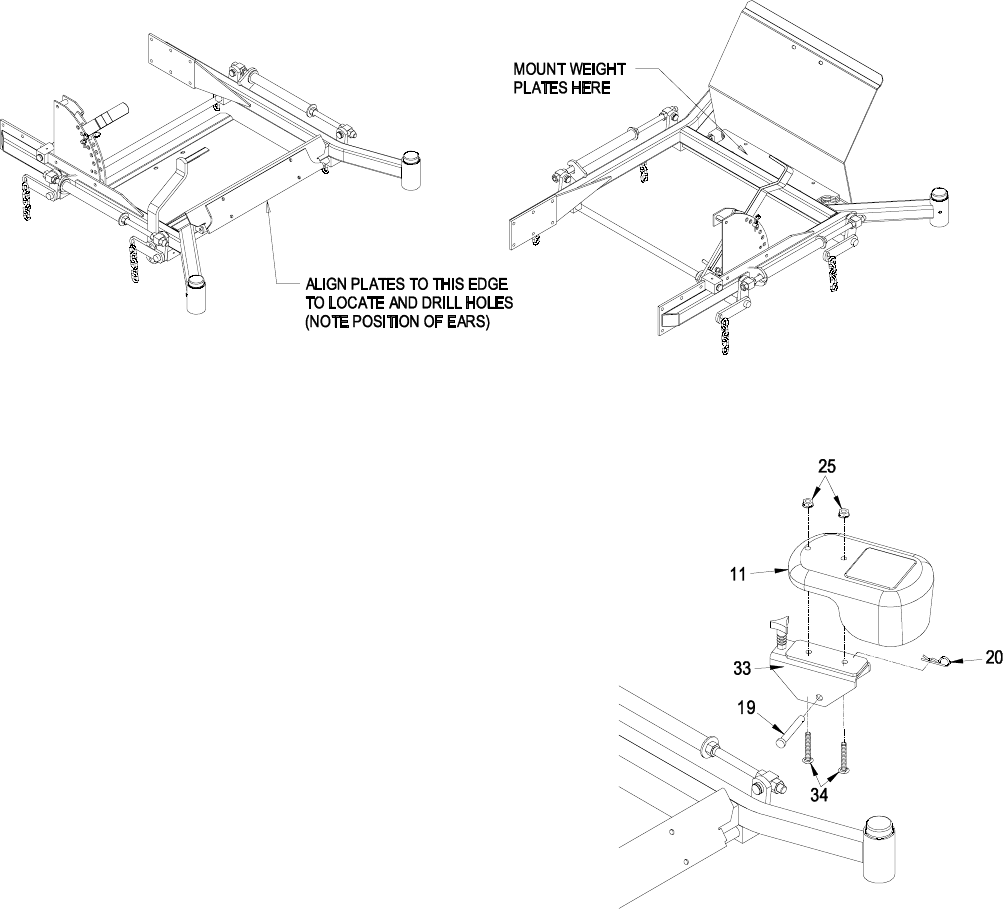
2. Locate the position of the mounting holes. On machines with serial numbers less than
320,000, clamping a weight plate to the front of the floor pan (See Figure 7) does this. The
ears on the weight plate should be towards the bottom (upside down from the actual
mounted position). Align the bottom edge of the weight plate with the bottom edge of the
floor pan front panel. Center the weight plate side to side. On machines with serial
numbers 320,000 or higher the hole positions are indicated by tool marks on the floor pan.
Mark the position of all four holes using a center punch.
3. Drill 3/8 inch holes at the points marked.
4. Open the floor pan and install the four weight plates behind the front panel using the 5/16-
18 x 1.50 screws, 5/16 washers and 5/16-18 whizlock nuts (Items 36, 37, and 38). The
weight plates will only fit with the ears located near the bend in the floor pan. The decal on
the floor pan will still be visible with the weight plates mounted.
FIGURE 7
FLOORPAN WEIGHT INSTALLATION
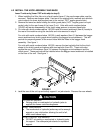
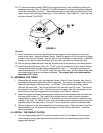
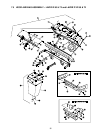
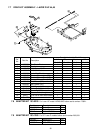
4.6 INSTALL THE REMOVABLE WEIGHTS
Note: The removable weights are heavy. Use
care when lifting them. Make sure that you can
hold them securely before lifting them. Use
caution when positioning your hands so that
you do not set them down on your hands or
fingers.
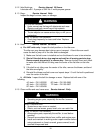
1. Assemble the weight brackets (Item 33) to the
removable weights (Item 11) using the 3/8-16
square head bolts (Item 34) and 3/8 whizlock nuts
(Item 25).
2. Install the removable weight assemblies over the
caster arms. On 52 and 60 inch Lazer Z machines
one weight has a wide mounting bracket and one
has a narrow bracket. They will only fit the
machine one way. Weights for the 60 Lazer XP
and all 72s are interchangeable left and right.
3. Install a clevis pin (Item 19) and hairpin (Item 20)
on each caster weight to retain them.
4. Tighten knob on weight assembly until the weight is
clamped securely to the caster arm.
FIGURE 8
REMOVABLE WEGHT
INSTALLATION