


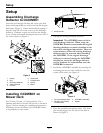
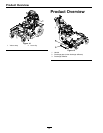


Setup
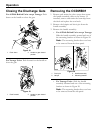
B. Align the existing hole at the rear of the
unit with the right hole on the bracket.
C. Position the bracket horizontally or with
the narrow end pointed slightly downward.
D. Using the mounting bracket as a template,
mark the left hole location onto the side
panel of the unit and drill 11/32 inch
diameter hole (see Figure 11).
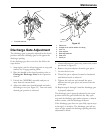
Figure 11
1. Drill 3. Mounting bracket
2. 5/16-18 x 5/8 inch
carriage bolt
4. 5/16 inch nyloc nut
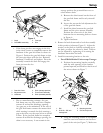
E. Align the two holes in the mounting
bracket with the panel of the unit. Install
5/16-18 x 5/8 inch carriage bolt and 5/16
inch nyloc nut in the hole on the right side.
F. Insert the handle assembly into the
mounting bracket as shown in Figure 12.
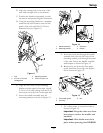
Figure 12
1. Handle assembly
3. Clevis pin
2. Mounting bracket 4. Hairpin
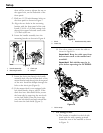
G. Insert the clevis pin through the handle
assembly hole, into the left hole of the
mounting bracket, and through the panel
of the unit. Secure the handle assembly
with hairpin as shown in Figure 12.
H. Remove the nut from the front panel
guard, install the loom clip, and replace
nut as shown in Figure 13.
Figure 13
1. Front panel guard 3. Nut
2. Loom clip
I. Use velcro straps to secure the cable as
shown in Figure 14.
Important: Keep the cable away from
heat sources such as the mufer and
manifold.
Important: Belt shields must be in
place before operating the OCDWB01.
11