


Maintenance
Drive System Maintenance
Checking the Tire Pressure
Service Interval: Every 25 hours/Monthly
(whichever comes rst)
Maintain the air pressure in the front and rear tires as
specied. Uneven tire pressure can cause uneven cut.
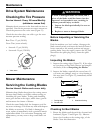
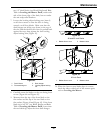
Check the pressure at the valve stem (Figure 31).
Check the tires when they are cold to get the most
accurate pressure reading.
Rear Tires: 13 psi (90 kPa)
Front Tires (caster wheels):
• Smooth: 13 psi (90 kPa)
• Sawtooth: 20 psi (138 kPa)
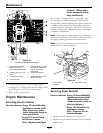
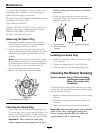
Figure 31
1. Valve stem
Mower Maintenance
Servicing the Cutting Blades
Service Interval: Before each use or daily
Maintain sharp blades throughout the cutting season
because sharp blades cut cleanly without tearing or
shredding the grass blades. Tearing and shredding
turns grass brown at the edges, which slows growth
and increases the chance of disease.
Check the cutter blades daily for sharpness, and for
any wear or damage. File down any nicks and sharpen
the blades as necessary. If a blade is damaged or
worn, replace it immediately with a genuine Exmark
replacement blade. For convenient sharpening and
replacement, you may want to keep extra blades on
hand.
WARNING
A worn or damaged blade can break, and a
piece of the blade could be thrown into the
operator’s or bystander’s area, resulting in
serious personal injury or death.
• Inspect the blade periodically for wear or
damage.
• Replace a worn or damaged blade.
Before Inspecting or Servicing the
Blades
Park the machine on a level surface, disengage the
blade control switch, and move the motion control
levers outward to the neutral position and engage
parking brake. Stop the engine, remove the key, and
disconnect the spark plug wire(s) from the spark
plug(s).
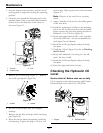
Inspecting the Blades
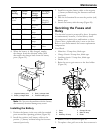
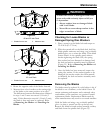
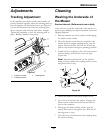
1. Inspect the cutting edges (Figure 32). If the edges
are not sharp or have nicks, remove and sharpen
the blades; refer to Sharpening the Blades.
2. Inspect the blades, especially the curved area. If
you notice any damage, wear, or a slot forming in
this area (item 3 in Figure 32), immediately install
a new blade.
Figure 32
1. Cutting edge 3. Wear/slot forming
2. Curved area
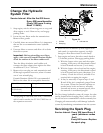
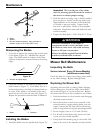
Checking for Bent Blades
1. Rotate the blades until the ends face forward and
backward (Figure 33 and Figure 34). Measure
from a level surface to the cutting edge, of the
blades. Note this dimension.
38