


108319-01B
3
3
For more information, visit www.desatech.com
For more information, visit www.desatech.com
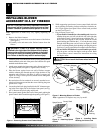
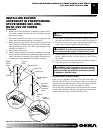
10. Turn on power to duplex outlet if previously turned off per the
warning in step 1, page 2.
11. Check to make sure that the power cord is completely clear of
the blower wheel and that there are no other foreign objects in
blower wheel. Turn blower on and check for operation.
12. Peel off the backing paper and stick the supplied wiring dia-
gram decal on the firebox bottom approximately 12" in front
of the blower.
13. Replace bottom of firebox.
Note:
Make sure the back of the
firebox bottom slides under the rear of the firebrick (lift the
firebrick up if necessary.)
14. Reattach firebox bottom using 4 screws removed in step 1,
page 2.
Note:
Discard the remaining hardware items.
15. Install the log set heater according to the installation instruc-
tions supplied with the heater.
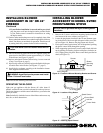
OPERATING THE BLOWER
Light your gas appliance with the blower off. After about 15
minutes, turn the blower on to deliver heated air at the top louvers.
The blower features a variable control which allows you to select the
speed you desire.
Note:
Periodically check the louvers of the firebox and remove any
dust, dirt or other obstructions.
INSTALLING BLOWER
ACCESSORY IN A 32" FIREBOX
Continued
INSTALLING BLOWER
ACCESSORY IN 36" OR 42"
FIREBOX
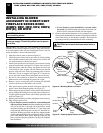
NOTICE: If a log set is installed in the firebox, discon-
nect log set from gas supply and remove from firebox.
Contact a qualified service person to do this.
Note:
Appearance of firebox may vary depending on model.
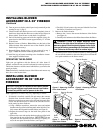
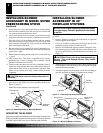
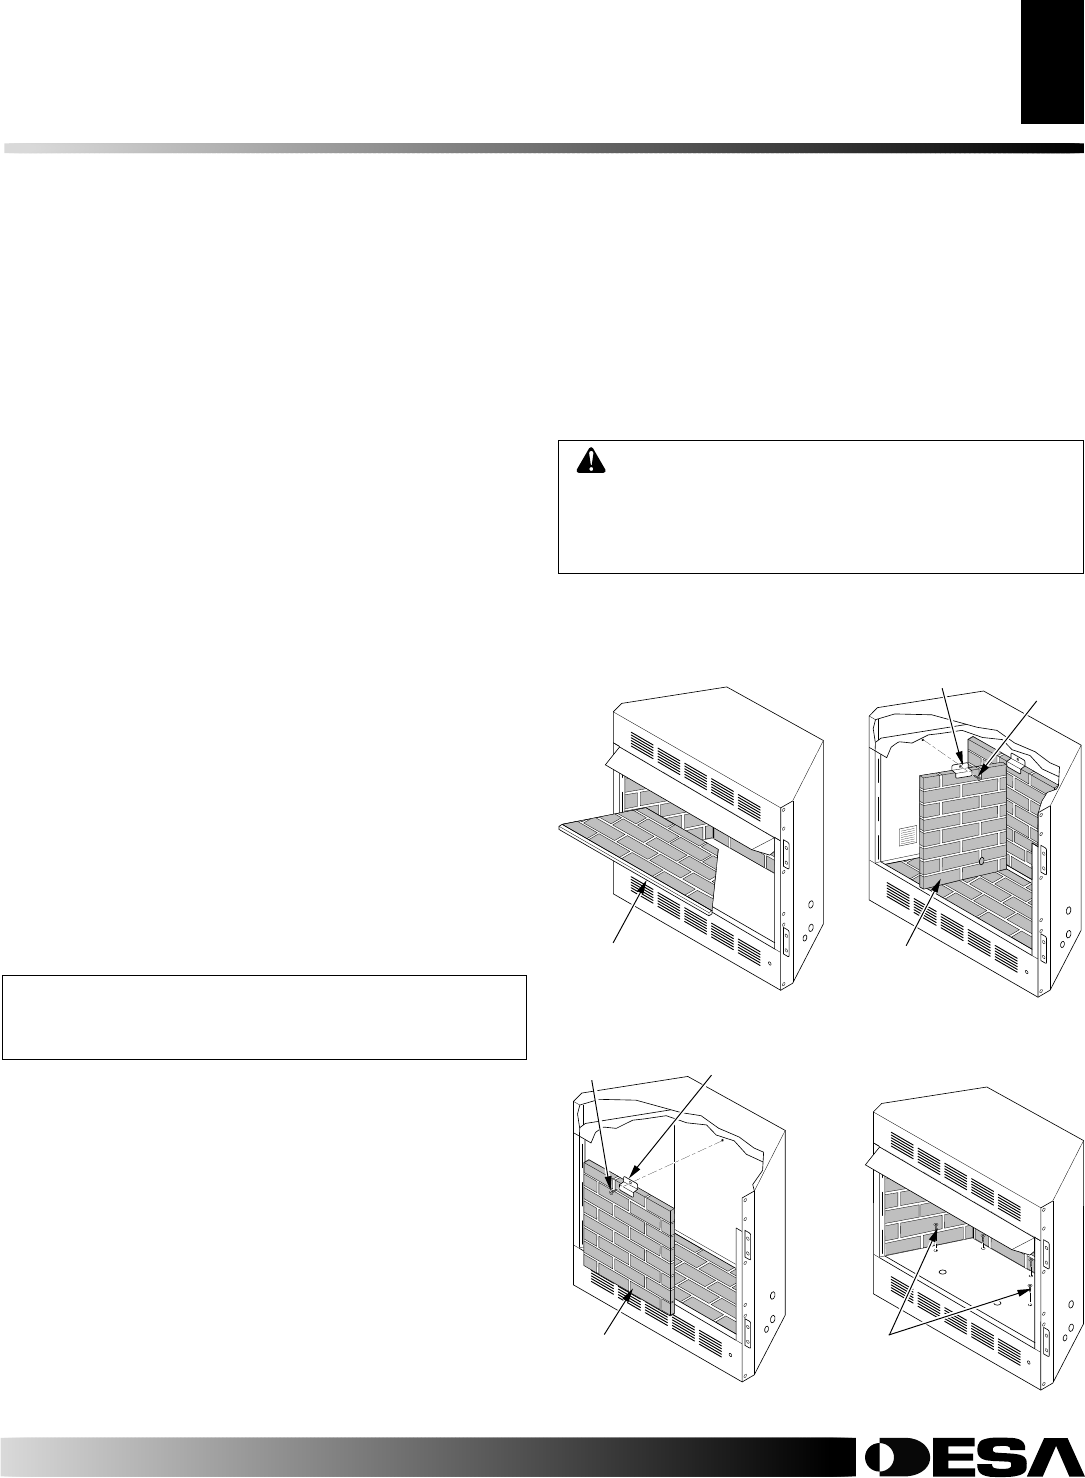
1. If firebrick is installed, carefully lift and remove the concrete
firebrick floor from the firebox (see Figure 5). Some model
fireboxes require that you remove the side and rear panels first.
Follow the directions below to remove the side and rear fire-
brick panels for those fireboxes.
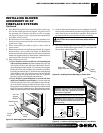
a. Using a Phillips screwdriver, remove the screw and retainer
bracket at the top of the brick liner panel on the left side. Care-
fully remove the left panel from the firebox (see Figure 6).
b.Repeat the removal steps for the brick liner panel on the
right side.
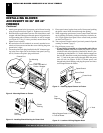
c. Remove the screw and retainer bracket at the top of the brick
liner panel at the rear of the firebox.
IMPORTANT:
Do not
let panel fall after bracket has bee removed. Carefully re-
move the rear panel from the firebox (see Figure 7).
d.Carefully lift and remove the concrete firebrick floor from
the firebox if installed (see Figure 5).
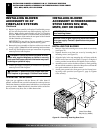
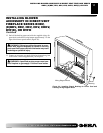
2. Remove the firebox bottom.
a. Remove the 4 screws that secure the bottom of the firebox
(see Figure 8).
b. Carefully raise and remove the firebox bottom from the firebox.
WARNING: If there is a duplex electrical outlet
installed in the right side of the bottom of the fireplace
base area, be sure that the electrical power to the outlet
is turned off before proceeding with the blower installa-
tion. Failure to do this may result in serious injury.
3. Attach the power cord to the blower motor by firmly pushing
the two female terminals at the end of the power cord onto the
two spade terminals on the blower motor.
Figure 5 - Removing Firebrick
Floor from Firebox
Firebrick Floor
Figure 6 - Removing Left Panel
from Firebox
Left Panel
Retainer Bracket
Screw
Back
Panel
Retainer Bracket
Screw
Figure 8 - Removing Firebox
Bottom
Figure 7 - Removing Back
Panel from Firebox
Screws
INSTALLING BLOWER ACCESSORY IN A 32" FIREBOX
INSTALLING BLOWER ACCESSORY IN 36" OR 42" FIREBOX