


Battery
The battery is sealed and is maintenance-free. Acid
levels cannot be checked and fluid can not be added.
• Always keep the battery cables and terminals clean
and free of corrosive build-up.
• After cleaning the battery and terminals, apply a
light coat of petroleum jelly or grease to both
terminals
• Always keep the rubber boot positioned over the
positive terminal to prevent shorting.
IMPORTANT: If removing the battery, disconnect the
NEGATIVE (Black) wire from it's terminal first, followed
by the POSITIVE (Red) wire. When re-installing the
battery, always connect the POSITIVE (Red) wire its
terminal first, followed by the NEGATIVE (Black) wire.
Be certain that the wires are connected to the correct
terminals; reversing them could change the polarity and
cause damage to your engine's alternating system.
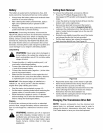
JumpStarting
,_ WARNING: Never jump start a damaged orfrozen battery. Be certain the vehicles do not
touch, and ignitions are off. Do not allow cable
clamps to touch.
• Connect positive (+) cable to positive post (+) of
your tractor's discharged battery.
• Connect the other end of the cable to the (positive
+) post of the jumper battery.
• Connect the second cable (negative-) to the other
post of the jumper battery.
• Make the final connection on the engine block of
the stalled tractor, away from the battery. Attach to
a unpainted part to assure a good connection.
IMPORTANT: If the jumper battery is installed on a
vehicle (i.e. car, truck), do NOT start the vehicle's
engine when jump starting your tractor.
• Start the tractor (as instructed on page 13).
• Set the tractor's parking brake before removing the
jumper cables, in reverse order of connection.
• Allow the tractor's engine to run for 15 minutes
before shutting it off to allow the alternating system
time to charge the discharged battery.
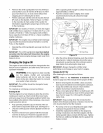
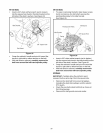
Charging
If the unit has not been put into use for an extended
period of time, charge the battery with an automotive-
type 12-volt charger for a minimum of one hour at six
amps.
,_ WARNING: Batteries give off an explosive
gas while charging. Charge battery in a well
ventilated area and keep away from an open
flame or pilot light as on a water heater, space
heater, furnace, clothes dryer or other gas
appliances.
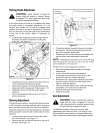
CuttingDeckRemoval
To remove the cutting deck, proceed as follows:
• Place the PTO/Blade Engage knob in the
disengaged (OFF) position and engage the parking
brake.
• Lower the deck by moving the deck lift lever into the
bottom notch on the right fender.
• Remove the deck belt from around the tractor's
electric PTO clutch (refer to Changingthe BeckBelt).
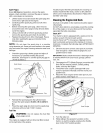
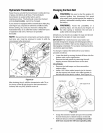
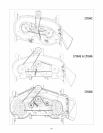
• Looking at the cutting deck from the left side of the
tractor, locate the deck support pin on the rear left
side of the deck.
• Rotate the pin slightly toward the rear of the tractor
and release the )in into the hole provided.
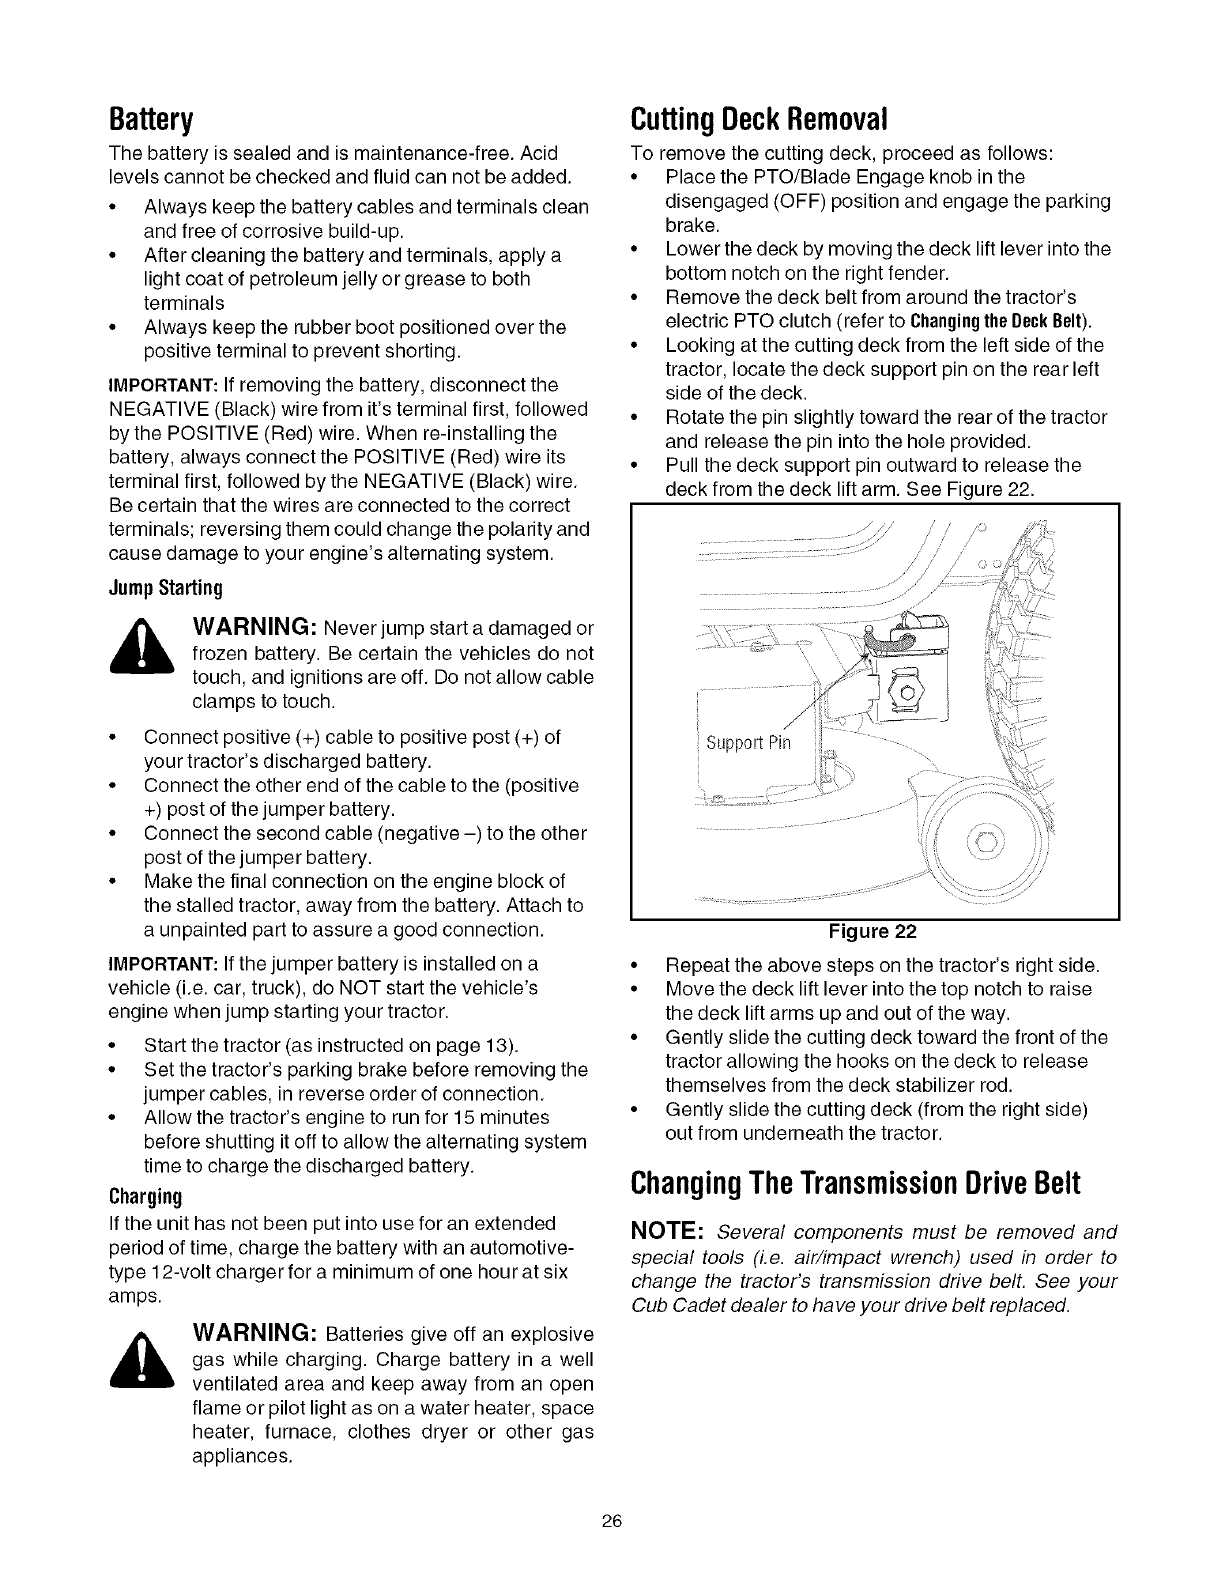
• Pull the deck support pin outward to release the
deck from the deck lift arm. See Figure 22.
/o
/ /
// //
SupportPin
Figure 22
• Repeat the above steps on the tractor's right side.
• Move the deck lift lever into the top notch to raise
the deck lift arms up and out of the way.
• Gently slide the cutting deck toward the front of the
tractor allowing the hooks on the deck to release
themselves from the deck stabilizer rod.
• Gently slide the cutting deck (from the right side)
out from underneath the tractor.
ChangingTheTransmissionDriveBelt
NOTE: Several components must be removed and
special tools (i.e. air/impact wrench) used in order to
change the tractor's transmission drive belt. See your
Cub Cadet dealer to have your drive belt replaced.
26