HOW TO USE YOUR PRESSURE WASHER
IF YOU HAVE ANY PROBLEMS operating your pres-
sure washer, please call the pressure washer helpline
at 1-800-222-3136.
A
WARNING NEVER adjust spray pattern
when spraying. NEVER put hands in front
of spray nozzle to adjust spray pattern.
You could be injured.
HOW TO ADJUST PRESSURE AND SPRAY PATrERN
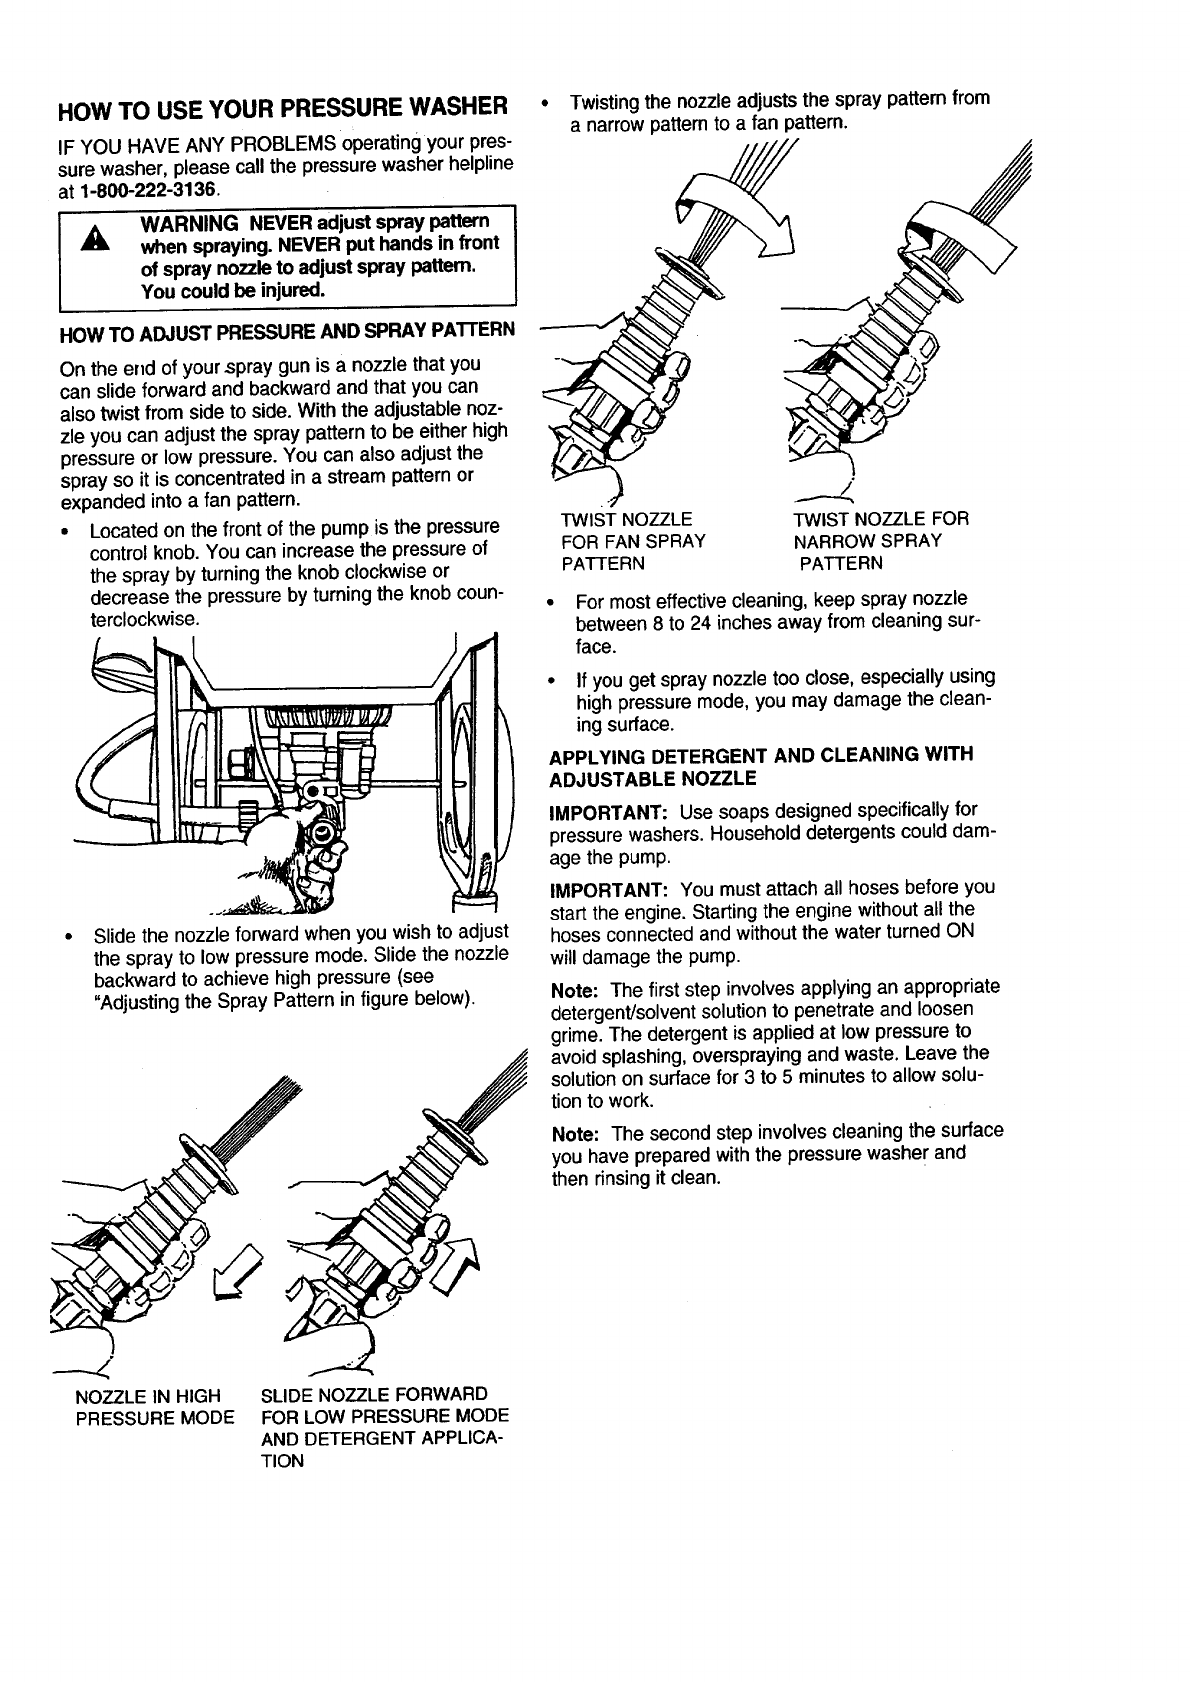
On the end of yourspray gun is a nozzle that you
can slide forward and backward and that you can
also twist from side to side. With the adjustable noz-
zle you can adjust the spray pattern to be either high
pressure or low pressure. You can also adjust the
spray so it is concentrated in a stream pattern or
expanded into a fan pattern.
• Located on the front of the pump is the pressure
control knob. You can increase the pressure of
the spray by turning the knob clockwise or
decrease the pressure by turning the knob coun-
Slide the nozzle forward when you wish to adjust
the spray to low pressure mode. Slide the nozzle
backward to achieve high pressure (see
"Adjusting the Spray Pattern in figure below).
• Twistingthe nozzle adjusts the spray pattem from
a narrow pattern to a fan pattern.
TWIST NOZZLE TWIST NOZZLE FOR
FOR FAN SPRAY NARROW SPRAY
PATTERN PATTERN
i For most effective cleaning, keep spray nozzle
terclockwise, between 8 to 24 inches away from cleaning sur-
face.
If you get spray nozzle too close, especially using
high pressure mode, you may damage the clean-
ing surface.
APPLYING DETERGENT AND CLEANING WITH
ADJUSTABLE NOZZLE
IMPORTANT: Use soaps designedspecificallyfor
pressure washers. Household detergents could dam-
age the pump.
IMPORTANT: You must attach all hoses before you
start the engine. Starting the engine without all the
hoses connected and without the water turned ON
will damage the pump.
NOZZLE IN HIGH SLIDE NOZZLE FORWARD
PRESSURE MODE FOR LOW PRESSURE MODE
AND DETERGENT APPLICA-
TION
Note: The first step involves applying an appropriate
detergent/solvent solution to penetrate and loosen
grime. The detergent is applied at low pressure to
avoid splashing, overspraying and waste. Leave the
solutionon surface for 3 to 5 minutes to allow solu-
tion to work.
Note: The second step involves cleaning the surface
you have prepared with the pressure washe r and
then rinsing it clean.


