


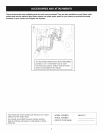
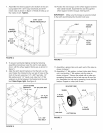
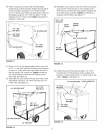

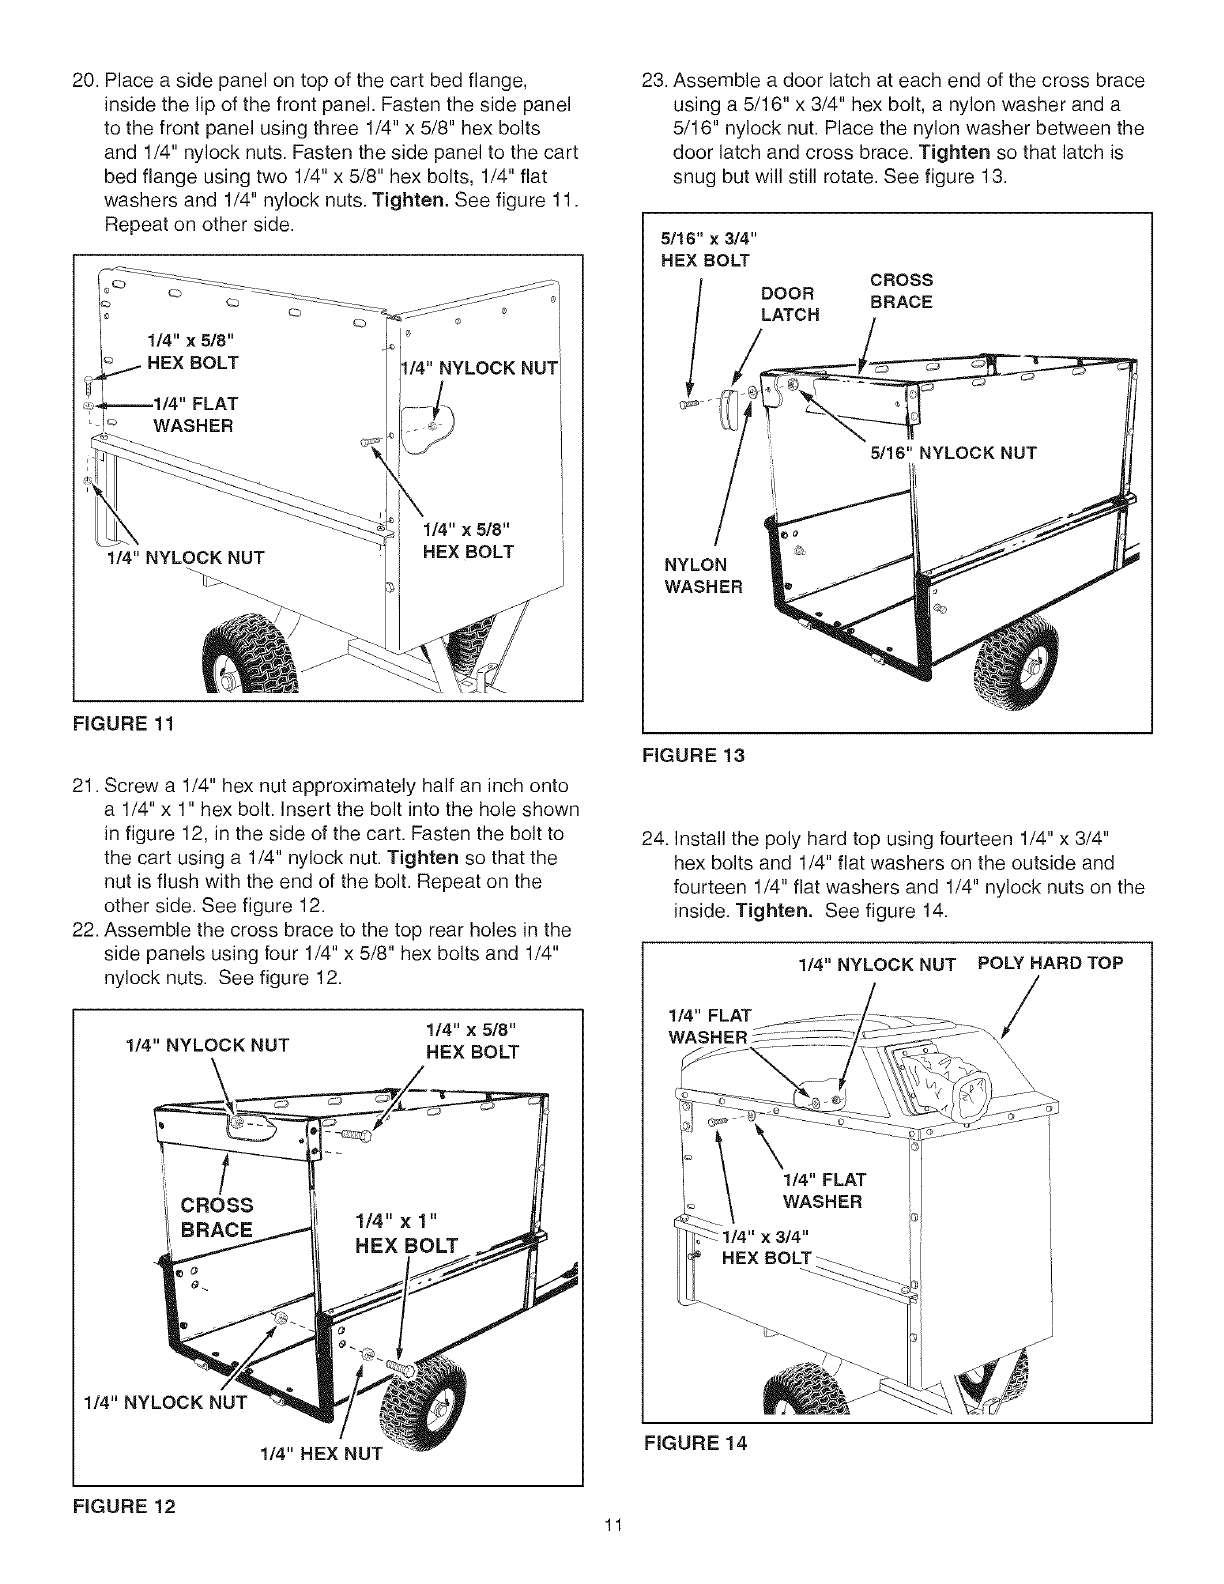
20. Place a side panel on top of the cart bed flange,
inside the lip of the front panel. Fasten the side panel
to the front panel using three 1/4" x 5/8" hex bolts
and 1/4" nylock nuts. Fasten the side panel to the cart
bed flange using two 1/4" x 5/8" hex bolts, 1/4" flat
washers and 1/4" nylock nuts. Tighten. See figure 11.
Repeat on other side.
Q ®
1/4" x 5/8" _
HEX BOLT 1/4" NYLOCK NUT]
L
FLAT
WASHER
1/4" NYLOCK NUT
1/4" x 5/8"
HEX BOLT
FIGURE 11
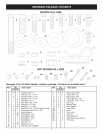
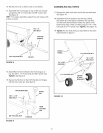
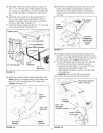
21. Screw a 1/4" hex nut approximately half an inch onto
a 1/4" x 1" hex bolt. Insert the bolt into the hole shown
in figure 12, in the side of the cart. Fasten the bolt to
the cart using a 1/4" nylock nut. Tighten so that the
nut is flush with the end of the bolt. Repeat on the
other side. See figure 12.
22. Assemble the cross brace to the top rear holes in the
side panels using four 1/4" x 5/8" hex bolts and 1/4"
nylock nuts. See figure 12.
1/4" NYLOCK NUT
1/4" × 5/8"
HEX BOLT
1/4" NYLOCK NUT
1/4" HEX NUT
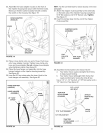
23. Assemble a door latch at each end of the cross brace
using a 5/16" x 3/4" hex bolt, a nylon washer and a
5/16" nylock nut. Place the nylon washer between the
door latch and cross brace. Tighten so that latch is
snug but will still rotate. See figure 13.
5/16" × 3/4"
HEX BOLT
DOOR
LATCH
CROSS
BRACE
5/18" NYLOCK NUT
NYLON
WASHER
FIGURE 13
24. Install the poly hard top using fourteen 1/4" x 3/4"
hex bolts and 1/4" flat washers on the outside and
fourteen 1/4" flat washers and 1/4" nylock nuts on the
inside. Tighten. See figure 14.
1/4" FLAT
1/4" NYLOCK NUT POLY HARD TOP
/
FIGURE 14
FIGURE 12
11