


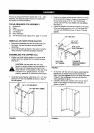
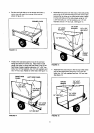
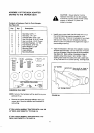
• Assemble the front tongue over the top of the rear
tongue using three 3/8" x 3" hex bolts, 3/8" lock
washers and 3/8" hex lock nuts. See figure 8.
(3)3/8"x 3"
TONGUE _,/HEX BOLTS
(REAR) _ TONGUE
(3)
WASHERS _'-_-.-. (3) 3/8" HEX
LOCK NUTS
FIGURE 8
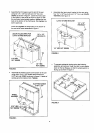
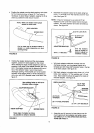
• Assemble the hitch bracket to the front tongue using "'
two 3/8" x 1-1/4" hex bolts, 3/8" lock washers and 3/8"
hex nuts. Tighten. See figure 9.
3/8" x 1-1/4" _ HITCH BRACKET ..
HEX BOLT "'"_1 /
.
3/8 LOCK _"_I_ TONGUE
WAS HER _..._........_ /
LOCK NUT---_
FIGURE 9
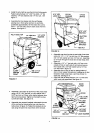
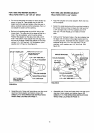
• Assemble the latch lock assembly to the tongue using
two 1/4" x 2-3/4" hex bolts, two 1/4" lock washers and
two 1/4" hex nuts. Fasten to the two front holes in the
forward grouping of four holes as shown in figure 10.
• Assemble the angle stop to the tongue using two 1/4"
x 2-3/4" hex bolts, two 1/4" lock washers and two 1/4"
hex nuts. Fasten to the two front holes in the rear
grouping of four holes as shown in figure 10.
HE)( BOLT
ANGLE
LATCH LOCK
ASS'Y.
TONGUE
1/4" LOCK WASHER
WASHER
1/4" HEX
NUT
FIGURE 10
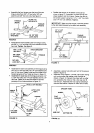
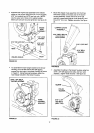
Position the tongue on the bottom of the cart as
shown in figure 11. Assemble the axle through the
wheel support and the tongue. Fasten the axle to
the wheel support using two 1/4" x 1-3/4" hex bolts
and 1/4" hex nuts (SEMS). Tighten.
IMPORTANT: Make sure the tongue is securely locked
to the latch stand bracket by the latch lock assembly.
1/4" x 1-3/4"
HEX BOLT
AXLE
TONGUE
"_ (DRAW BAR)
114" HEX
NUT (SEMS)
FIGURE 11
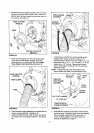
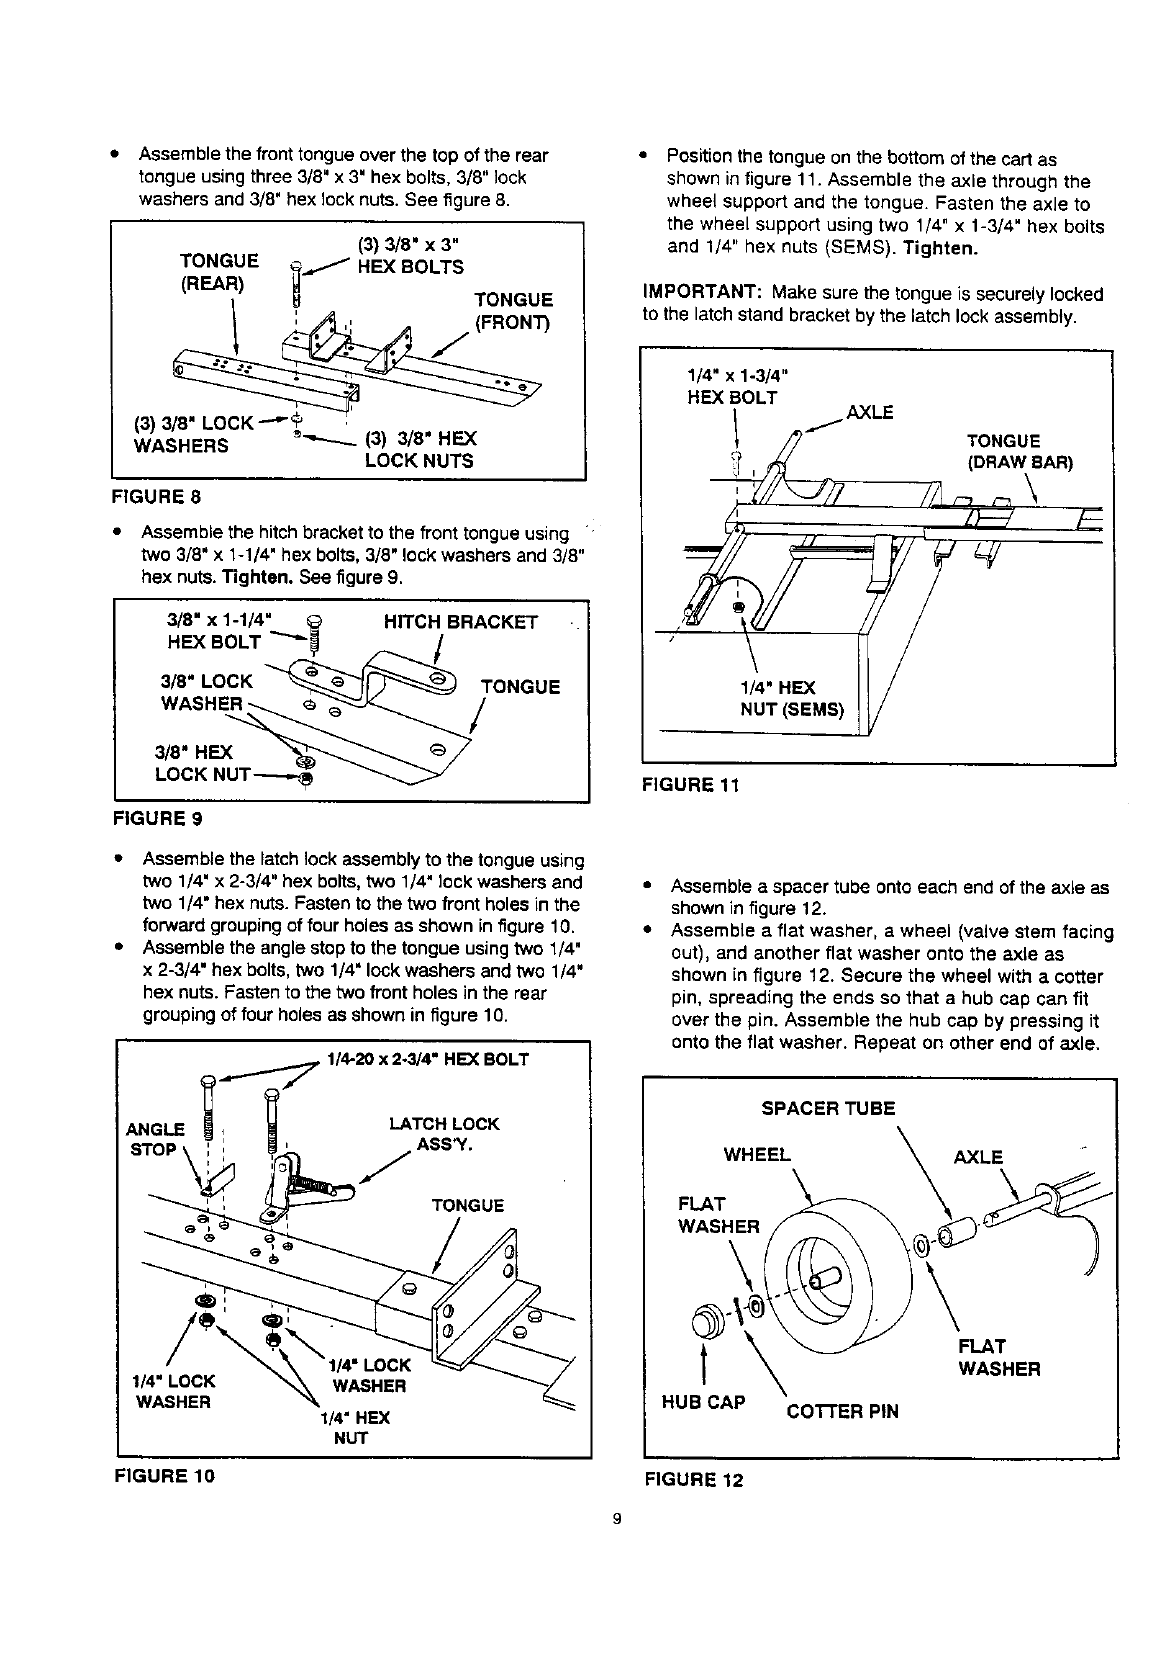
• Assemble a spacer tube onto each endof theaxle as
shown infigure 12.
• Assemble a flat washer, a wheel (valve stem facing
out), and another flat washer onto the axle as
shown in figure 12. Secure the wheel with a cotter
pin, spreading the ends so that a hub cap can fit
over the pin. Assemble the hub cap by pressing it
onto the flat washer. Repeat on other end of axle.
SPACER TUBE
WHEEL
FLAT
WASHER
\
t
HUB CAP
CoI-rER PIN
FLAT
WASHER
FIGURE 12