


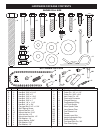
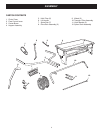
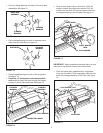
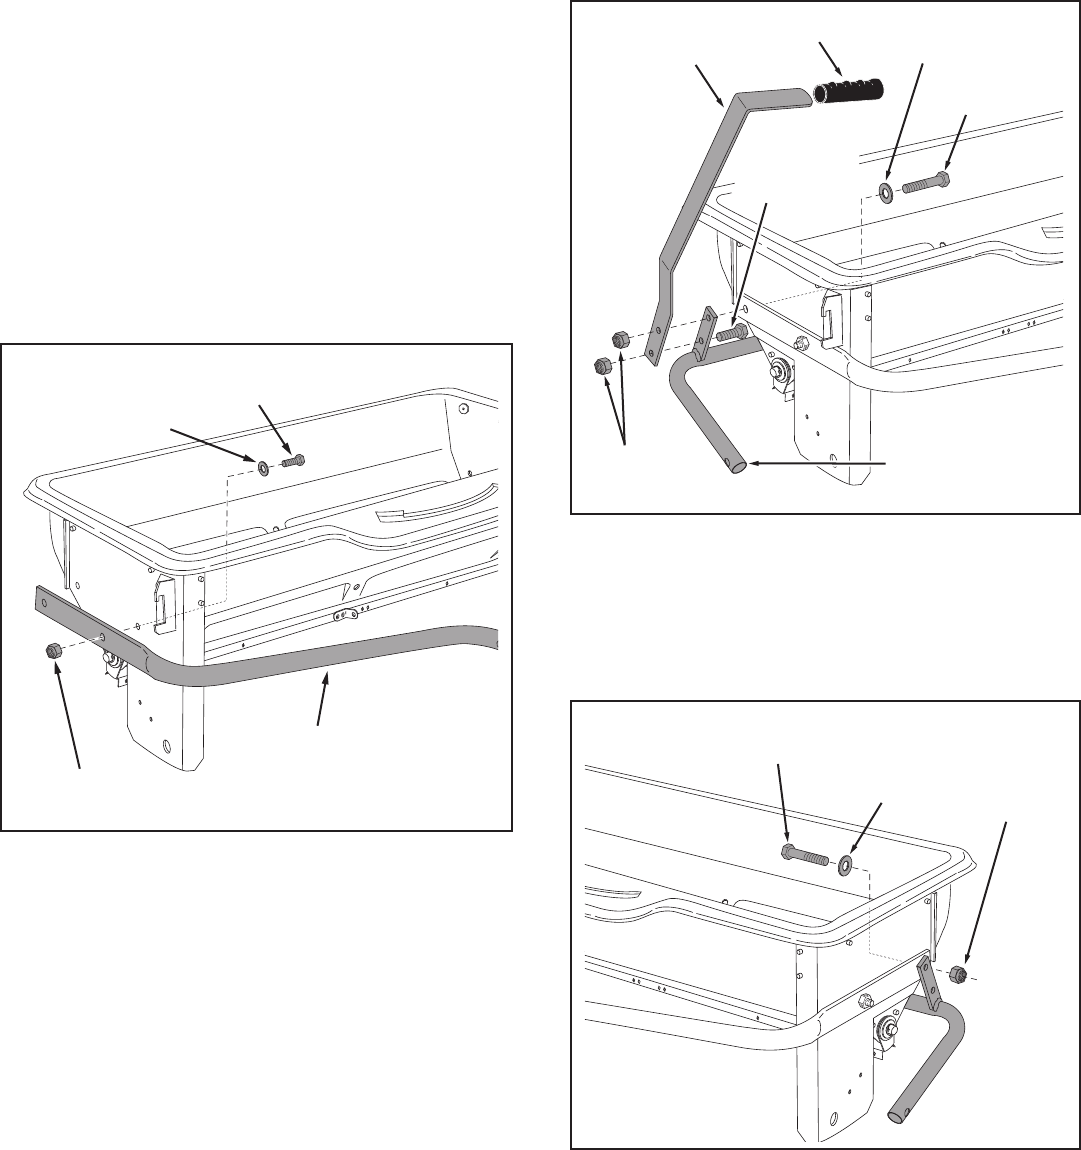
6
FIGURE 1
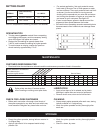
HITCH TUBE
5/16" FLAT
WASHER
5/16" 1-1/2"
HEX BOLT
5/16" NYLOCK HEX NUT
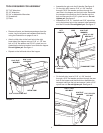
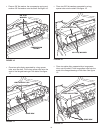
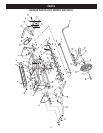
• Assemble the grip onto the lift handle. See gure 2.
• On the right side, insert a 5/16" x 1-3/4" hex bolt
through a 5/16" at washer and then through the
rear hole in the hopper and the hitch tube. Assemble
the transport tube and then the lift handle onto the
bolt and secure with a 5/16" nylock hex nut. Do not
tighten yet. See gure 2.
• Assemble a 5/16" x 1" hex bolt and 5/16" nylock hex
nut to the bottom hole in the transport tube assembly
and the lift handle. Do not tighten yet. See gure 2.
5/16"FLAT
WASHER
5/16" x 1-3/4"
HEX BOLT
GRIP
LIFT
HANDLE
TRANSPORT TUBE
5/16" NYLOCK
HEX NUT
5/16" x 1"
HEX BOLT
FIGURE 2
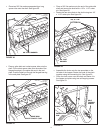
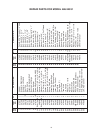
FIGURE 3
5/16" x 1-3/4"
HEX BOLT
5/16"FLAT
WASHER
5/16" NYLOCK
HEX NUT
• On the left side, insert a 5/16" x 1-3/4" hex bolt
through a 5/16" at washer and then through the rear
hole in the hopper and the hitch tube. Assemble the
transport tube onto the bolt and secure it with a 5/16"
nylock hex nut. Do not tighten yet. See gure 3.
TOOLS REQUIRED FOR ASSEMBLY
(2) 7/16" Wrenches
(2) 1/2" Wrenches
(2) 3/4" or Adjustable Wrenches
(1) Screwdriver
(1) Pliers
• Remove all parts and hardware packages from the
carton. Lay out all parts and hardware and identify
using the illustrations on pages 3 and 4.
• Attach a hitch tube to the front hole in the right
hand side of the hopper using a 5/16" x 1-1/2" hex
bolt, a 5/16" at washer and a 5/16" nylock hex nut.
Assemble the bolt and washer from inside the hopper.
Do not tighten yet. See gure 1.
• Repeat on the left hand side of the hopper.