


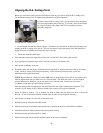
35
• Any 100 to 400 ISO color slide film
. Focus the telescope by turning the focus knob until the image is sharp.
4.
5.
. Advance the film and repeat the process.
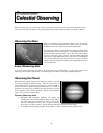
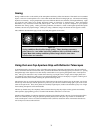
Lunar Phase ISO 100 ISO 200 ISO 400
• Fuji Super HG 400
2. Center the Moon in the field of your telescope.
3
Set the shutter speed to the appropriate setting (see table 7-1).
Trip the shutter using a cable release.
6
ISO 50
Crescent
1/2 1/4 1/8 1/15
Quarter
1/15 1/30 1/60 1/125
Full
1/30 1/60 1/125 1/250
The exposure times listed in table 7-1 should be used as a starting point. Always make exposures that are longer and
shorter than the recommended time. Also, take a few photos at each shutter speed. This will ensure that you will get a
good photo.
• If using black and white film, try a yellow filter to reduce the light intensity and to increase contrast.
• Keep accurate records of your exposures. This information is useful if you want to repeat your results or
various astronomy magazines for possible publication!
• This technique is also used for photographing the Sun with the proper solar filter.
if you want to submit some of your photos to
E
E
y
y
e
e
p
p
i
i
e
e
c
c
e
e
P
P
r
r
o
o
j
j
e
e
c
c
t
t
i
i
o
o
n
n
f
f
o
o
r
r
a
a
S
S
c
c
h
h
m
m
i
i
d
d
t
t
-
-
C
C
a
a
s
s
s
s
e
e
g
g
r
r
a
a
i
i
n
n
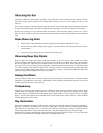
arily the Moon and planets.
ces. Moderate to high
nfortunately, the
size on film. In
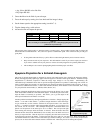
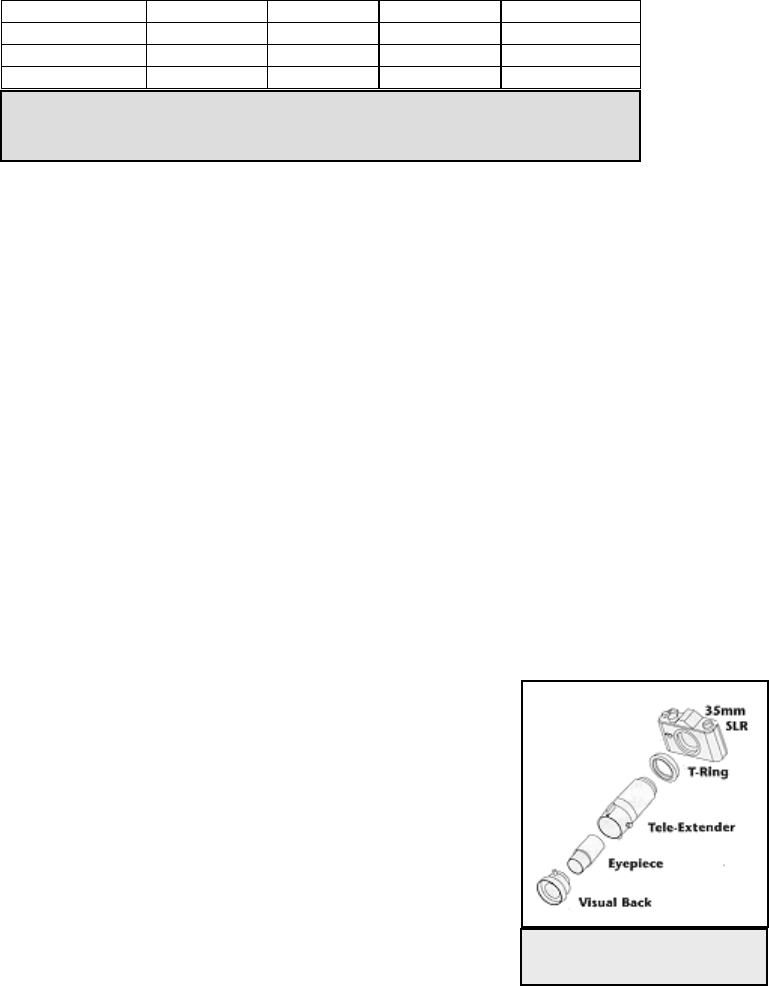
e enough, you must attach your camera to the telescope with the eyepiece in place. To do so,
ccessories; a deluxe tele-extender (#93643), which attaches to the visual back, and a T-ring
r your particular camera make (i.e., Minolta, Nikon, Pentax, etc.).
all which makes it difficult to find and center objects. To make the job a little easier,
possible. This allows you to get the object in the
er's view alone.
e incorporates a hand-held black card
t as a shutter. The card prevents light
you're ready for your next shot. Keep in mind that the
eld a few inches in front of the telescope, and not touching it. It is easier if you use two people for this
elease the camera shutter and one to hold the card. Here's the process for making the exposure.
This form of celestial photography is designed for objects with small angular sizes, prim
lanets, although physically quite large, appear small in angular size because of their great distan
P
magnification is, therefore, required to make the image large enough to see any detail. U
camera/telescope combination alone does not provide enough magnification to produce a usable image
order to get the image larg
ou need two additional a
y
fo
Because of the high magnifications during eyepiece projection, the field of view is quite
sm
align the finder as accurately as
lescope's field based on the find
te
Another problem introduced by the high magnification is vibration. Simply tripping the
shutter ⎯ even with a cable release ⎯ produces enough vibration to smear the image.
To get around this, use the camera's self-timer if the exposure time is less than one
second ⎯ a common occurrence when photographing the Moon. For exposures over
one second, use the "hat trick." This techniqu
placed over the aperture of the telescope to ac
from entering the telescope while the shutter is released. Once the shutter has been
released and the vibration has diminished (a few seconds), move the black card out of
the way to expose the film. After the exposure is complete, place the card over the front
f the telescope and close the shutter. Advance the film and
o
card should be h
process; one to r
Table 6-1
Above is a listing of recommended exposure times when photographing the Moon at the
p
rime focus of
y
our telesco
p
e.
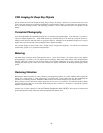
Figure 6-1 - Accessorie
Projection Photograph
s for
y