


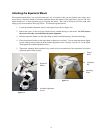
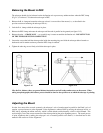
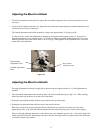

5. The DEC slow motion knob attaches in the same manner as the R.A. knob. The shaft that the DEC slow motion
ount, just below the telescope mounting platform. Once again, you have
o shafts to choose from. Use the shaft that is pointing toward the ground. This makes it easy to reach while
oking through the telescope, something which is quite important when you are observing but again if it is more
suits your needs.
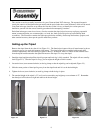
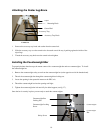
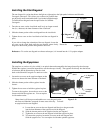
. Put the polar axis cap over the polar axis. It is held into place by a tension fit.
knob fits over is toward the top of the m
tw
lo
convenient for you to use, then reinstall the knob that best
6
A
A
t
t
t
t
a
a
c
c
h
h
i
i
n
n
g
g
t
t
h
h
e
e
T
T
e
e
l
l
e
e
s
s
c
c
o
o
p
p
e
e
T
T
u
u
b
b
e
e
t
t
o
o
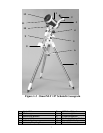
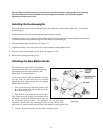
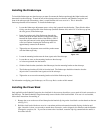
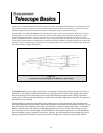
he telescope optical tube attaches to the mount via a dovetail slide bar mounting bracket. For the refractors and the
which is attached to the tube rings. For the Schmidt-
ottom of the telescope tube. Before you attach the optical
sion clutch knobs (clamps) are tight. This will ensure that
ddenly while attaching the telescope optical tube. To mount the telescope tube:
1 R be. You will have to remove the tube rings on the refractors
and the paper.
w on the side of the mount platform so they do not
T
latform to hold the telescope in place.
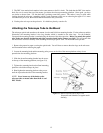
Hand tighten the mounting platform safety screw
ntil the tip touches the side of the mounting bracket.
OTE: Never loosen any of the knobs on the
lescope tube or mount other than the R.A. and
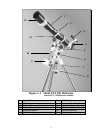
Figure 2-9 Refractor Optical Tube is shown. The
Newtonian and Schmidt-Cassegrain attach
imilarly.
t
t
h
h
e
e
M
M
o
o
u
u
n
n
t
t
T
Newtonian, the mounting bracket is the long bracket
Cassegrain the mounting bracket is attached along the b
tube, make sure that the declination and right ascen
the mount does not move su
emove the protective paper covering the optical tu
Newtonian before removing
2 Loosen the mounting knob and the mounting safety scre
protrude into the mounting platform
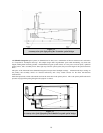
3. Slide the dovetail mounting bracket into the recess
on the top of the mounting platform (see figure 2-9).
5 ighten the mounting knob on the Omni mounting
p
6
u
N
te
DEC knobs.
s
12