


Page 10 2007 Woodcrest Series Gazebo Owner’s Manual
LTR20071040, Rev. A
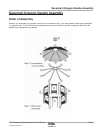
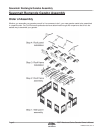
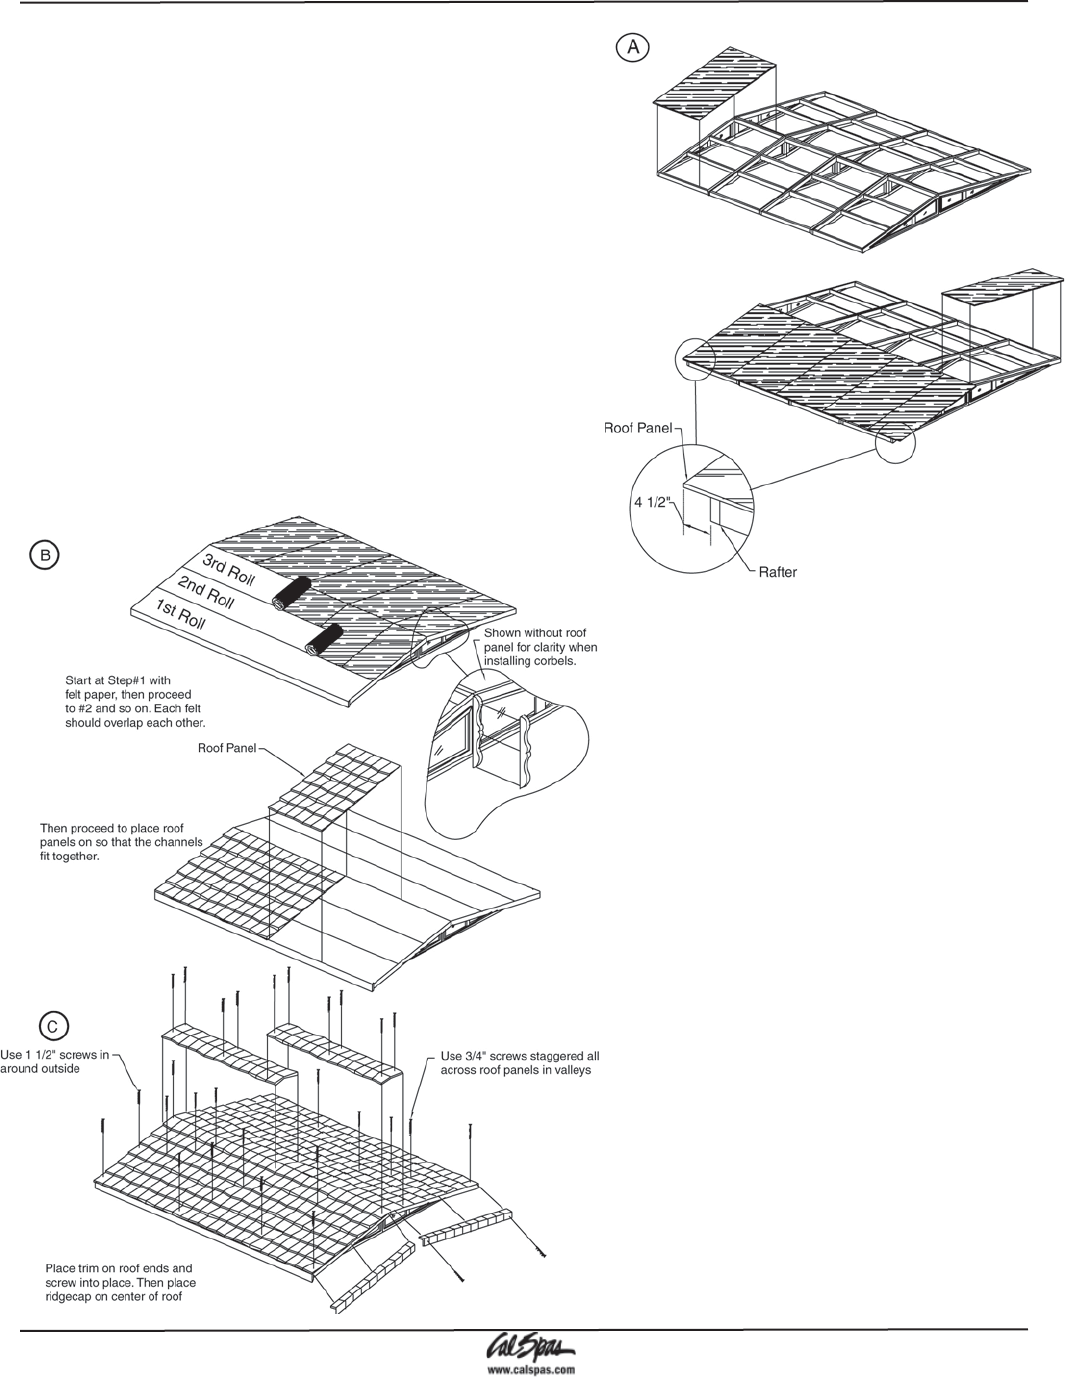
Savannah Rectangle Gazebo Assembly
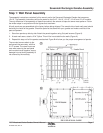
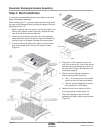
Step 4: Roof Installation
It is strongly recommended that you use a ladder for the fi nal
steps of the gazebo assembly.
When installing the T1-11 plywood (grooved side facing down),
the edge of the plywood should overhang the edge of the plexi-
glass gable end 4 1/2”.
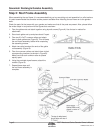
Begin by placing one roof panel on to the roof section and
secure using drywall screws (Figure A). Repeat this step
until all of the roof panels are secured.
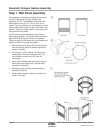
Once the roof panels are secured, roll out the felt paper
along the bottom of the roof panels (Figure B). Make sure
that each layer of felt paper overlaps the previous layer.
To help reinforce the gable ends, attach a corbel to each
side, on the gable seam. Secure with drywall screws
(Figure B).
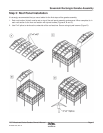
1.
2.
3.
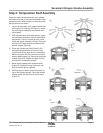
Place each roof tile panel on top of the
roof. Do not secure yet. Line up tile panels
and make sure that everything is fl ush, all
the way around (Figure B) and that all the
channels fi t together.
Please use the following methods to
secure the tile panels (Figure C):
Use 1 1/2” screws around the outside
portion of the roof (outer-most edge).
Use 3/4” screws staggered all across
the roof panels, in the valleys.
Attach the roof trim on each end of the
roof using drywall screws (Figure C).
Place the ridgecap on top of the roof
assembly and attach using drywall screws
(Figure C).
4.
5.
a.
b.
6.
7.