


17
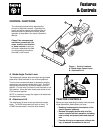
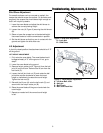
Removal
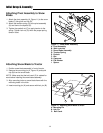
6. Remove the snow blade hair pin (B, Figure 18) and
mounting pin (A).
7. Slide the snow blade assembly away from the tractor.
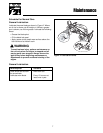
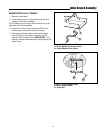
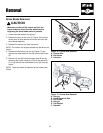
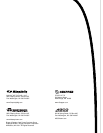
8. Remove the lower latch pin (A, Figure 19) from the
front of the hitch assembly.
9. Lift the hitch assembly off of the support fingers (C).
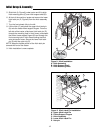
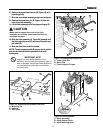
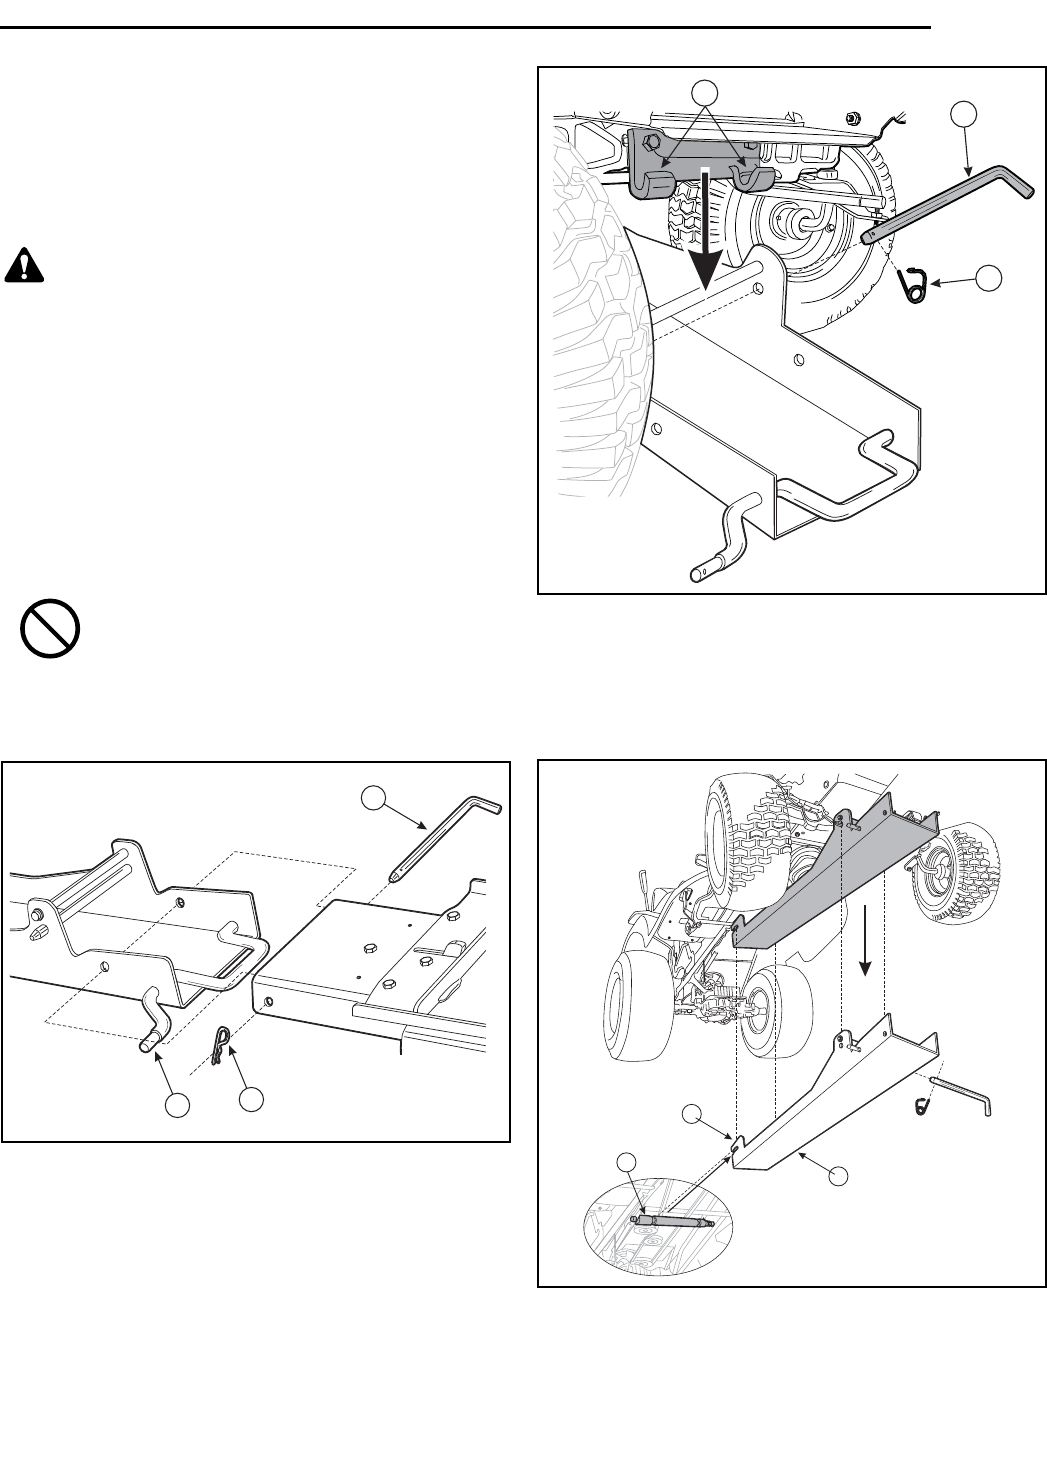
10.Slide the hitch assembly (A, Figure 20) forwards until
the hitch mounting arms (C) are free of the hitch sup-
port shaft (B).
11.Slide the hitch from under the tractor.
NOTE: The hitch support shaft (B) may be left in position
and will not interfere with the operation of the lawn
mower deck.
6. Remove the snow blade hair pin (B, Figure 18) and
mounting pin (A).
7. Slide the snow blade assembly away from the tractor.
8. Remove the lower latch pin (A, Figure 19) from the
front of the hitch assembly.
9. Lift the hitch assembly off of the support fingers (C).
10.Slide the hitch assembly (A, Figure 20) forwards until
the hitch mounting arms (C) are free of the hitch sup-
port shaft (B).
11.Slide the hitch from under the tractor.
NOTE: The hitch support shaft (B) may be left in position
and will not interfere with the operation of the lawn
mower deck.
CAUTION
Make sure to support the front of the hitch
assembly as is will be loose when the latch pin
has been removed.
A
C
B
B
Figure 19. Remove Hitch Latch Pin
A. Lower Latch Pin
B. Quick Clip
C. Frame Support Fingers
C
A
B
Figure 20. Hitch Removal
A. Hitch Assembly
B. Hitch Support Shaft
C. Hitch Mounting Arms
A
B
C
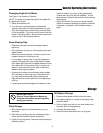
Figure 18. Removing Snow Blade from Hitch
A. Mounting Pin
B. Hair pin
C. Bell Crank
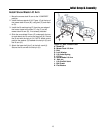
IMPORTANT NOTE
Inspect the snow blade assembly, hitch
assembly, and all component parts for signs of
wear or damage. Have these items repaired or
serviced before reinstalling the snow blade
onto the tractor.