


14
Initial Setup & Assembly
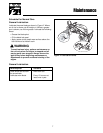
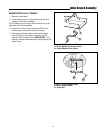
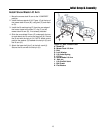
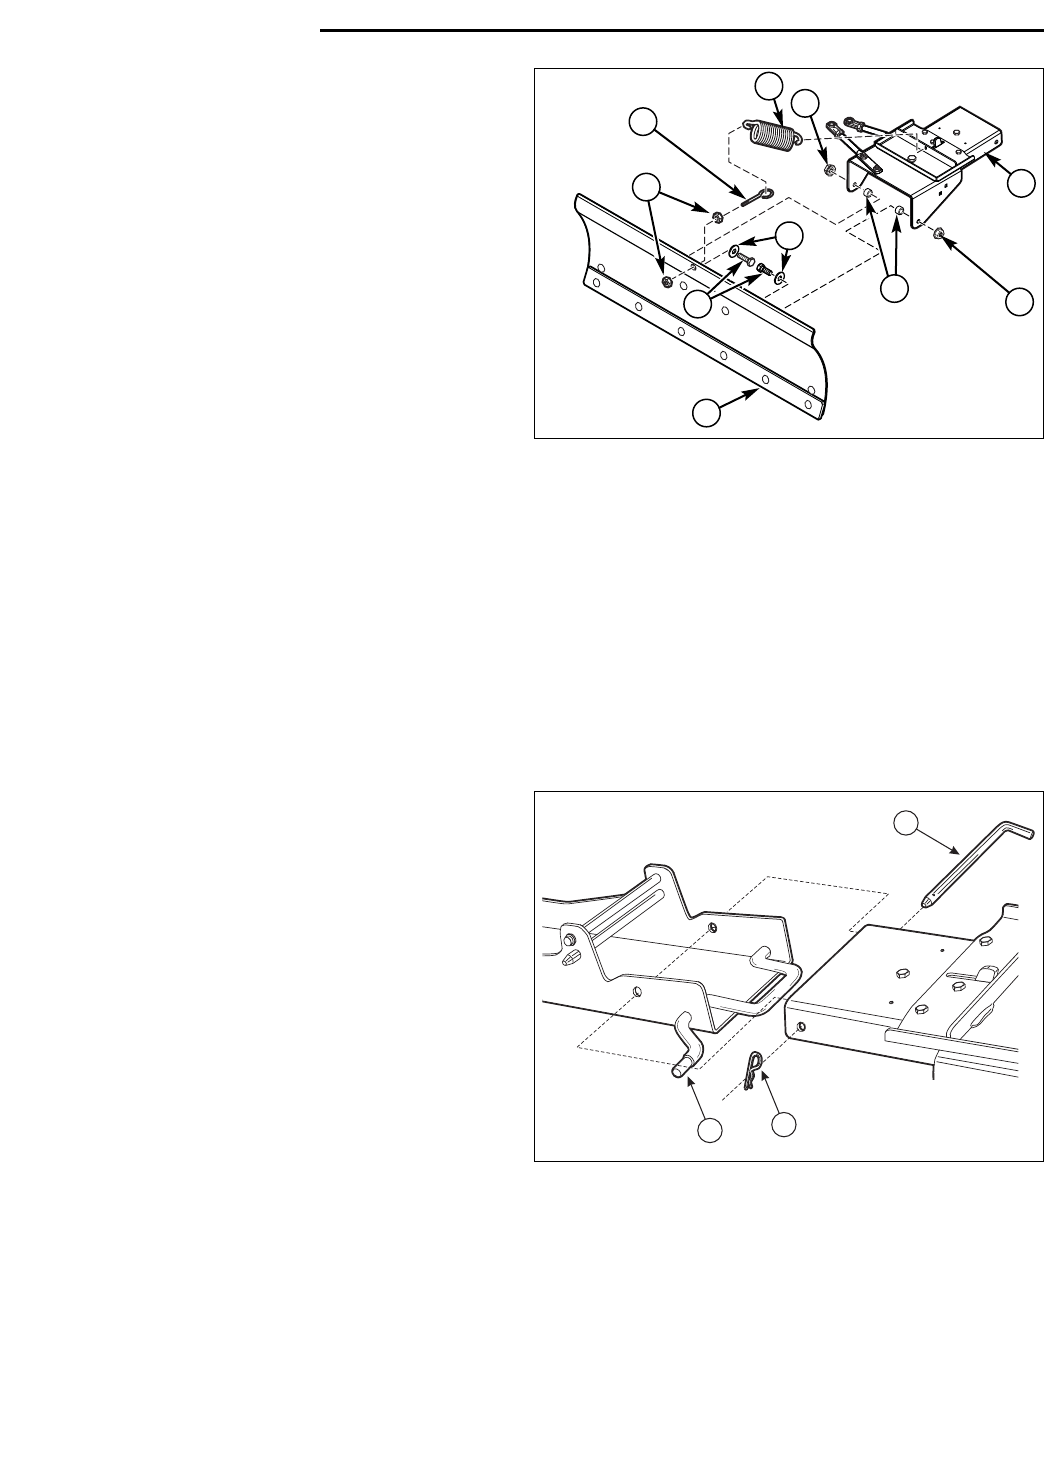
Figure 11. Snow Blade Assembly
A. Pivot Assembly
B. Whiz Lock Nut
C. Snow Blade Assembly
D. Tension Spring
E. Eyebolt
F. Nut
G. Capscrew
H. Flat Washer
I. Spacer
A
B
C
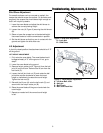
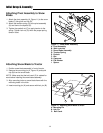
Figure 12. Attaching Snow Blade to Hitch
A. Mounting Pin
B. Hair Pin
C. Bell Crank
Attaching Pivot Assembly to Snow
Blade
1. Attach the pivot assembly (A, Figure 11) to the snow
blade (C) using bolt and nut (B).
2. Attach the tension spring (D) to the pivot assembly
(A) and then to the eyebolt (E).
3. Tighten the eyebolt nut (F) to apply tension to the
spring. Tighten lock nut (G) when the proper spring
tension is set.
Attaching Snow Blade to Tractor
1. Position snow blade assembly in front of tractor.
2. Remove the mounting pin (A, Figure 12) and quick
clip (B) from the snow blade.
NOTE: Make sure that the bell crank (C) is rotated for-
ward before installing the snow blade assembly.
3. Align mounting holes on snow blade frame with the
mounting holes in the hitch.
4. Insert mounting pin (A) and secure with hair pin (B).
A
B
C
F
E
D
G
H
B
I