


12
Initial Setup & Assembly
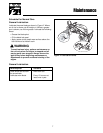
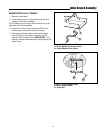
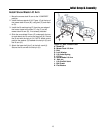
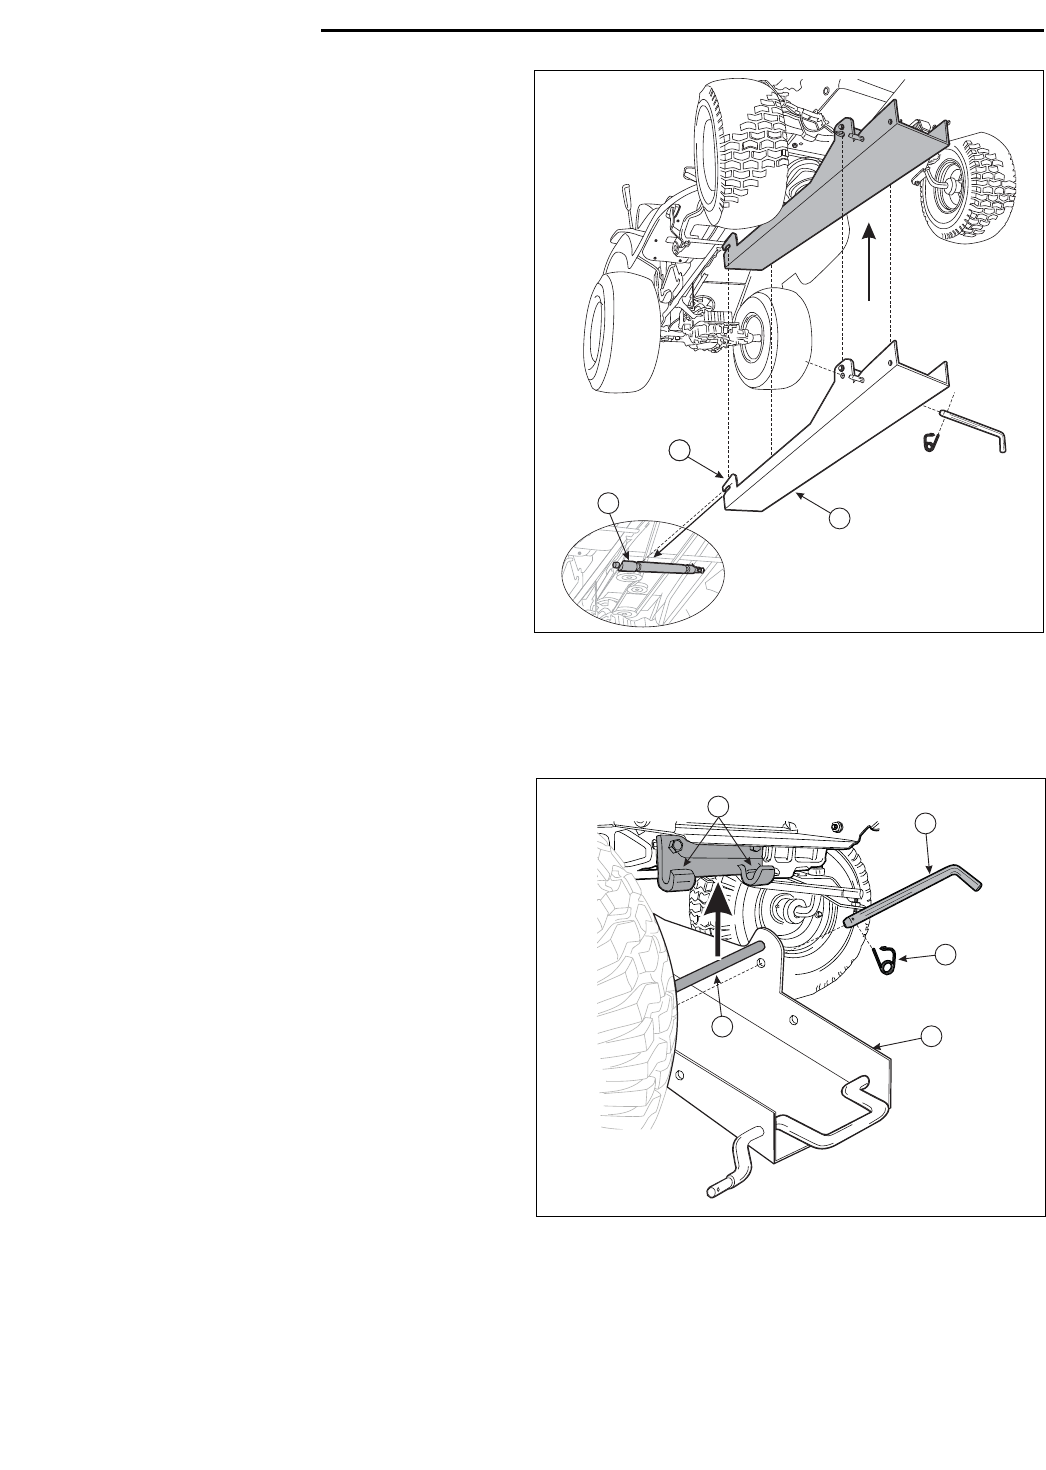
Figure 8. Hitch Installation
A. Hitch Assembly
B. Hitch Support Shaft
C. Hitch Mounting Arms
5. Slide hitch (A, Figure 8) under tractor and lift to slide
hitch mounting arms (C) over hitch support shaft (B).
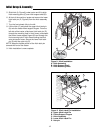
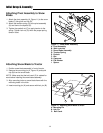
6. At front of the machine, locate and remove the lower
hitch latch pin (D, Figure 9) from the hitch assembly
(C).
7. Turn the front wheels fully to the left.
8. Lift the hitch (C) and place the upper hitch latch pin
(A) onto the tractor frame support fingers. From the
left side of the tractor, slide lower hitch latch pin (D)
through the mounting hole in hitch frame, underneath
the tractor frame support fingers (B) and through the
final mounting hole in hitch frame locking the hitch
onto the tractor frame. Secure the lower hitch latch
pin (D) with the quick clip (E).
NOTE: Keep the handle portion of the hitch latch pin
towards the front of the tractor.
9. Hitch installation is now complete.
C
A
B
C
Figure 9. Hitch Latch Pin Installation
A. Upper Hitch Latch Pin
B. Frame Support Fingers
C. Hitch Assembly
D. Lower Hitch Latch Pin
E. Hair pin
D
C
B
E
B
A