150
Basic Design Center Operations
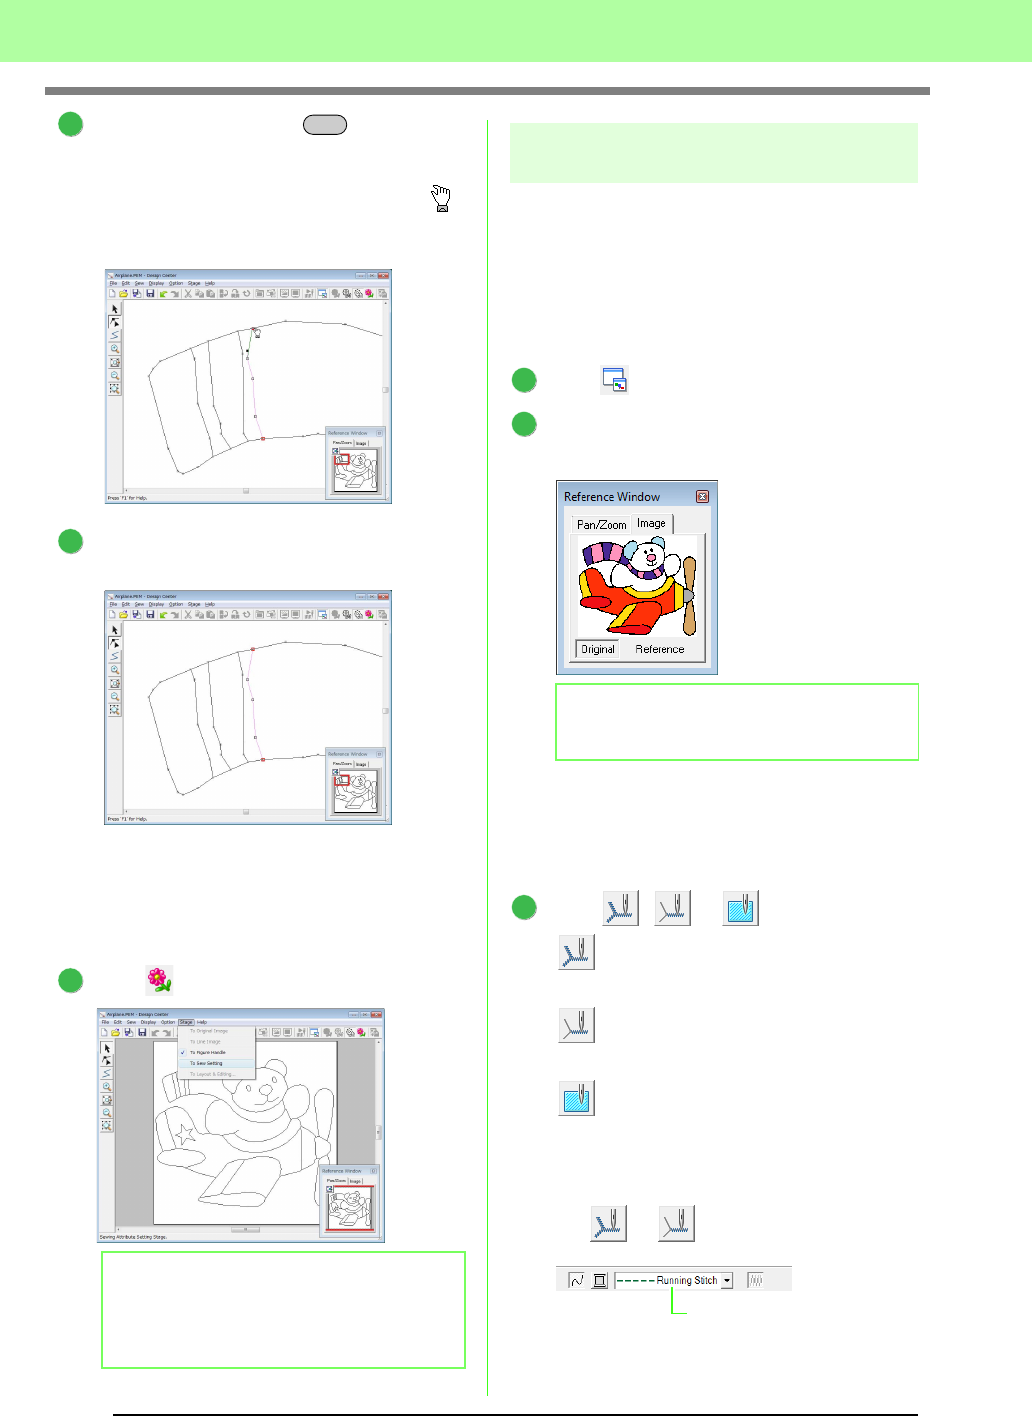
While holding down the key, drag the
selected point to the other point that you want
to connect to it.
→ The shape of the pointer changes to ,
and a red square appears when the two
points are overlapping.
Release the mouse button to connect the two
points.
■ Continuing to the Sew Setting
Stage
When the figure handle image is finished, continue
to stage 4.
Click , or click
Stage
, then
To Sew Setting
.
Step 4 Sew Setting Stage
We are now going to apply sewing attributes to the
different parts of the outline to create the embroidery
pattern.
■ Using the Reference Window
This allows you to select colors while checking the
colors in the original image.
Click .
Click the Image tab.
→ The image opened in stage 1 appears.
■ Specifying sewing attributes
To specify sewing attributes, first select the color
and sew type, and then click the line or region where
the sewing attributes are to be applied.
Click , or .
: Click this button to apply sewing
attributes to the entire outline.
: Click this button to apply sewing
attributes to a portion of the outline.
: Click this button to apply sewing
attributes to a region.
→ The Sewing Attributes bar appears as
shown below.
For or
b Memo:
Even after continuing to the Sew Setting
Stage, you can return to the Figure Handle
Stage to edit the figure handle image.
2
Alt
3
1
b Memo:
If
Reference
has been clicked, click
Original
.
1
2
1
Line sew type selector
