English Français
26
6. Set up 6. Assemblage
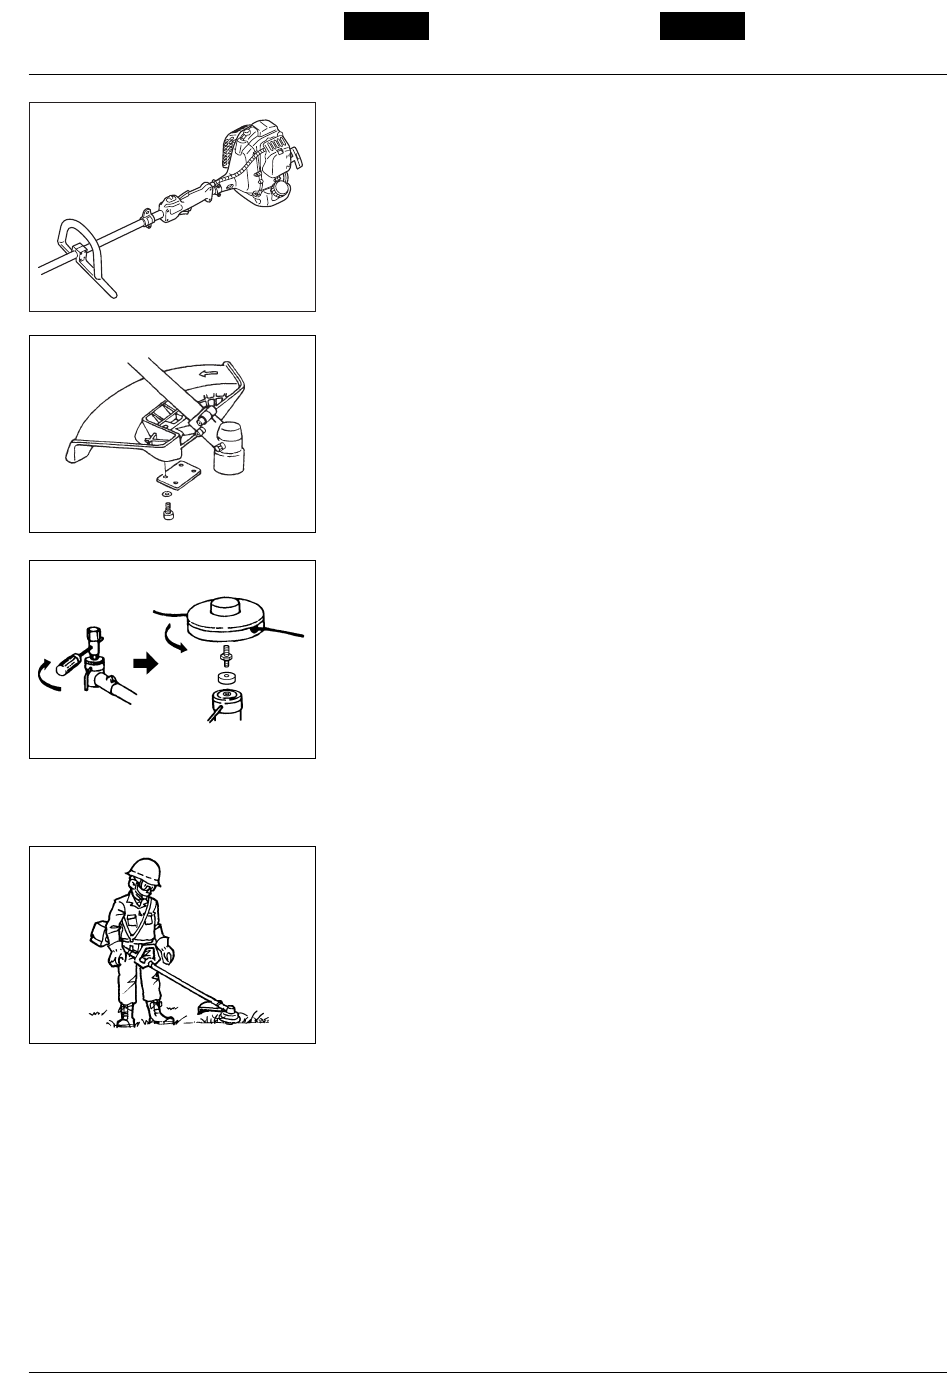
■ INSTALLING HANDLE
• Mount the handle to the shaft tube and
clamp it at a location that is comfortable
to you. (SE1)
■ INSTALLING DEBRIS GUARD
• Put the debris guard on the gear box,
attach it with the 4 screws and
hardware provided. (SE2)
■ INSTALLING CUTTING HEAD (SE3)
1. While locking the gear shaft by inserting
the supplied tool into the upper holder
on the gear box, loosen and remove the
hexagon bolt(left-handed)
2. Fit the holder attached to the upper
holder. Then screw in the cutting head
to the gear shaft over the holders.
Hand-tighten it securely.
■ BALANCE UNIT
1. Put on strap and attach unit to strap.
2. Slide clamp up or down until unit
balances with head just touching the
ground. (SE4)
• You could (aprox. 10 – 30cm) apart the
unit from the ground when using saw
blade so that you feel easy of the
machine.
■ MISE EN PLACE DE LA POIGNEE
• Monter la poignée sur le bras de
l'appareil et la positionner pour avoir
une prise confortable et sûre (SE1).
■ MISE EN PLACE DU CACHE ANTI-
PROJECTION
• Mettre en place le cache anti-projection
sur le carter du renvoi d’angle et le fixer
à l’aide de la visserie fournie avec la
machine (SE2).
■ INSTALLATION DE LA TETE DE
COUPE (SE3)
1 Tout en bloquant l’arbre d’entraînement
à l’aide de la tige fournie avec la
machine en la plaçant à travers le trou
du flasque supérieur et dans le carter
de renvoie d’angle, desserrer et retirer
la vis à tête hexagonale (pas à gauche).
2. Assemblez le support attaché au
support du haut. La vis de la lame
dépasse des supports. Serrez-la à fond
manuellement.
■ EQUILIBRAGE DE LA MACHINE
1. Mettre le harnais sur l’épaule et y
accrocher la débroussailleuse.
2. Faire glisser le collier vers le haut ou
vers le haut jusqu'à ce que la tête de
l'appareil soit droite au niveau du sol
(SE4).
• On peut relever la machine du sol pour
une utilisation plus facile (d’environ 10 à
30 cm) lorsqu’on utilise la lame de
tonte.
SE1
SE2
SE3
SE4


