


9
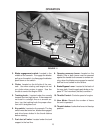
SET-UP
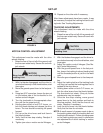
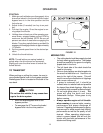
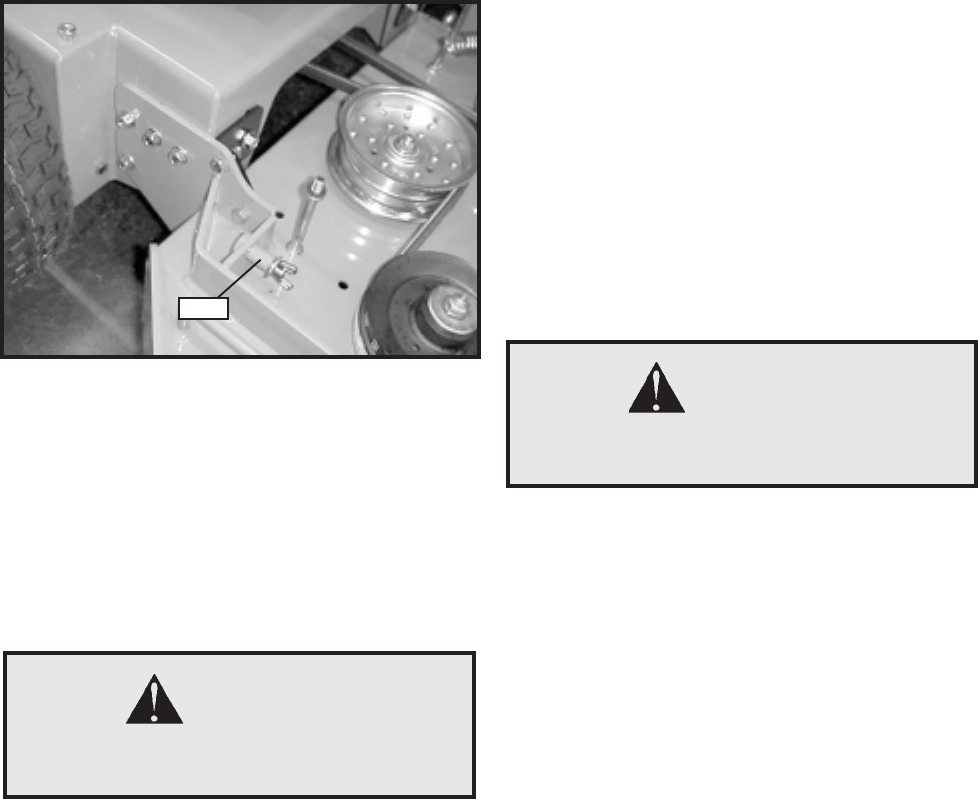
FIGURE 4
PIN
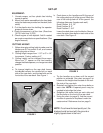
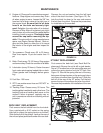
MOTION CONTROL ADJUSTMENT
This adjustment must be made with the drive
wheels rotating.
1. Raise the rear of the unit off of the ground until
the tires can rotate freely. Secure the unit with
jack stands.
CAUTION
Keep hands, feet and clothing away from
rotating tires.
2. With the blades disengaged and the drive le-
vers locked securely in the thumb latches, start
the engine.
3. Move the ground speed lever to the fast posi-
tion.
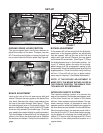
4. Using two 9/16” wrenches, loosen the jam nut
on the bottom side of the turnbuckle on the
motion control linkages.
5. Turn the turnbuckle in the appropriate direc-
tion until the tire stops turning.
6. Holding down either or both O.P. levers, un-
lock the thumb latches and release the drive
levers. The ires should be rotating full speed
forward.
7. Pull up on the drive levers and lock them in
the thumb latches.
8. Verify that the tires stop rotating. Readjust if
necessary.
9. Tighten jam nuts on motion control linkages.
10. Repeat on the other side if necessary.
After these adjustments have been made, it may
be necessary to adjust the tracking bolt and track-
ing knob. See Tracking Adjustments.
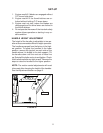
TRACKING ADJUSTMENTS
This adjustment must be made with the drive
wheels rotating.
1. Raise the rear of the unit off of the ground until
the tires can rotate freely. Secure the unit with
jack stands.
CAUTION
Keep hands, feet and clothing away from
rotating tires.
2. With the blades disengaged and the drive le-
vers locked securely in the thumb latches, start
the engine.
3. Adjust the motion control linkages (See Mo-
tion Control Adjustment).
4. With the ground speed lever in the fast posi-
tion, loosen the tracking knob and tracking bolt
until the threaded portion is just thru the weld
nuts.
5. Move the ground speed lever to the slow posi-
tion.
6. Adjust the tracking bolt and the tracking knob
until they just contact the tracking plate that is
welded to the drive levers.
7. Holding down either or both O.P. levers, un-
lock the drive levers from the thumb latches.
The tires should not rotate. If they do, further
adjustments may be needed.
8. Once the tires stop rotating, move ground
speed lever to the fast position and back to
the slow position. Verify that the tires do not
rotate. Readjust if necessary.
9. Lock the drive levers into the thumb latches.
Verify that the tires do not rotate.
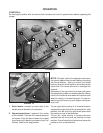
NOTE: A small amount of grease needs to be on
the tracking plate where the tracking bolt and
tracking knob contact it. Failure to keep grease
on the tracking plate may result in premature
mis-adjustments of either tracking or motion
control linkages.