


7
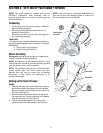
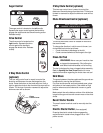
Figure 8
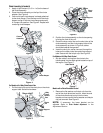
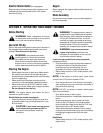
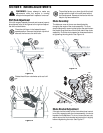
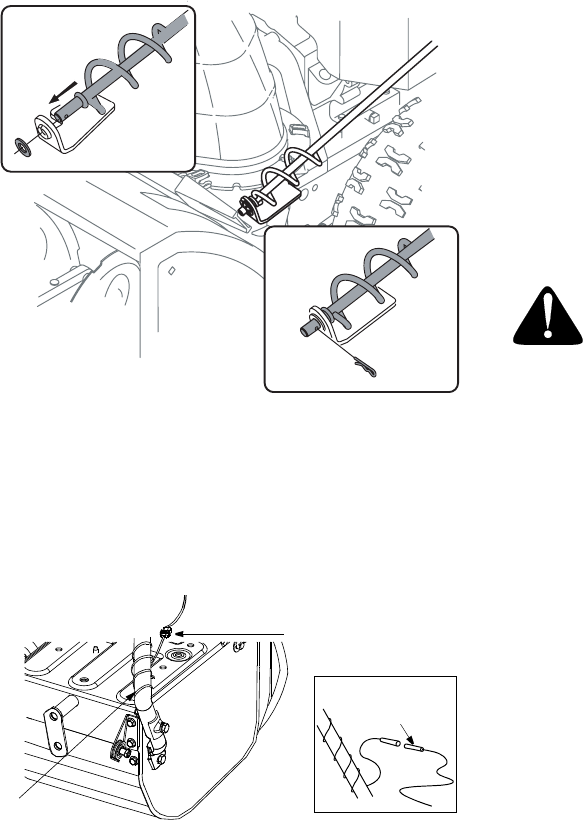
Lamp Wire (optional)
1. Make sure the lamp wire is wrapped down the right
handle as shown in Figure 9 .
2. Make sure the lamp wire is plugged into the
alternator lead wire under the fuel tank. See Figure
9 inset.
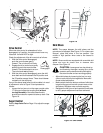
Figure 9
Chute Clean-out Tool
1. The chute clean-out tool is fastened with a cable tie
to the rear of the auger housing for shipping
purposes. Cut the cable tie and remove the
extension cord (if equipped) before operating the
snow thrower.
Final Adjustments
After setting up your snow thrower, check the
adjustments as instructed below and make any final
adjustments necessary before operating the unit.
CAUTION: Failure to comply with these adjustment
instructions may cause damage to the unit.
CAUTION: Prior to operating your snow
thrower, refer to Auger Control Test on page 12.
Read and follow all instructions carefully and
perform all adjustments to verify your snow
thrower is operating safely and properly.
Tire Pressure
• Before operating, check tire pressure and reduce
pressure in both tires to between 15 psi and 20 psi.
NOTE: If the tire pressure is not equal in both tires,
the unit may not travel in a straight path and the shave
plate may wear unevenly.
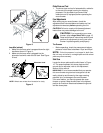
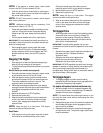
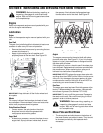
Skid Shoe
Locate the shave plate and the skid shoes in Figure
10. The space between this shave plate and the
ground can be adjusted, refer to the Adjustment
section of this manual.
IMPORTANT:
It is not recommended that you operate
this snow thrower on gravel as loose gravel can be
easily picked up and thrown by the auger causing
personal injury or damage to the snow thrower.
If for some reason, you have to operate the snow
thrower on gravel, keep the skid shoe in the highest
position for maximum clearance between the ground
and the shave plate.
Alternator Lead
Lamp Wire
Alternator
Lead
NOTE
: Wheels are omitted from illustration for clarity.