


6
NOTE: If the connector is not properly assembled,
the shift rod will pivot and you will not be able to shift
gears or change directions.
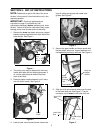
7. Models with two-piece chute crank only:
Remove the hairpin clip from the end of the
upper chute crank. Slide the upper chute crank
into the lower chute crank. Align the holes, and
secure with hairpin clip.
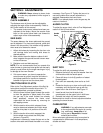
8. Models with one-piece chute crank only:
(Follow steps 13 through 15.) Loosen the two
hex nuts which secure chute crank support
bracket to the snow thrower housing beside
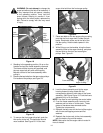
discharge chute. See Figure 6.
9. Remove the hairpin clip and one flat washer
from the lower end of the chute crank. Leave the
other flat washer in place on the end of the
chute crank. See Figure 6.
Figure 6
10. Insert the end of the crank into the hole in the
plastic bushing in the chute crank support
bracket. Place the other flat washer onto the end
of the crank, and secure with hairpin clip. See
Figure 6.
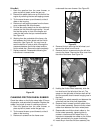
Figure 7
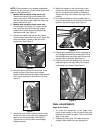
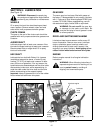
11. Adjust the chute crank support bracket so that
the spiral on the chute crank fully engages the
teeth on the chute assembly. See Figure 7.
Tighten the nuts on the chute crank support
bracket securely.
12. Adjust the eyebolt on the chute crank so the
chute crank does not touch the engine. Move
the hex nut against the handle (if necessary).
Tighten the wing nut to secure the crank in this
position.
13. If not already attached, slip the cables that run
from the handle panel to the chute into the cable
guide on top of the engine. See Figure 8.
Figure 8
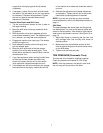
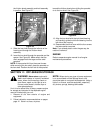
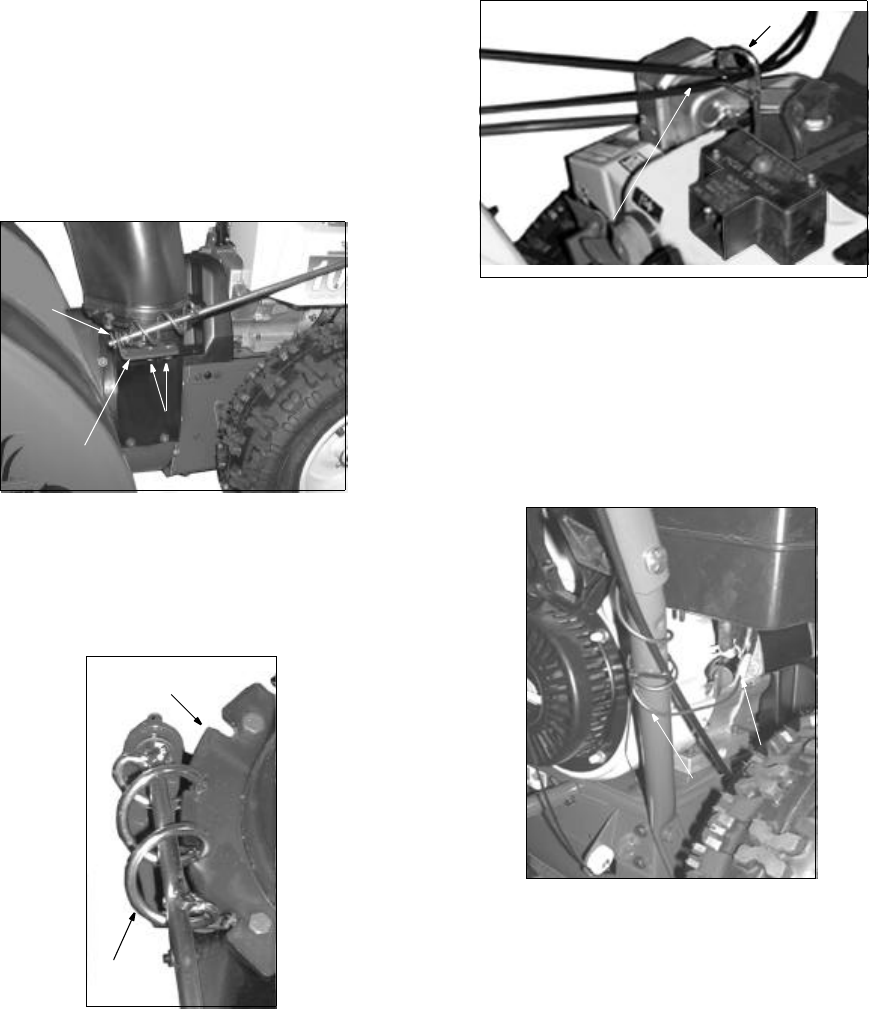
14. Unwrap the headlight wire which is attached to
the headlight, beneath the handle panel. Wind
the headlight wire around the right handle until
excess slack is removed. See Figure 9.
15. Plug the wire from the headlight into the wire
lead coming from the right side of the engine,
underneath the fuel tank. See Figure 9.
Figure 9
FINAL ADJUSTMENTS
Auger Drive Clutch
1. To check the adjustment of the auger drive
clutch, push forward on the left hand clutch grip
(depress the rubber bumper). There should be
slack in the cable.
2. Release the clutch grip. The cable should be
straight. Make certain you can depress the
Hex Nut
Support
Bracket
Hairpin
Clip,
Flat
Washer
Chute Assembly
Chute
Crank
Cable Guide
Route cables
through guide
Headlight
Wire
Wire
lead