www.iOptron.com
9
TIP:
GPS module makes life a
lot easier, it
automatically sets the
time and location for
you.
TIP:
The controller
automatically skips
those stars below the
horizon of your current
time and location.
0.3 Getting Started
For most beginner users who may not need a lot of
astronomical detail this chapter gives just enough information
to set up the controller. After the easy-to-follow setup you will
be ready to point your telescope to wherever you want in the
night sky.
After assembling the telescope [Refer to our Assembling
Chart], you need to level the mount. This is done by centering
the bubble in the circle on the mount. Turn on the power
button located on the mount. You will see the iOptron logo
displayed for a few seconds. Then you will see the zero
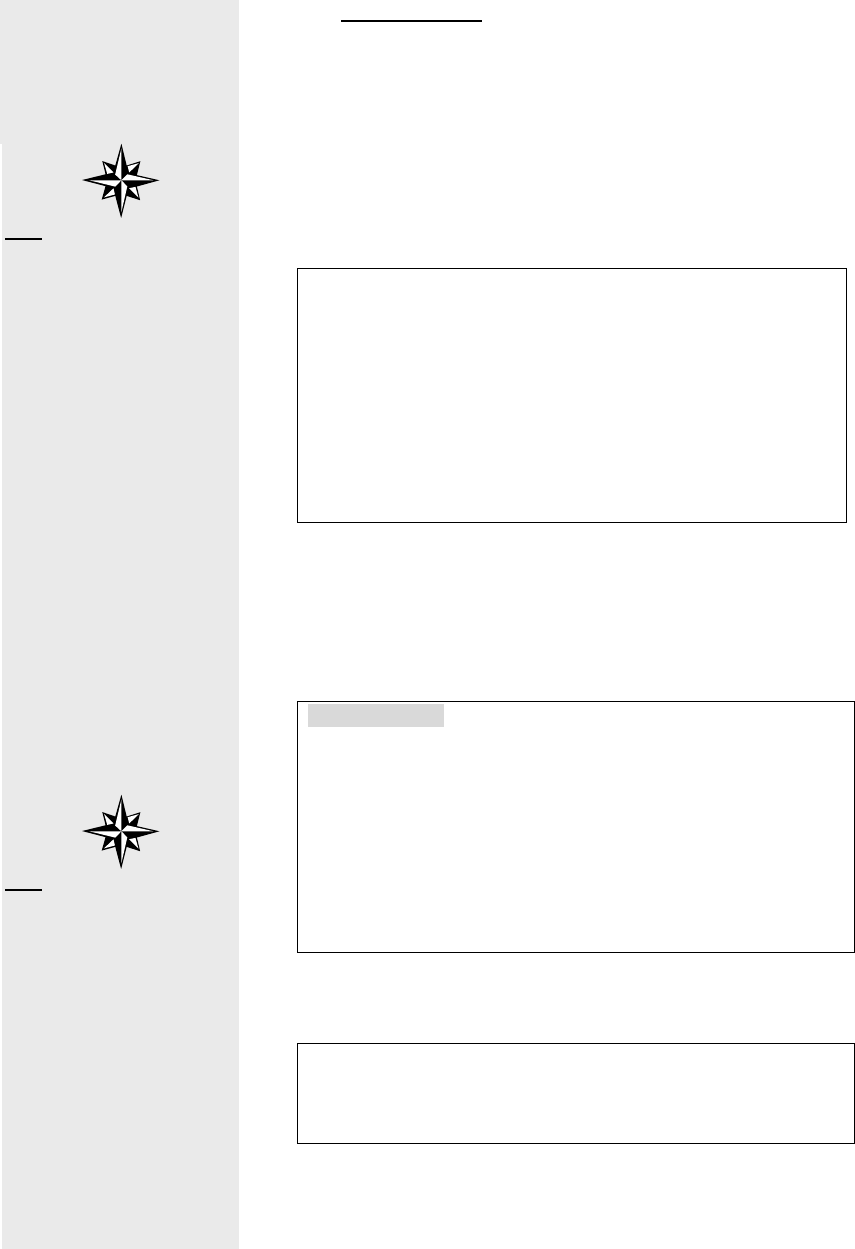
position screen. By default, it works in Alt-Az mode:
TR.A. 1h36m 2s
TDEC 90°0’ 0”
R.A. 19h52m 5s
DEC 47°31’16” 64X
Lgst 7h52m38s Stop
Alt. 0°0’ 0”
Azi. 0°0’ 0”
2007-07-10 14:25:23 N
When the power is turned on, you will see “G_ON” (GPS
turned on) on the upper right corner of the screen. In about a
minute, after the internal GPS communicate with the
satellites, you will see “G_OK” on the screen, both time and
location are automatically set.
Press MENU button, then you will see this screen:
Select and slew
Sync. To target
Electric Focuser
Set up GOTONOVA
Align
PEC option
Set up tracking
User objects
Auto guide
Park scope
To park position
From the main menu, select “Align”. The system provides
“one-star align” and “two-star align”.
Select “one-star align”. You will see this screen:
Alphard
A 39°43.3′ Z 221°20.0′
Center the target then
press
“
ENTER
”
2X
Use “UP” and “DOWN” arrow buttons to select a star and
press ENTER. Use SPEED button to select a speed, and use
arrow buttons to center the star in your telescope. Press
ENTER when finished. Now your GoToNova
TM
is ready to


