


7
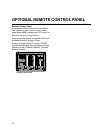
OPERATION
The FP3000-12 provides 120 volt AC power
from auxiliary DC batteries, automatic battery
charging and automatic AC transfer switching
between an external AC source and inverter
mode.
External AC Power
When external AC power is available, the
three-stage battery charger, transfer switching,
and Power Sharing automatically function.
When external AC power is not available and
the INVERT switch is ON (either through the
auxiliary switch or the INVERT button on the
remote), the inverter will automatically turn ON.
If the INVERT switch is OFF (the INVERT LED
will not be illuminated), the inverter will be OFF.
If installed with the Remote Control Panel, the
unit will be set up and controlled from the
remote. Refer to the remote manual for more
information.
Front Panel Controls and Indicators
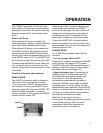
INVERT MODE
The INVERT push-button switch is located on
the front of the unit and has two functions:
• Turn the inverter ON/OFF and reset after a
fault condition. Pressing the INVERT switch
turns the inverter ON. The green INVERT LED
will be ON when the inverter is inverting.
When the inverter is ON, pressing the INVERT
switch turns the inverter OFF.
INVERT
CHARGE
• Battery type setup. To enter the battery type
select mode, press and hold the INVERT
switch for five seconds. The status LEDs will
change from indicating status information to
indicating battery type. The selection of the
battery type is made with the Charge switch.
Turning the INVERT OFF will reduce battery
power consumption to a very low level. This is
recommended if the unit will not be used for an
extended period of time.
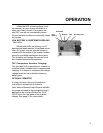
CHARGE MODE
The CHARGE push-button switch has two
functions:
• Turn the charger ON and OFF
If external AC is present, pressing the CHARGE
switch will turn the charger ON. The green
CHARGE LED will be ON when the charger is
charging. When the charger is ON, pressing
this switch will turn the charger OFF.
• Select the battery type After holding the
INVERT switch for five seconds, press the
CHARGE switch to select the battery type.
One of the four LEDs will rapidly blink,
indicating the present battery type setting.
Press the CHARGE switch again to change
the battery type. Continue to press until the
desired battery type is selected. If the CHARGE
switch is not pressed for five seconds, the unit
will return to normal operation and the battery
type selection will have been made.
When the 12 volt input to the unit is
disconnected, the battery type setting is stored
in non-volatile memory. When the unit is
reconnected, the battery type selection
conveniently returns to the setting.