


24
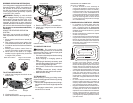
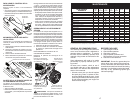
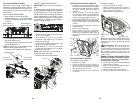
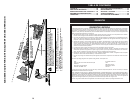
REPLACING BATTERY
WARNING: Do not short bat tery ter mi-
nals by al low ing a wrench or any other object
to contact both terminals at the same time.
Before con nect ing battery, remove metal
bracelets, wrist watch bands, rings, etc.
Positive terminal must be connected first to
prevent spark ing from ac ci den tal grounding.
1. Lift seat pan to raised position.
2. Remove terminal cover.
3. Disconnect BLACK battery cable then
RED battery cable, battery strap and
carefully remove battery from riding
mower.
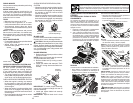
4. Install new battery with terminals in same
position as old battery.
5. Reinstall terminal cover.
6. First connect RED battery cable to
positive (+) battery terminal with bolt and
nut as shown. Tighten securely.
7. Connect BLACK grounding cable
to negative (-) bat tery terminal with
remaining bolt and nut. Tighten securely
8. Lower seat pan.
INTERLOCKS AND RELAYS
Loose or damaged wiring may cause your
riding mower to run poorly, stop running, or
prevent it from starting.
• Check wiring. Ensure all wiring and con-
nectors are secure.
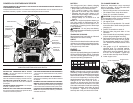
ENGINE
Your carburetor is not adjustable. If your
engine does not operate properly due to
suspected carburetor problems, take your
riding mower to a qualified service center
for repair and/or adjustment.
TO START ENGINE WITH A WEAK
BAT TERY
CAUTION: Lead-acid batteries gen er ate
ex plo sive gases. Keep sparks, flame and
smoking ma te ri als away from bat ter ies. Always
wear eye pro tec tion when around batteries.
If your battery is too weak to start the engine,
it should be recharged. (See "BATTERY" in
the Maintenance section of this man u al).
Seat Pan
Nut
Nut
Positive
Cable
(Red)
Negative
Cable
(Black)
Bolt
TO ADJUST STEERING WHEEL
ALIGNMENT
If steering wheel crossbars are not horizontal
(left to right) when wheels are positioned
straight forward, remove steering wheel
and reassemble per instructions in the
"INSTALL STEERING COLUMN" section
of this manual.
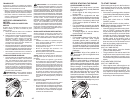
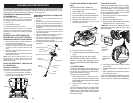
TO REMOVE WHEEL FOR REPAIRS
FRONT WHEEL
1. Block up front axle securely.
2. Remove dust cover, retaining ring, and
washer to allow wheel removal.
3. Repair tire and reassemble.
4. Replace washer and retaining ring
securely in axle groove.
REAR WHEEL
1. Block up rear axle securely.
2. Remove dust cover, retaining ring, wash-
er, and square key while pulling tire off.
3. Repair tire and reassemble.
4. Replace square key while putting tire back
on, then replace washer and retaining
ring securely in axle groove.
NOTE: To seal tire punctures and pre vent
flat tires due to slow leaks, purchase and
use tire sealant from authorized service
center. Tire sealant also pre vents tire dry
rot and corrosion.
Retaining
Ring
Dust
Cover
Washer
Square Key
(rear wheel only)
33
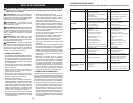
Capacidad de 1.5Q (1.4L)
gasolina y Tipo: Regular sin plomo
Tipo de Aceite SAE 30 (Sobre 32°F/0°C)
------
(API-SG-SL): SAE 5W30 (Deabajo 32°F/0°C)
Capacidad 48 onzas
de aceite:
Bujía: Champion RC12YC
(Abertura: .030"/0,76 mm)
Velocidad de Marcha
Recarrido: Adelante: 0 - 4/6,4
(Mph/Kph) Atrás: 0 - 2/3,2
Sistema de 3 Amps Bateria
Carga:
Torque del perno 45 - 55 Pies /Libras (62-75 Nm)
-
de la cuchilla:
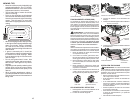
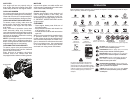
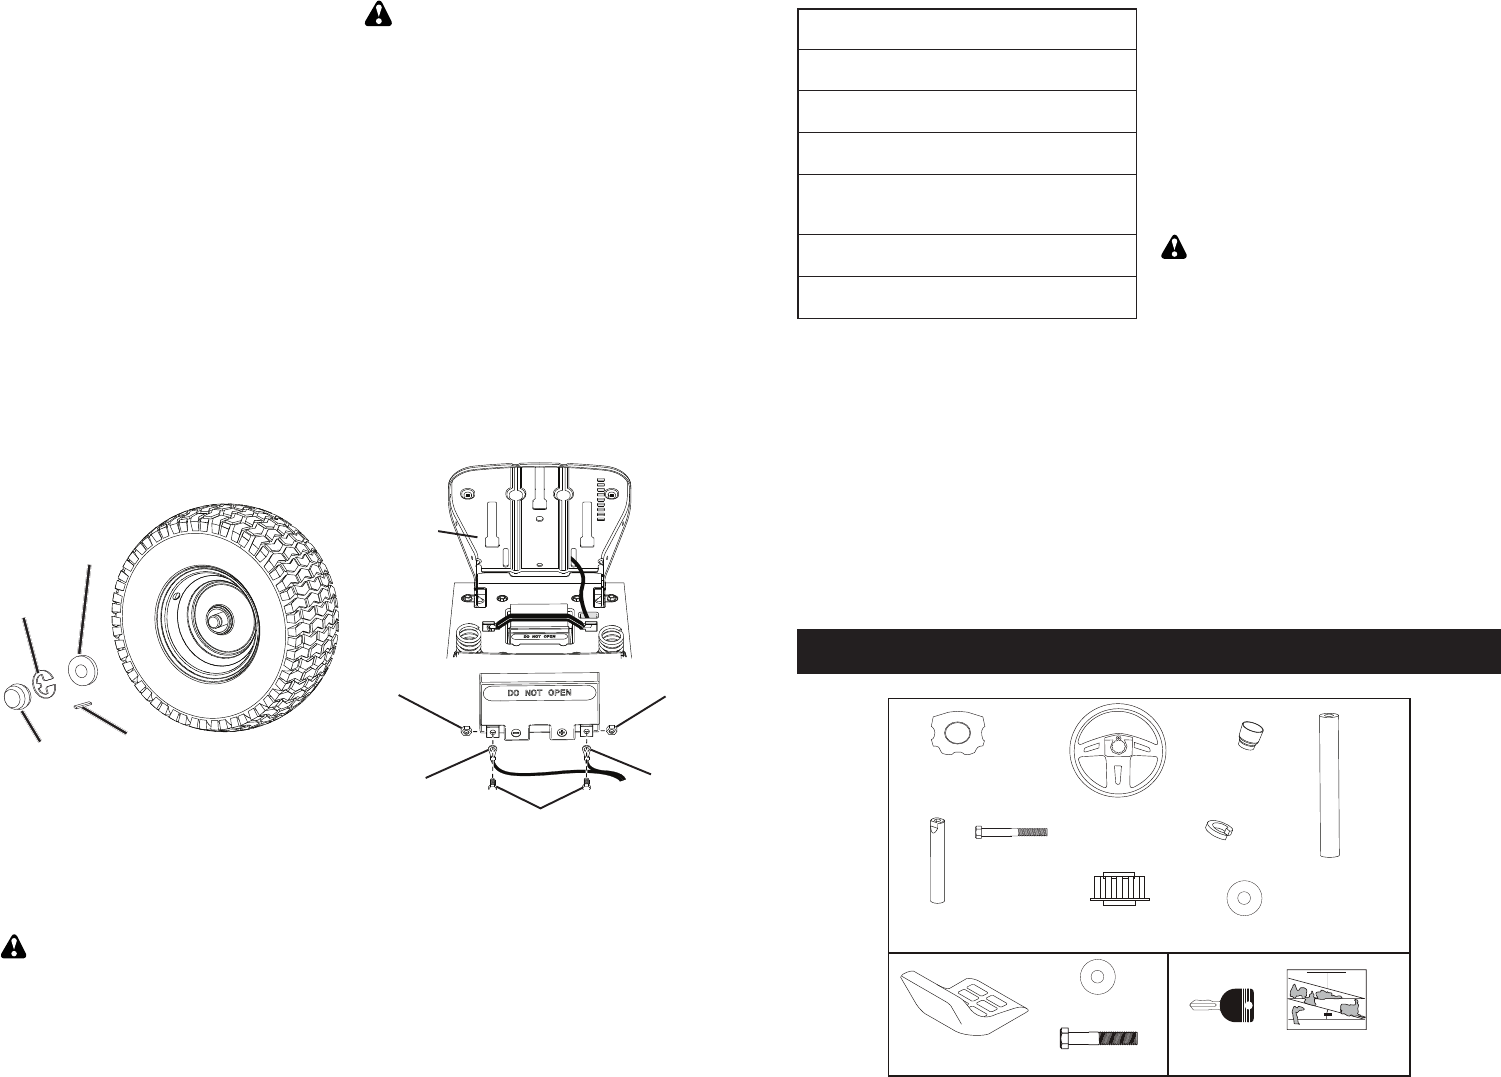
ESPECIFICACIONES DEL PRODUCTO
Inserto del volante
de dirección
Volante
de dirección
Accesorio
de transción
de la dirección
Asiento
Cobertura
Eje de
Extención
(1) Arandela
(1) Arandela
(1) Arandela
de seguridad
(1) 5/16-18 x 4
Perno de cabeza
hexagonal
(1) Perno
Hoja de
pendiente
(2) Llave
Adaptador
PARTES NO ENSAMBLADAS
FELICITACIONES por la compra de su tractor.
Ha sido diseñado, planificado y fabricado para
darle la mejor confiabilidad y el mejor rendimiento
posible.
En el caso de que se encuentre con cualquier
problema que no pueda solucionar fácilmente,
haga el favor de ponerse en contacto con un
centro de servicio o con un otro centro de servicio
cualificado. Cuenta con técnicos bien capacitados
y com pe ten tes y con las herramientas adecuadas
para darle servicio o para reparar este tractor.
Haga el favor de leer y de guardar este man u al.
Estas instruc-ciones le permitirán montar y man-
tener su unidad en forma ade cua da. Siempre
observe las “REGLAS DE SEGURIDAD.”
RESPONSABILIDADES DEL CLIENTE
• Lea y observe las reglas de seguridad.
• Siga un programa regular al darle man teni mien-
to, cuidados y uso a su cortadora de césped.
• Siga las instrucciones de las secciones de
“Man te nimiento” y “Alma cenamiento” de es te
manual del pro pietario.
• Utilice prendas de seguridad adecuadas al
manejar la máquina, incluidos (como mínimo)
calzado de seguridad, gafas protectoras y pro-
tección auditiva. No utilice pantalones cortos
y/o calzado abierto cuando corte la hierba.
• Informe siempre a alguien de que se dispone
a cortar la hierba en el exterior.
ADVERTENCIA: Esta cortadora de césped
está equipada con un motor de com bus tión
interna y no se debe usar en o cerca de terrenos
cubiertos de bosques sin me jo ras, cubiertos de
arbustos o cu biertos de pastos, a menos que
el sistema de escape del motor esté equipado
con un parachispas que cumpla con las leyes
locales o estatales aplicables (de haberlas). Si
se usa un parachispas, el operador deberá darle
mantenimiento en un orden de trabajo efectivo.
En el estado de California, las leyes exigen el uso
de un parachispas (Sección 4442 del Código de
Recursos Públicos de California). Otros estados
pueden tener leyes similares. En los terrenos
federales se aplican las leyes federales. Se
puede obtener un parachispas para el silenciador
a través del centro de servicio autorizado más
cercano.