


Getting Started Model T265 Chemiluminescence Ozone Analyzer Addendum to Model T200 Manual
14
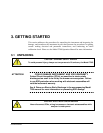
CAUTION
Remove dust plugs from pneumatic fittings on the rear panel of the analyzer,
prior to applying power to the analyzer.
Note
It is recommended that you store shipping containers/materials for
future use if/when the instrument should be returned to the factory for
repair and/or calibration service. See Warranty section in this manual
and shipping procedures on our Website at http://www.teledyne-api.com
under Customer Support > Return Authorization.
1. First, verify that there is no apparent external shipping damage. If damage
has occurred, please advise the shipper first, then Teledyne-API. Save the
packaging for shipper’s examination.
2. Included with your analyzer is a printed record of the final performance
characterization performed on your instrument at the factory. This record,
titled Final Test and Validation Data Sheet (P/N 06627) is an important
quality assurance and calibration record for this instrument. It should be
placed in the quality records file for this instrument.
3. Carefully remove the top cover of the analyzer and check for internal
shipping damage.
Remove the set screw located in the top, center of the front panel.
Remove the two screws fastening the top cover to the unit (one per side
towards the rear).
Slide the cover backward until it clears the analyzer’s front bezel.
Lift the cover straight up.
Check for internal shipping damage, and generally inspect the interior
of the instrument to make sure all circuit boards and other components
are in good shape and properly seated.
4. Reinstall the cover and screws, once the inspection is complete.
5. Check the voltage and frequency label on the serial number tag on the rear
panel. Compare that to your local power before plugging the instrument
into an outlet.
07337B DCN6324