


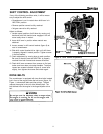

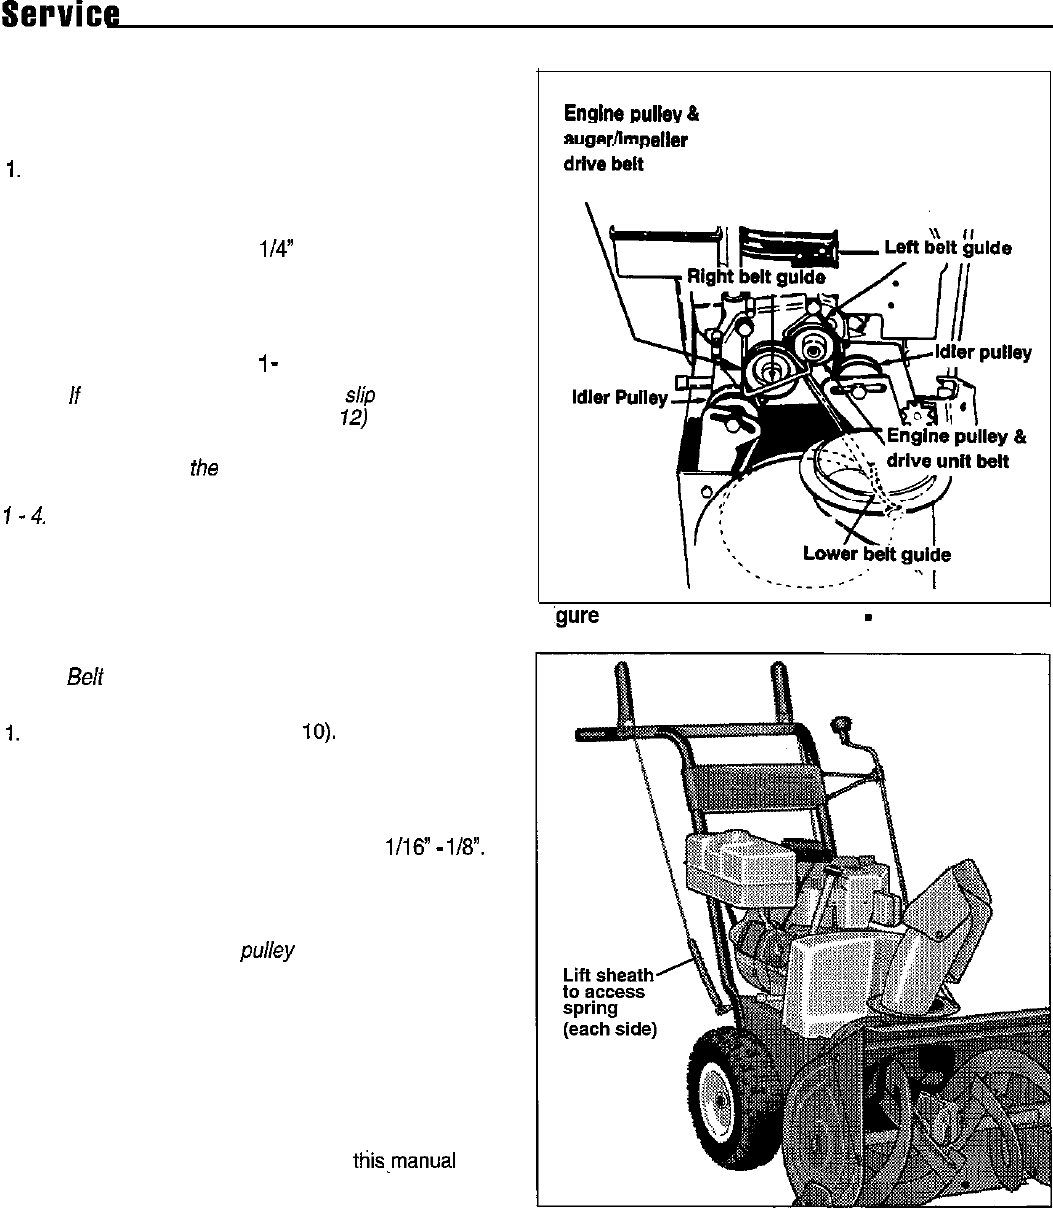
Adjusting Drive Belts
If the auger or wheels slip under load, belts could be
stretched or worn. Adjust as follows:
1.
Remove the belt cover (figure 10). Determine which
belt requires adjustment.
2. Loosen the locknut on the appropriate idler pulley
and move the idler pulley i/4” toward the belt (figure
11). Tighten the locknut.
3. Re-install the belt cover.
4. Determine if additional adjustment is required by try-
ing the unit. Repeat step
1
-
3 if necessary.
NOTE: If auger or wheels continue to slip after adjust-
ing the idler pulleys, the spring (figure
12)
on either con-
trol rod might be stretched and worn and require replace-
ment. Replace either
the
auger control rod spring or
drive control rod spring as necessary, then repeat steps
I-4.
Adjusting Belt Guides
Check each belt guide for proper clearance using the fol-
lowing procedure.
NOTE: Belt guides on 7 HP mode/s are slight//y different
than shown, but adjustment is the same.
I.
Remove the belt cover (figure
IO).
2. Have someone hold both the auger and drive clutch
levers tight against the handgrips (figure 12).
3. Loosen the screw securing the belt guide (figure 11).
Adjust the guide so it clears the belt by
l/16”
-
l/8”.
The clearance should be equal on both side of the
pulley. Tighten the screw securely.
NOTE: When adjusting the right belt guide, make sure
guide does not contact the
pulley hub.
4. Re-install the belt cover.
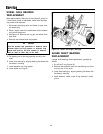
Replacing Drive Belts
The drive belts on this snowthrower are of special con-
struction and should be replaced with original equipment
belts available from your dealer. See COMMON
REPLACEMENT PARTS at the back of tfiis.manual for
part numbers.
1. Remove gas from fuel tank and run engine until it
stops running from lack of fuel.
2. Disconnect spark plug wire and fasten it away from
the spark plug.
3. Remove belt cover (figure 10).
Use the following procedure to replace either drive belt.
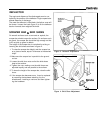
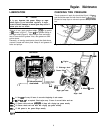
Figure 12. Drive Control Spring
4. Loosen the screw securing the belt guide (figure 11).
Pivot the belt guide as necessary and remove the
drive belt from the pulley.
5. Stand the snowthrower up onto the auger end.
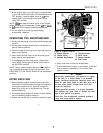
Englne
PUIIOY
01
dr;ve
bel;
\
‘gure 11. Drive Belts and Pulleys
-
Belt Cover Off
12