


52
PARA OPERAR LA SEGADORA
Su tractor viene equipada con un interruptor
sen sor que exige la presencia del operador. Si
el motor está funcionando y el em bra gue del ac-
cesorio está enganchado y el operador trata de
bajarse del asiento, se apagará el motor. Tiene
que mantenerse sentado completa y centralmente
en el asiento para impedir que el motor vacile o
se apague cuando se opere su equipo en terreno
disparejo, áspero o en cerros.
1. Elija a qué altura cortará el césped por medio
de la palanca elevadora.
2. Haga arrancar las cuchillas de la segadora
enganchando el control del embrague del
accesorio.
PARA PARAR LAS CUCHILLAS DE LA SEGA-
DORA - desenganche el control del embrague
del accesorio.
PRECAUCIÓN: No opere la segadora sin,
ya sea, el recogedor de césped completo en las
segadoras así equipadas o con la pro tec ción
contra la descarga en su lugar.
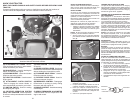
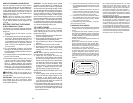
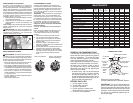
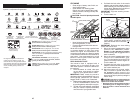
S
ROS "ON" Position Engine "ON" Position
(Normal Operating)
FUNCIONAMIENTO ATRÁS
Tu tractor está equipado con el Sistema de
Funcionamiento Atrás (ROS). Cualquier tenta-
tiva del operador de viajar marcha atrás con el
embrague puesto apagará el motor a menos
que la llave de ignición se ponga en la posición
de “ON” del ROS.
ATENCIÓN: Ir marcha atrás con el embrague
puesto para cortar, no es recomendable. Po-
niendo el ROS en posición “ON”, para permitir
el funcionamiento atrás con el embrague pues-
to, se tiene que hacer sólo cuando el operador
lo considera necesario para reposicionar la
máquina con el dispositivo embragado. No
siegue en revés a menos que sea absoluta-
mente necesario.
USAR EL SISTEMA DE FUNCIONAMIENTO
ATRÁS -
Utilice el tractor solamente si está seguro de
que no ingresarán niños ni otras personas
o animales al área donde se va a cortar el
césped.
1. Presionar el pedal freno hasta el fondo.
2. Con el motor en marcha, girar la llave
del interruptor de la ignición en el sentido
inverso al de las agujas del reloj hasta la
posición “ON”.
3 Mire hacia abajo y hacia atrás no sólo
antes de ir marcha atrás, sino mientras esté
yendo marcha atrás.
4. Presione lentamente el pedal reverso de la
impulsión para comenzar el movimiento.
5. Cuando el uso del ROS es más necesario,
dé vuelta a la llave de ignición en el sentido
de las agujas del reloj hasta la posición
“ON”.
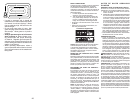
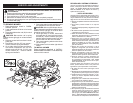
PARA OPERAR EN CERROS
ADVERTENCIA: No maneje hacia arriba o ha-
cia abajo en cerros con pendientes su pe rio res a
15° y no maneje atravesando nin gu na pendiente.
Utilice la guía de la pendiente proporcionada en
la parte posteriora de este manual.
• Escoja la velocidad más lenta antes de arran-
car hacia arriba o hacia abajo en cerros.
• Evite parar o cambiar la velocidad en cerros.
• Si es absolutamente necesario el parar, empuje
el pedal de freno rápidamente a la posición de
freno y en gan che el freno de estacionamiento.
• Para volver a empezar con el movimiento,
suelte len ta men te, el freno de estacionamiento
y el pedal de freno.
• Apretar despacio el pedal apropiado hasta la
posición más lenta.
• Gire siempre lentamente.
21
MAINTENANCE
GENERAL RECOMMENDATIONS
The warranty on this tractor does not cover
items that have been subjected to operator
abuse or negligence. To receive full value
from the warranty, operator must main tain
tractor as instructed in this manual.
Some adjustments will need to be made pe-
riodically to properly maintain your tractor.
At least once a season, check to see if
you should make any of the adjustments
described in the Service and Adjustments
section of this manual.
• At least once a year you should replace
the spark plug, clean or replace air filter,
and check blades and belts for wear. A
new spark plug and clean air filter assure
proper air-fuel mixture and help your en-
gine run better and last longer.
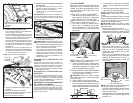
BEFORE EACH USE
1. Check engine oil level.
2. Check brake operation.
3. Check tire pressure.
4. Check operator presence and
ROS systems for proper operation.
5. Check for loose fasteners.
IMPORTANT: Do not oil or grease the pivot
points which have special nylon bearings.
Viscous lu bri cants will attract dust and dirt
that will short en the life of the self-lu bri cat ing
bearings. If you feel they must be lu bri cat ed,
use only a dry, pow dered graphite type lu-
bri cant sparingly.
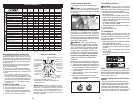
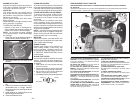
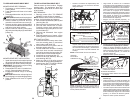
LUBRICATION CHART
T
R
A
C
T
0
R
1 - Change more often when operating under a heavy load or in high ambient temperatures.
2 - Service more often when operating in dirty or dusty conditions.
E
N
G
I
N
E
3
2
2
2
2
3 - Replace blades more often when mowing in sandy soil.
4 - Not required if equipped with maintenance-free battery.
5 - See Cleaning in Maintenance Section.
1
,
1,2
2
4
5
1,2
BEFORE
EACH
USE
EVERY
8
HOURS
EVERY
25
HOURS
EVERY
50
HOURS
EVERY
100
HOURS
EVERY
SEASON
BEFORE
STORAGE
Inspect Muffler/Spark Arrester
Clean Air Filter
Change Engine Oil (with oil filter)
Replace Air Filter Paper Cartridge
Replace Spark Plug
Check Engine Oil Level
Clean Engine Cooling Fins
Clean Air Screen
Replace Oil Filter (If equipped)
Replace Fuel Filter
Change Engine Oil (without oil filter)
Lubrication Chart
Check Brake Operation
Check Battery Level
Check Tire Pressure
Clean Battery and Terminals
MAINTENANCE
SCHEDULE
Check for Loose Fasteners
Check/Replace Mower Blades
Che
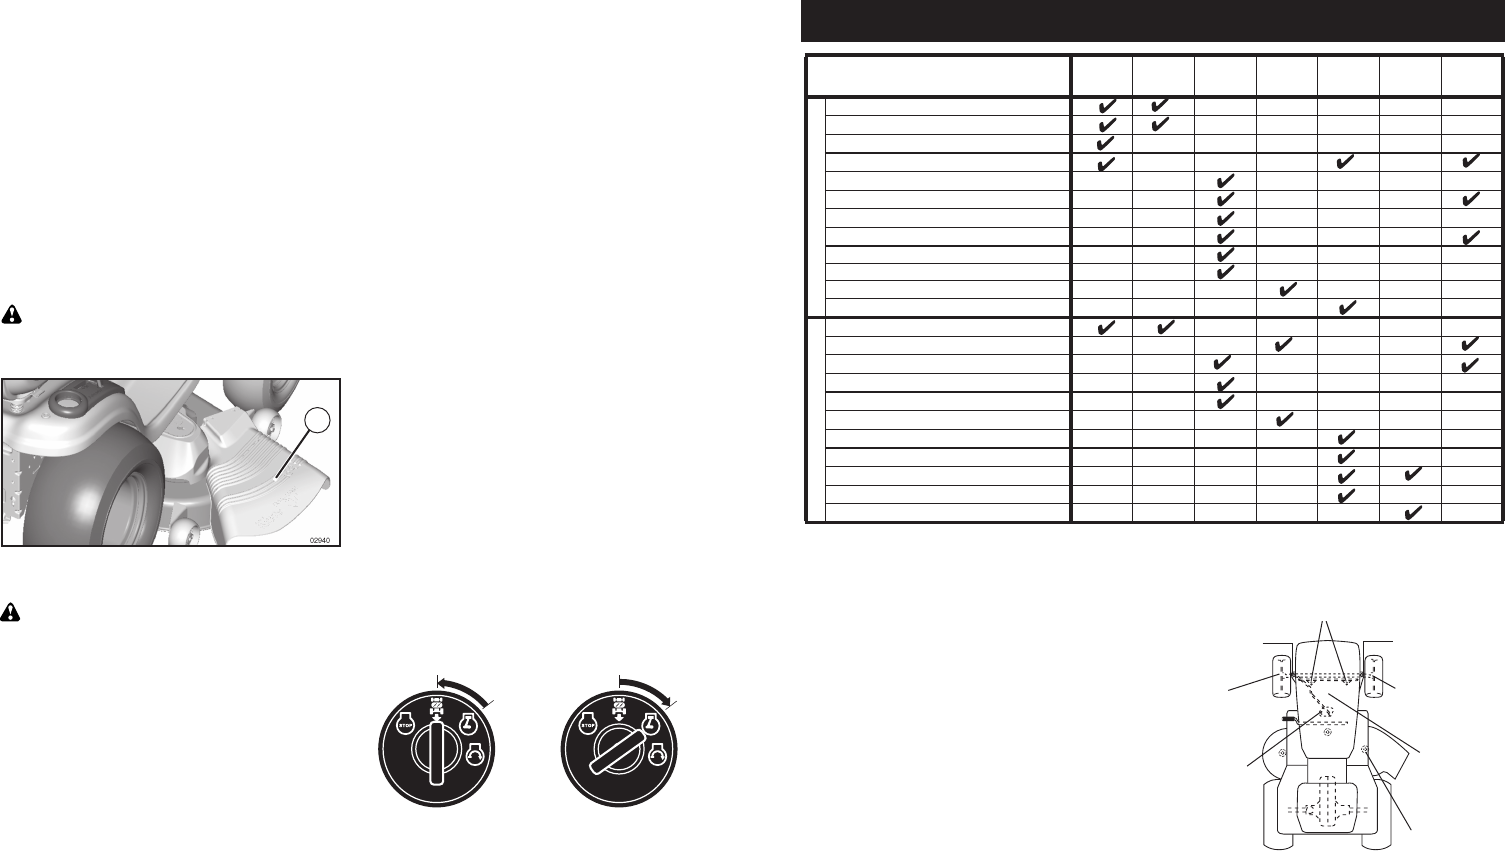
Clean Debris Off Steering Plate
ck Transaxle Cooling
Che
Check Operator Presence & ROS Systems
ck V-Belts
Check Mower Levelness
➀Steering Pivot Bolts
➀General Purpose Grease
➁Refer to Maintenance “ENGINE” Section.
➁ Engine
➀ Front
Wheel
Bearing
Zerk
➀ Spindle
Zerk
➀ Spindle
Zerk
➀ Front Wheel
Bearing Zerk
➀ Steering
Sector
Gear
Teeth
➁ Mandrel
Zerks