


NOTE: Before initial use or first time use after stor-
age, be certain to fill the reservoir as instructed in next
section.
IMPORTANT: Reservoir tank must be full as in-
structed. Low fluid level will damage the pump and
void your warranty.
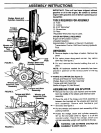
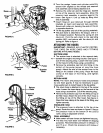
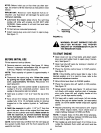
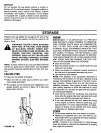
• Lubricate the beam area where the splitting
wedge will slide with engine oil (DO NOT USE
GREASE). Make certain to oil both front and back
of the beam face.
• Fill fuel tank as instructed previously.
• Attach spark plug wire and cover to spark plug.
See figure 11.
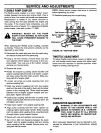
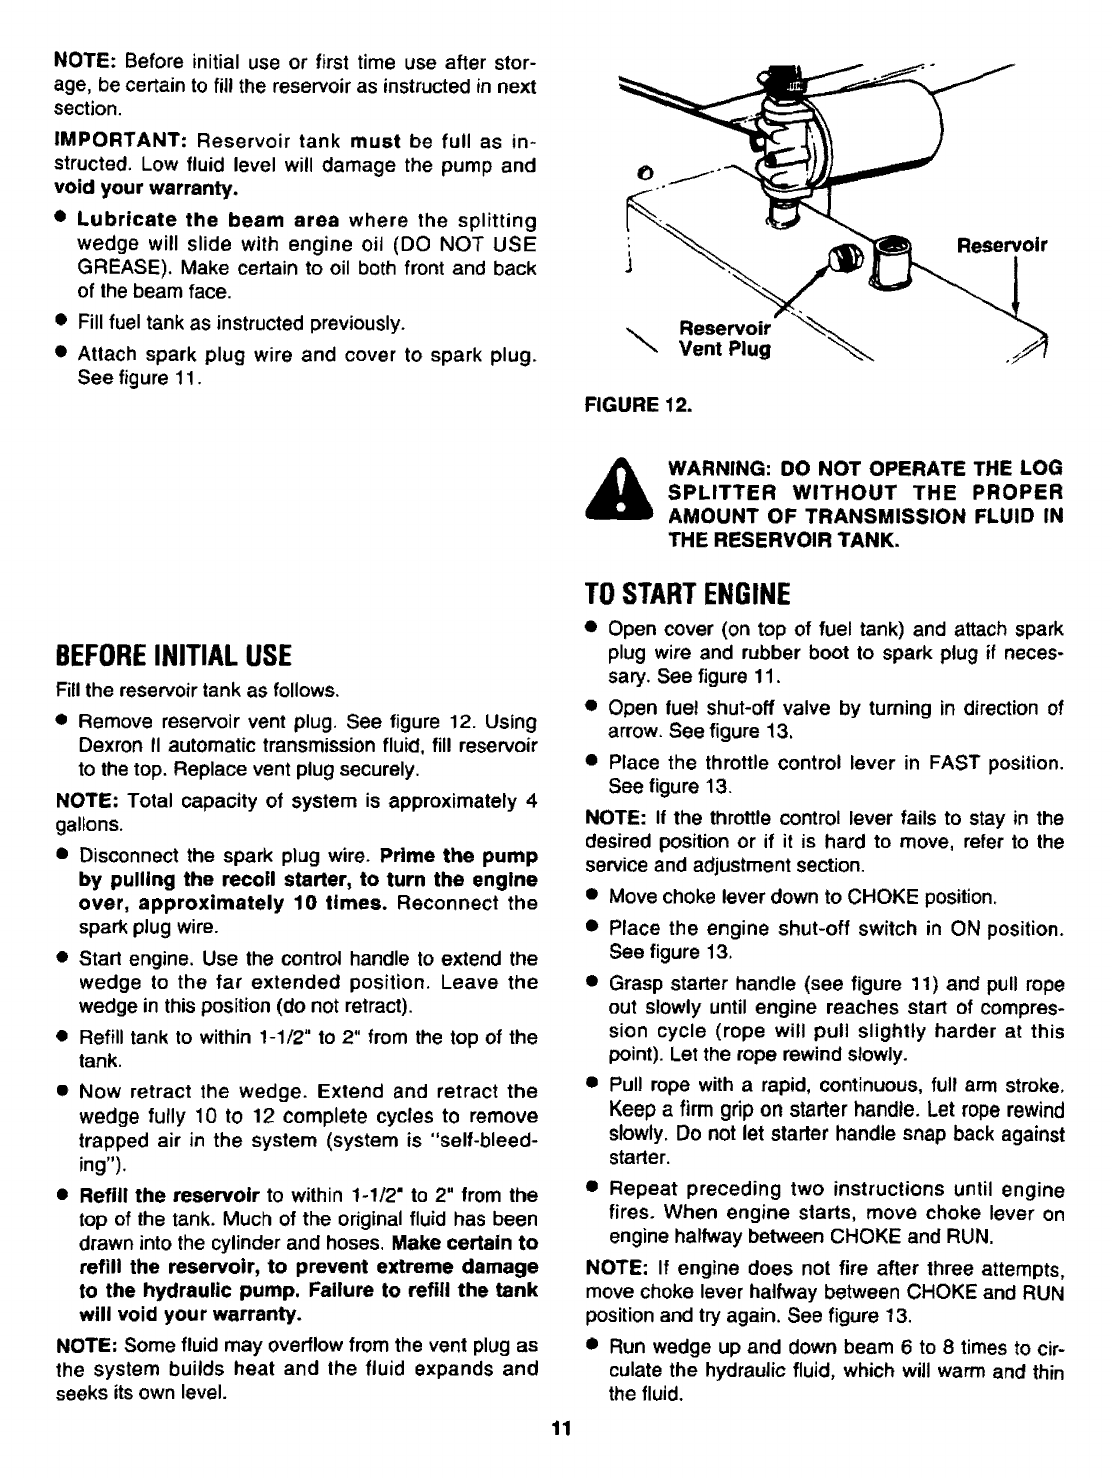
FIGURE 12.
&
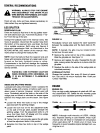
WARNING: DO NOT OPERATE THE LOG
SPLITTER WITHOUT THE PROPER
AMOUNT OF TRANSMISSION FLUID IN
THE RESERVOIR TANK.
BEFOREINITIAL USE
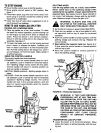
Fill the reservoir tank as follows.
• Remove reservoir vent plug, See figure 12. Using
Dexron II automatic transmission fluid, fill reservoir
to the top. Replace vent plug securely.
NOTE: Total capacity of system is approximately 4
gallons.
• Disconnect the spark plug wire. Prime the pump
by pulling the recoil starter, to turn the engine
over, approximately 10 times. Reconnect the
spark plug wire.
• Start engine. Use the control handle to extend the
wedge to the far extended position. Leave the
wedge in this position (do not retract).
• Refill tank to within 1-1/2" to 2" from the top of the
tank.
• Now retract the wedge. Extend and retract the
wedge fully 10 to 12 complete cycles to remove
trapped air in the system (system is "self-bleed-
ing").
• Refill the reservoir to within 1-1/2" to 2" from the
top of the tank. Much of the original fluid has been
drawn into the cylinder and hoses. Make certain to
refill the reservoir, to prevent extreme damage
to the hydraulic pump. Failure to refill the tank
will void your warranty.
NOTE; Some fluid may overflow from the vent plug as
the system builds heat and the fluid expands and
seeks itsown level.
11
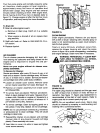
TOSTARTENGINE
• Open cover (on top of fuel tank) and attach spark
plug wire and rubber boot to spark plug if neces-
sary. See figure 11.
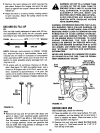
• Open fuel shut-oft valve by turning in direction of
arrow. See figure t3,
• Place the throttle control lever in FAST position.
See figure 13.
NOTE: If the throttle control lever fails to stay in the
desired position or if it is hard to move, refer to the
service and adjustment section.
• Move choke lever down to CHOKE position.
• Place the engine shut-off switch in ON position.
See figure 13.
• Grasp starter handle (see figure 11) and pull rope
out slowly until engine reaches start of compres-
sion cycle (rope will pull slightly harder at this
point). Let the rope rewind slowly.
• Pull rope with a rapid, continuous, full arm stroke,
Keep a firm grip on starter handle. Let rope rewind
slowly. Do not let starter handle snap back against
starter.
• Repeat preceding two instructions until engine
fires. When engine starts, move choke lever on
engine halfway between CHOKE and RUN.
NOTE: If engine does not fire after three attempts,
move choke lever halfway between CHOKE and RUN
position and try again. See figure 13.
• Run wedge up and down beam 6 to 8 times to cir-
culate the hydraulic fluid, which will warm and thin
the fluid.