


15
15
3.6 ADJUSTING VALVE CLEARANCE
After the first 50 hours of operation, check the valve clearance in the
engine and adjust if necessary.
Important: If feeling uncomfortable about doing this procedure or the
proper tools are not available, please take the generator to the nearest
service center to have the valve clearance adjusted. This is a very
important step to insure longest life for the engine.
To check valve clearance:
Make sure the engine is at room temperature (60° - 80° F).•
Make sure that the spark plug wire is removed from the spark plug and •
out of the way.
Remove the four screws attaching the valve cover.•
Make sure the piston is at Top Dead Center (TDC) of its compression •
stroke (both valves closed). To get the piston at TDC, remove the
intake screen at the front of the engine to gain access to the flywheel
nut. Use a large socket and socket wrench to rotate the nut and hence
the engine in a clockwise direction while watching the piston through
the spark plug hole. The piston should move up and down. The piston
is at TDC when it is up as high as it can go.
Insert a 0.002 - 0.004 inch (0.05 - 0.1mm) feeler gauge between the •
rocker arm and valve stem. Correct clearance is when a slight drag is
felt when sliding the gauge back and forth. If the clearance is either
excessively loose or tight the rocker arms will need adjusting.
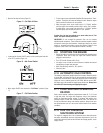
To adjust valve clearance:
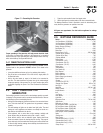
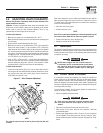
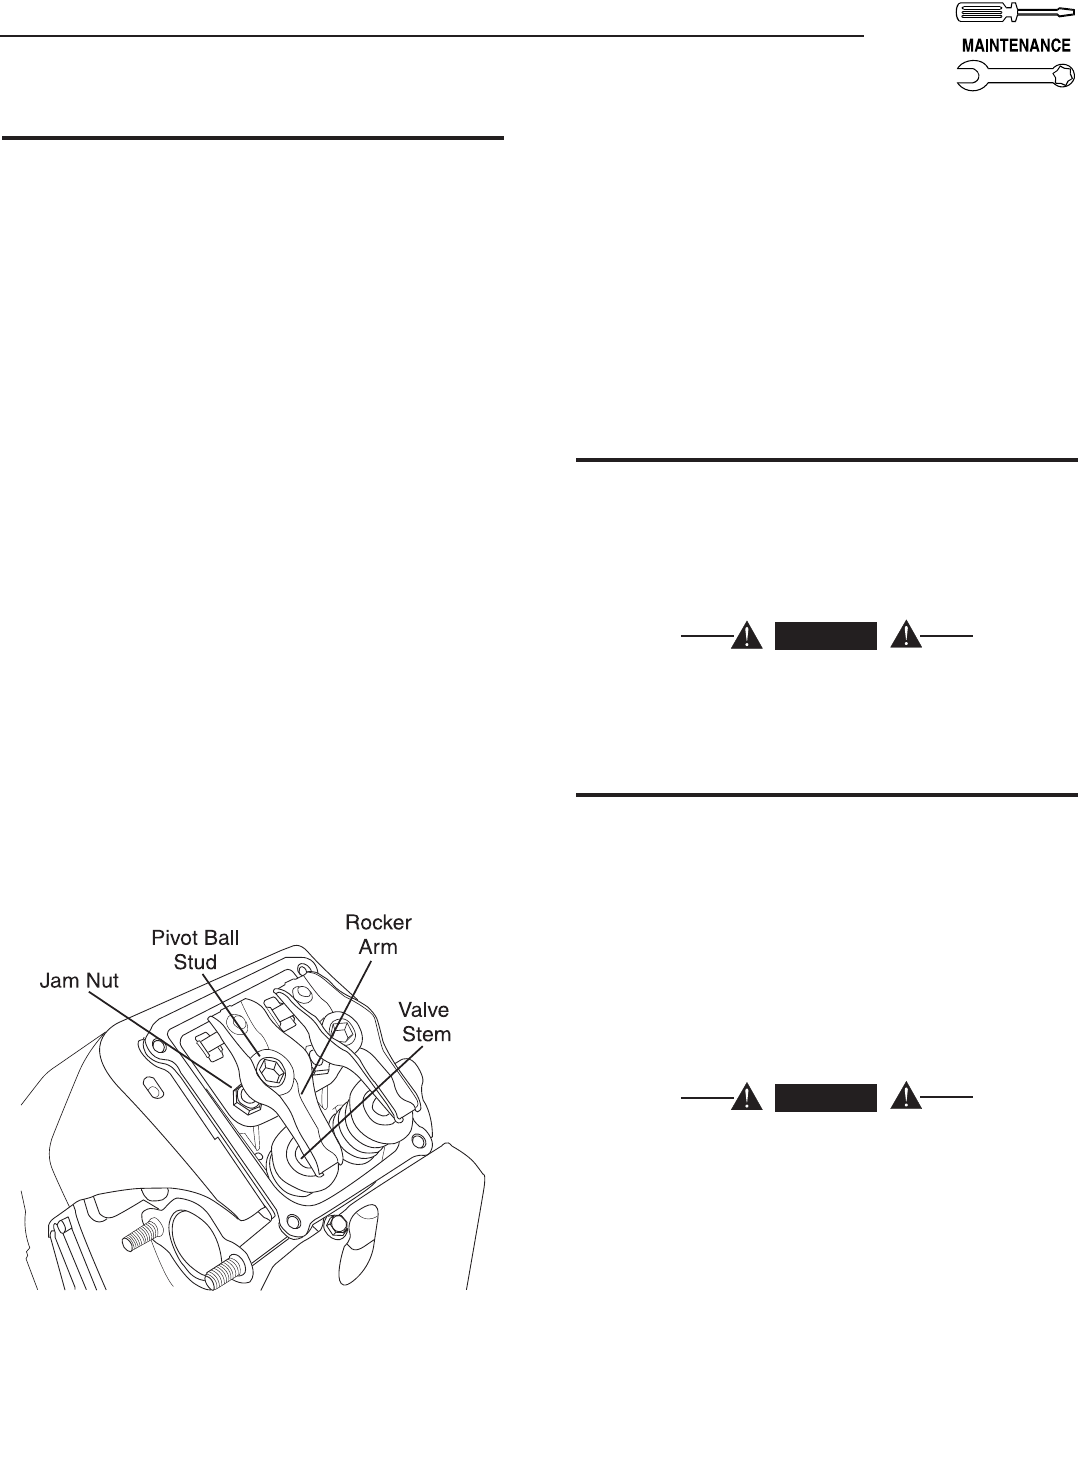
Loosen the rocker jam nut (Figure 21). Use an 10mm allen wrench to •
turn the pivot ball stud while checking clearance between the rocker
arm and the valve stem with a feeler gauge. Correct clearance is
0.002-0.004 inch (0.05-0.1 mm).
Figure 21 - Valve Clearance Adjustment
NOTE:
The rocker arm jam nut must be held in place as the pivot ball stud
is turned.
When valve clearance is correct, hold the pivot ball stud in place with the
allen wrench and tighten the rocker arm jam nut. Tighten the jam nut to
174 in/lbs. torque. After tightening the jam nut, recheck valve clearance to
make sure it did not change.
Install new valve cover gasket.•
Re-attach the valve cover.•
NOTE:
Start all four screws before tightening or it will not be possible to get all
the screws in place. Make sure the valve cover gasket is in place.
Re-attach the spark plug wire to the spark plug.•
Repeat the process for the other cylinder.•
3.7 GENERAL
The generator should be started at least once every seven days and be
allowed to run at least 30 minutes. If this cannot be done and the unit must
be stored for more than 30 days, use the following information as a guide
to prepare it for storage.
DANGER
NEVER store engine with fuel in tank indoors or
in enclosed, poorly ventilated areas where fumes
may reach an open flame, spark or pilot light as on
a furnace, water heater, clothes dryer or other gas
appliance.
3.8 LONG TERM STORAGE
It is important to prevent gum deposits from forming in essential fuel
system parts such as the carburetor, fuel hose or tank during storage.
Also, experience indicates that alcohol-blended fuels (called gasohol,
ethanol or methanol) can attract moisture, which leads to separation and
formation of acids during storage. Acidic gas can damage the fuel system
of an engine while in storage.
To avoid engine problems, the fuel system should be emptied before
storage of 30 days or longer, as follows:
Remove all gasoline from the fuel tank.•
DANGER
Drain fuel into approved container outdoors, away
from open flame. Be sure engine is cool. Do not
smoke.
Start and run engine until engine stops from lack of fuel.•
While engine is still warm, drain oil from crankcase. Refill with •
recommended grade.
Remove spark plugs and pour about 1/2 ounce (15 ml) of engine oil •
into the cylinders. Cover spark plug hole with rag. Press the “Start”
button and allow engine to crank for 2 seconds. Then press the “Stop”
button.
Section 3 — Maintenance