


4
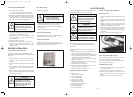
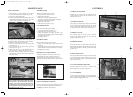
INSTALLING THE BATTERY
1. Remove the battery as follows
(a) remove the terminal cables from the battery.
(b) undo the wingnuts and remove the clamp bar.
2. The battery is not filled with Electrolyte. This should
be done by adding 33% strength battery acid to each
cell until the plates are covered. Electrolyte must be
purchased from a local battery supply outlet.
3. Leave the filler caps off and connect the battery
charger to the battery terminals. Charge the battery at
4 Amps/Hour for a minimum of 6 hours.
4. After charging, check that the Electrolyte is still
covering the plates, if not, add to the correct level.
Install the filler caps.
5. Replace the battery and secure.
6. Install the positive (red) cable to the positive (+)
terminal and the negative (black) cable to the
negative (-) battery terminal. Secure for good
electrical contact.
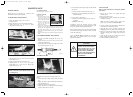
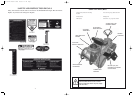
BEFORE OPERATING
FILL CRANK CASE WITH OIL
The rider mower may be delivered without oil in the
crankcase. Oil must be added before attempting to start
the engine.
1. Place the machine on level surface. Ensure that the
oil plug is securely tightened. Clean around the
dipstick.
2. Unscrew and remove the dipstick from the oil filler
tube.
3. Insert a funnel into the filler tube and slowly add oil
in accordance with the engine manufacturer’s
direction.
4. Ensure oil level is at the full mark on the dipstick
when screwed completely in. When finished, replace
the dipstick and re-tighten.
FILL FUEL TANK
Refer Safety Instructions.
1. Clean around the fuel tank cap so foreign matter
cannot enter the tank when the cap is removed.
2. Using a funnel, fill the tank with unleaded petrol.
Replace the cap.
3. Wipe up any petrol that may have spilled.
CHECK TYRE PRESSURE
Check and maintain tyre pressure at 140 KPA (20PSI)
front and 96 KPA (14PSI) rear maximum.
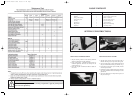
ADJUSTING THE SEAT
Tip the seat forward, loosen the seat securing screws.
Relocate the seat for operator comfort. Tighten the seat
securing screws and lower the seat. Fig 5.
Fig. 5
13
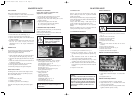
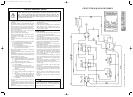
MAINTENANCE
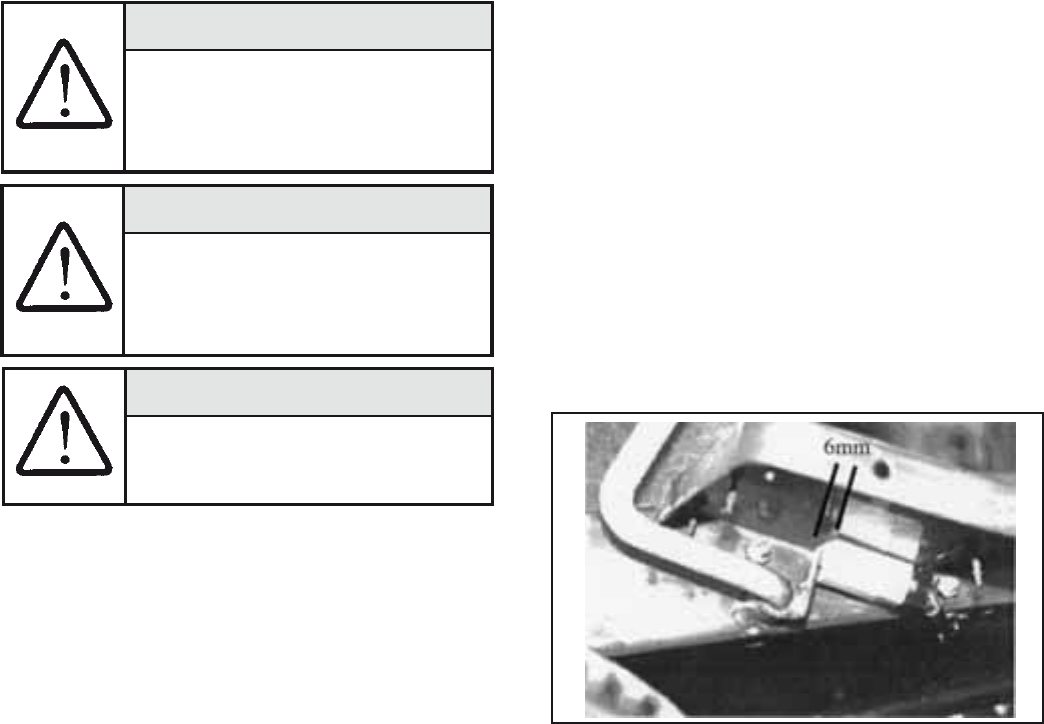
Fig. 29 Clutch brake safe switch
13
The engine will not start unless the clutch/brake pedal
is depressed and the cutter drive is disengaged.
STORAGE:
Never store the engine with fuel in tank indoors or in
poor ventilated enclosures where the fuel fumes may
accumulate.
If the machine is to be stored over 30 days proceed as
follows:
1. Remove all fuel from the carburettor and the fuel
tank to prevent varnish-like gum deposits.
2. Remove the spark plug and pour 30ml of engine oil
into the cylinder. Crank the engine several times to
distribute the oil. Replace the spark plug.
3. Clean the engine and cooling fins, etc., and any
clippings, dirt and chaff.
4. Clean the underside of the mower and cutting unit.
Paint any chips or scratches.
5. Lubricate the chassis components.
6. Remove and charge the battery and store in a cool
dry spot. Recharge every 30 days.
7. Store the machine in a clean dry place.
REMOVAL FROM STORAGE
1. Change the oil
2. Fill the fuel tank with fuel
3. Check the spark plug
4. Check the drive belts
5. Check the drive chain
6. Lubricate the drive chain
7. Lubricate the pivot points
8. Grease the front axle spindles
9. Check the tyre pressure
10.Check safety interlock
11.Check cutting blades.
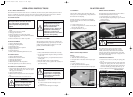
SAFETY SWITCH ADJUSTMENTS
Clutch Brake Pedal
1. Depress the clutch brake pedal and apply the parking
brake.
2. Loosen the two safety switch retaining screws and
slide the safety switch towards the rear of the mower.
Fig. 29
3. Depress the clutch brake pedal and release the
parking brake allowing the clutch brake pedal to
return to its normal disengaged position.
4. Slide the safety switch towards the tab on the clutch
brake shaft. Position the safety switch with a
clearance of 6mm between the safety switch body
and the tab.
5. Tighten the two safety switch retaining screws.
Cutter Engagement Safety Switch
The cutter engagement safety switch does not require
any routine adjustment. It should be checked
occasionally for operation, working condition and it’s
fasteners checked for tightness.
Seat Panel Safety Switch
1. Raise the seat panel and allow it to open till it rests
on the steering wheel.
2. Loosen the two safety switch retaining screws.
3. Position the safety switch to give the safety switch
button 10mm of protrusion above the cowl body
panel.
4. Tighten the two safety switch retaining screws.
WARNING
The engine will stop if the
operator leaves the seat with the
speed selector engaged and/ or
the cutter drive engaged.
CAUTION
Do not overfill battery, acid will
overflow into other parts of the
machine and severe corrosion and
deterioration will result.
CAUTION
Use only unleaded petrol.
Do not mix oil with petrol
– engine damage may result.
WARNING
If the interlock system fails, see
an authorised Rover Service
Dealer. Do not operate the mower
until the fault is corrected.
CAUTION
The safety switch circuit may
become defective if wet. Do not
spray switches and connections.
CAUTION
Avoid premature engine failure by
ensuring the funnel is clean so
contaminants are not introduced
into the crankcase. Wipe any oil
spills so it will not cause dirt to
collect on the engine.
2303 Current Artwork 7-2003 18/5/06 2:11 PM Page 6