


Thank you for choosing a quality 'Redring'
product manufactured in Peterborough, England.
CONTENTS Page
Information for the user
Important Safety Instructions 2
How to use your 'Redring' power shower 2
How to maintain your 'Redring' power
shower 4
What to do if things go wrong 4
Additional accessories 10
Information for the installer
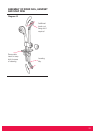
Fixing the shower to the wall 5
Plumbing 6
Electrical 9
Guarantee 12
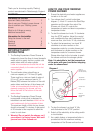
IMPORTANT SAFETY
INSTRUCTIONS
1. The Redring Expressions Power Shower is
designed to boost the flow of stored domestic
water, which is gravity fed from a static cold
water cistern and hot water cylinder.
Under no circumstances should this unit be
connected directly to the mains cold or hot
water supplies.
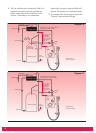
2. The cold water cistern should have a
minimum capacity of 114 Litres (25 galls).
There must be a minimum head of water of
8.0 cm (3") and a maximum head of 10
Metres (33ft) between the bottom of the cold
water cistern and the top of the shower unit.
Under no circumstances should any of the
pipework supplying the shower unit rise
above the level of the bottom of the cold
water cistern.
3. The Redring Expressions Power Shower
incorporates a motor that is designed for
intermittent use and therefore should not be
used continuously for long periods of time.
The maximum length of time for any shower
should not exceed 15 minutes. A rest period
of 45 minutes is then required to allow the
motor to cool down.
4. Warning! Do not switch the shower on if
you suspect it of being frozen. Wait until
you are sure it has thawed out.
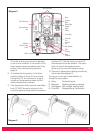
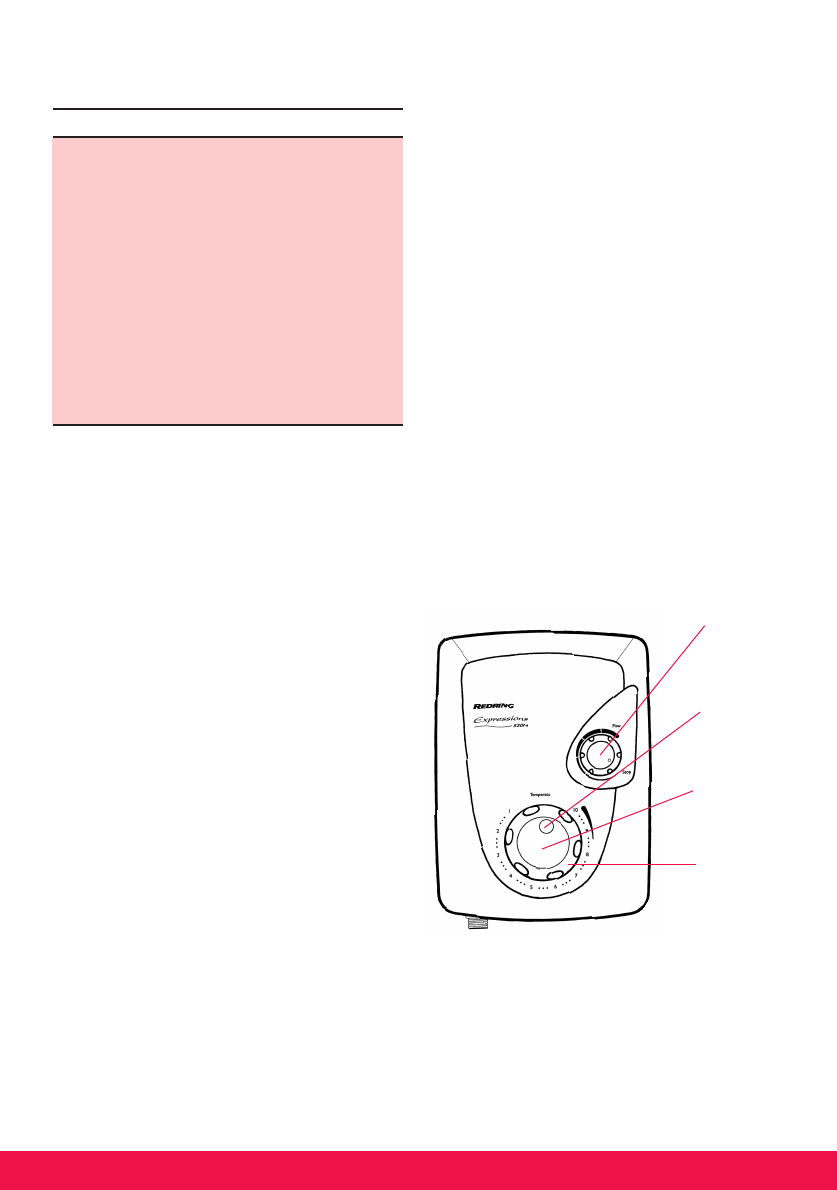
HOW TO USE YOUR 'REDRING'
POWER SHOWER
1. Ensure the electricity and water supplies are
turned on to the unit.
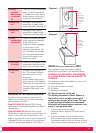
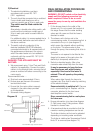
2. Your shower has 2 control knobs (see
diagram 1). Knob 'A' controls the Start/Stop
operation and the water flow rate of the
Shower unit. Knob 'B' controls the
temperature of water and also incorporates a
temperature limiter.
3. To start the shower turn knob 'A' clockwise
from the STOP position. Adjust the control
until a satisfactory flow rate is achieved. For
maximum flow, turn Knob 'A' fully clockwise.
4. To adjust the temperature, turn knob 'B'
clockwise to a lower number on the
temperature scale for a cooler shower and
anti-clockwise to a higher number on the
temperature scale for a warmer shower.
Please allow time for the hot water to reach
the shower unit from the storage cylinder.
Note: It is advisable to test the temperature
of the water with your hand before stepping
under the showerhead.
5. To stop the shower, turn knob 'A' fully
anti-clockwise to the 'STOP' position.
6. Switch off the electricity at the ceiling switch
or local isolator.
7. As a safety feature, a temperature limiter is
provided so that the maximum working
temperature of the Shower unit can be set.
Diagram 1
2
Knob 'A'
(Start/stop and
flow rate control).
Temperature
overide button.
Control knob
cap.
Knob 'B'
(Temperature
adjust).