


28
1.Turn off power to the heater.
2.Turn off gas to the heater.
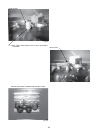
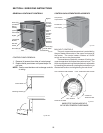
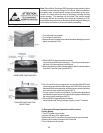
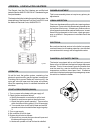
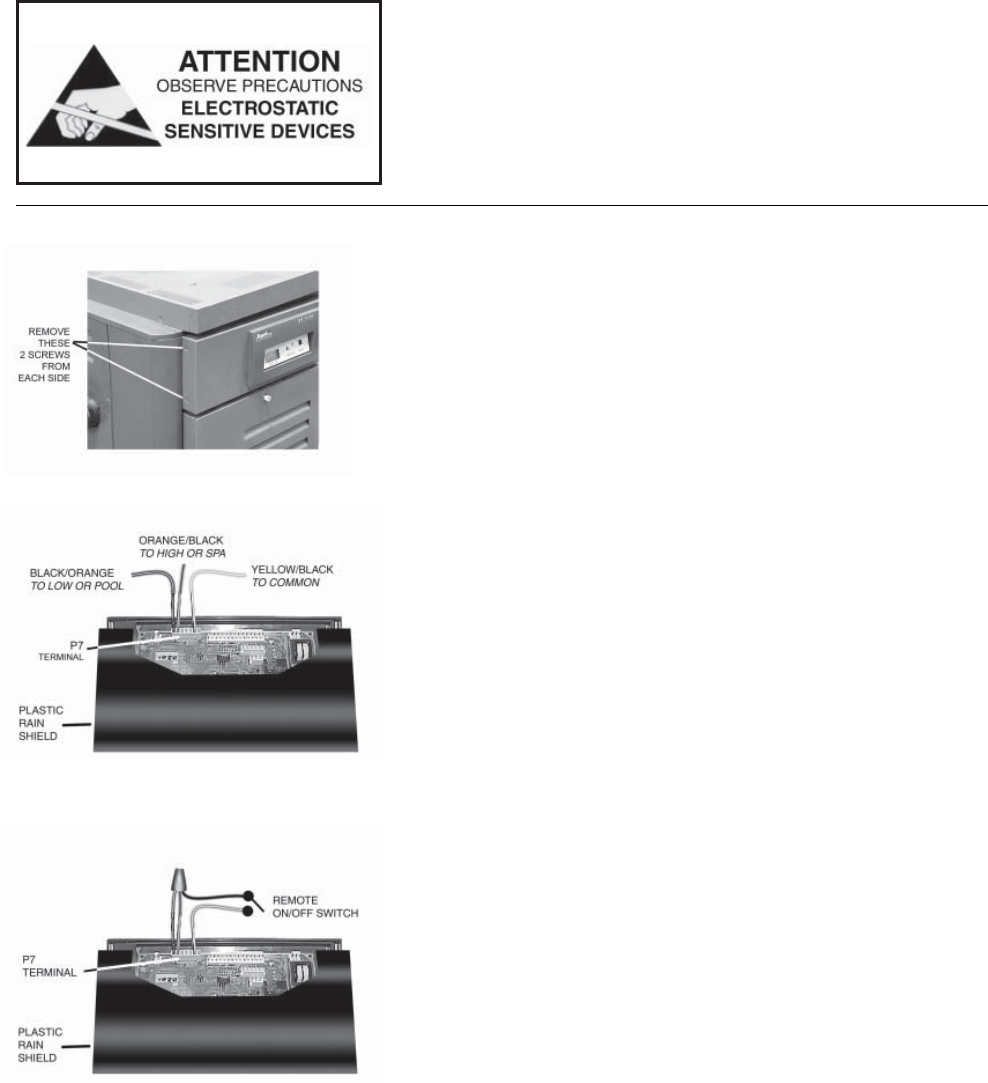
3.Remove the four screws on the side of the heater holding the control
panel (see figure # 9375).
4.Perform ESD charge removal procedures:
Lay control panel forward towards you. This will provide access to
the back of the temperature control board.
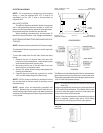
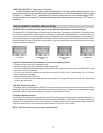
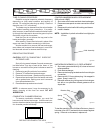
5.Remove the Remote Wire Harness Adaptor from the wire bundle or
from the P7 terminal (see figure # 9373).
Fig # 9375
Note: ElectroStatic Discharge (ESD) damage can be caused by direct
or indirect contact with the wiring or circuit board. When one walks to
the heater area, an electrostatic charge accumulates on the body.
Contact of a finger allows the body to discharge, possibly causing
device damage. This damage can be limited if the service person
discharges himself by removing that charge by adhereing to ESD
preventative/removal practices and reducing that charge by holding on
to the heater enclosure for 5 seconds before proceeding.
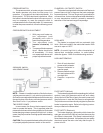
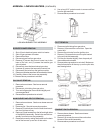
6.For a 3-wire/2 function configuration, connect the HIGH/SPA wire
to the orange wire with the black stripe; the LOW/POOL wire to the
black wire with the orange stripe; and the common wire to the yellow
wire with the black stripe (see figure # 9373).
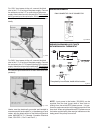
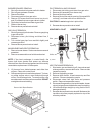
7.For the 2-wire/1 function configuration, connect the orange/black
and black/orange wires to one contact and the yellow/black wire to
the other contact (see figure # 9374).
8.Perform ESD charge removal procedures:
Install the Remote Wiring Harness Adaptor on the P7 terminal.
Fig # 9373
Fig # 9374
THREE WIRE TWO FUNCTION
TWO WIRE ONE FUNCTION
ON/OFF ONLY
Remote Wiring Instructions
To Disconnect Remote Controller and Re-connect
Factory Wiring:
1.Turn OFF power to the heater.
2.Access the back of the digital board.
3.Disconnect the P7 plug where the remote wires are connected
4.Reconnect the black connector at P5 terminal.
5.Turn ON power to the heater.