


II I IIIIIIIII[IIIIIIIIIIIIII I I II I II IIIIII I llll llIllll
D.
CARBURETOR ADJUSTMENTS
• Poorengine performance canbea result ofother
causes such as dirty air filter,carbon build-up on
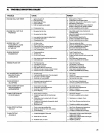
muffler outlets, etc. See "Trouble Shooting
Chart" before proceeding with carburetor
adjustments.
• Forthe bestresults, Beaird-Poulan recommends
that you havea qualified service dealer make all
carburetor adjustments. "Yourdealerhasthetrain-
ing,experience and toolsnecessaryto properlyadjust
your saw to meet our factory performance specifica-
tions. This service is not covered by warranty. If +t
becomes necessary for you to make carburetor
adjustments yourself,followthe described procedures
very carefully.
• The carburetor has been adjusted at the factory
for sea levelconditions. Adjustmentsmaybecome
necessary if the unit is used at s{gnificantlyhigher
altitudes orifyounoticeanyofthefollowing conditions:
NOTE: Be sure to properly prepare the saw as
described in "1. Preparation" below, beforemaking
anyadjustments.
--Chain moves when the engine runs at idle
speed. See "2. idle Speed Adjustment."
-- Saw will not idle. See "2. Idle Speed Adjust-
ment" and "3. Low Speed Mixture Adjust-
ment."
-- Enginedies or hesitates when itshould accel-
erate. See "4. Acceleration Adjustment."
-- Loss of cutting power which is not corrected
byair filtercleaning. "See" 5. High Speed Mix-
ture Adjustment."
ICAUTION:I Permanent damage willoccur toany
2-cycle engine if incorrect carburetor adjust-
ments are made.
• Iftheunit willnotoperate properlyafter making
these adjustments, take the unitto a qualified
service dealer.
WARNING
The chainwill bemoving during mostofthis procedure.
Wear your protective gear and observe all safety
precautions.
1. PREPARATION
a. Stop engine.
b. Use a fresh fuel mixture with proper gasolinel
oil ratio.
c. Placethesaw on asolid, flatsurfaceand makesure
the chain will not contact any object.
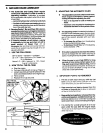
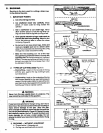
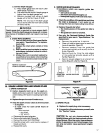
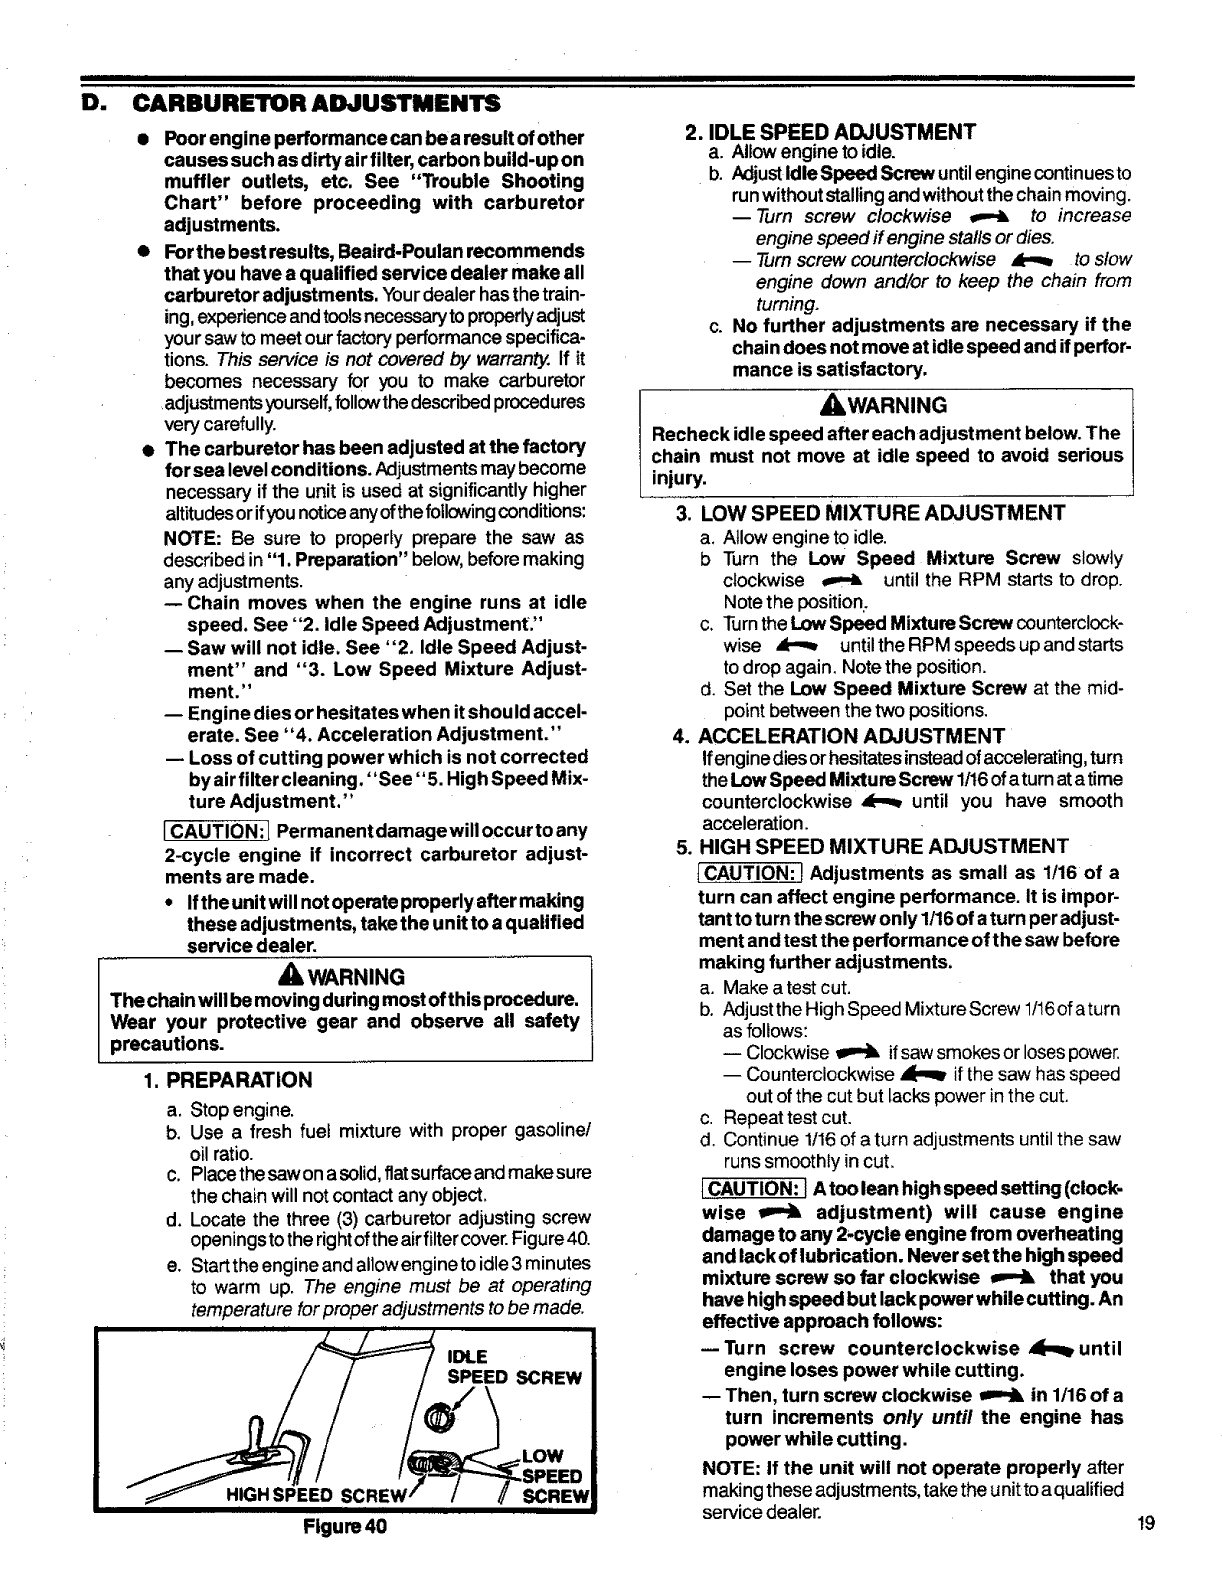
d. Locate the three (3) carburetor adjusting screw
openings tothe rightofthe airfiltercover.Figure 40.
e. Start the engine and allowengineto idle3 minutes
to warm up. The engine must be at operating
temperature for proper adjustments tobe made.
IDLE
Figure 40
2. IDLE SPEED ADJUSTMENT
a. Allowenginetoidle.
b. AdjustIdleSpeed Screwuntilenginecontinuesto
runwithoutstalling and withoutthechainmoving.
--Turn screw clockwise _ to increase
enginespeed ff engine stallsordies.
-- Turnscrewcounterclockwise _ toslow
engine down and/or to keep the chain from
turning.
c. No further adjustments are necessary if the
chaindoes not move at idlespeed and ifperfor-
mance is satisfactory.
_ILWARNING
Recheck idle speed after each adjustment below.The
chain must not move at idle speed to avoid serious
injury.
3. LOW SPEED MIXTURE ADJUSTMENT
a, Allow engine toidle.
b Turn the Low Speed Mixture Screw slowly
clockwise _ until the RPM starts to drop.
Notetheposition,.
c. Turnthe LowSpeed Mixture Screwcounterclock-
wise _ untilthe RPM speeds up andstarts
to drop again. Note the position.
d. Set the Low Speed Mixture Screw at the mid-
point between the two positions.
4. ACCELERATION ADJUSTMENT
Ifengine diesor hesitates insteadofaccelerating, turn
the LOwSpeed Mixture ScR,w 1/16ofaturn atatime
counterclockwise _ until you have smooth
acceleration.
5. HIGH SPEED MIXTURE ADJUSTMENT
ICAUTION:] Adjustments as small as 1/16 of a
turn can affect engine performance. It is impor-
tant toturnthe screwonly 1/16ofaturn peradjust-
ment and test the performance of the saw before
making further adjustments.
a. Make a test cut.
b. Adjust theHigh Speed Mixture Screw 1/16ofaturn
asfollows:
-- Clockwise _ ifsaw smokes or loses power.
-- Counterclockwise _ if the saw has speed
out ofthe cut but lacks power in the cut.
c. Repeat test cut.
d. Continue 1116of a turn adjustments until the saw
runs smoothly in cut.
tCAUTION: ] Atoo lean high speed setting (clock-
wise _ adjustment) will cause engine
damage to any 2+cycleengine from overheating
and lackof lubrication. Never set the high speed
mixture screw so far clockwise _ that you
havehigh speed but lack powerwhile cutting. An
effective approach follows:
--Turn screw counterclockwise _until
engine loses power while cutting.
-- Then, turn screw clockwise _ in 1/16of a
turn increments only until the engine has
power while cutting.
NOTE: If the unit will not operate properly after
making these adjustments, take theunitto a qualified
service dealer.
19