- i iiiiiiiiiiiiiii i ii ii iiiiii
USING YOUR SAW
/ i ii i1[11
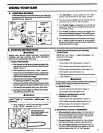
All CONTROL DEVICES
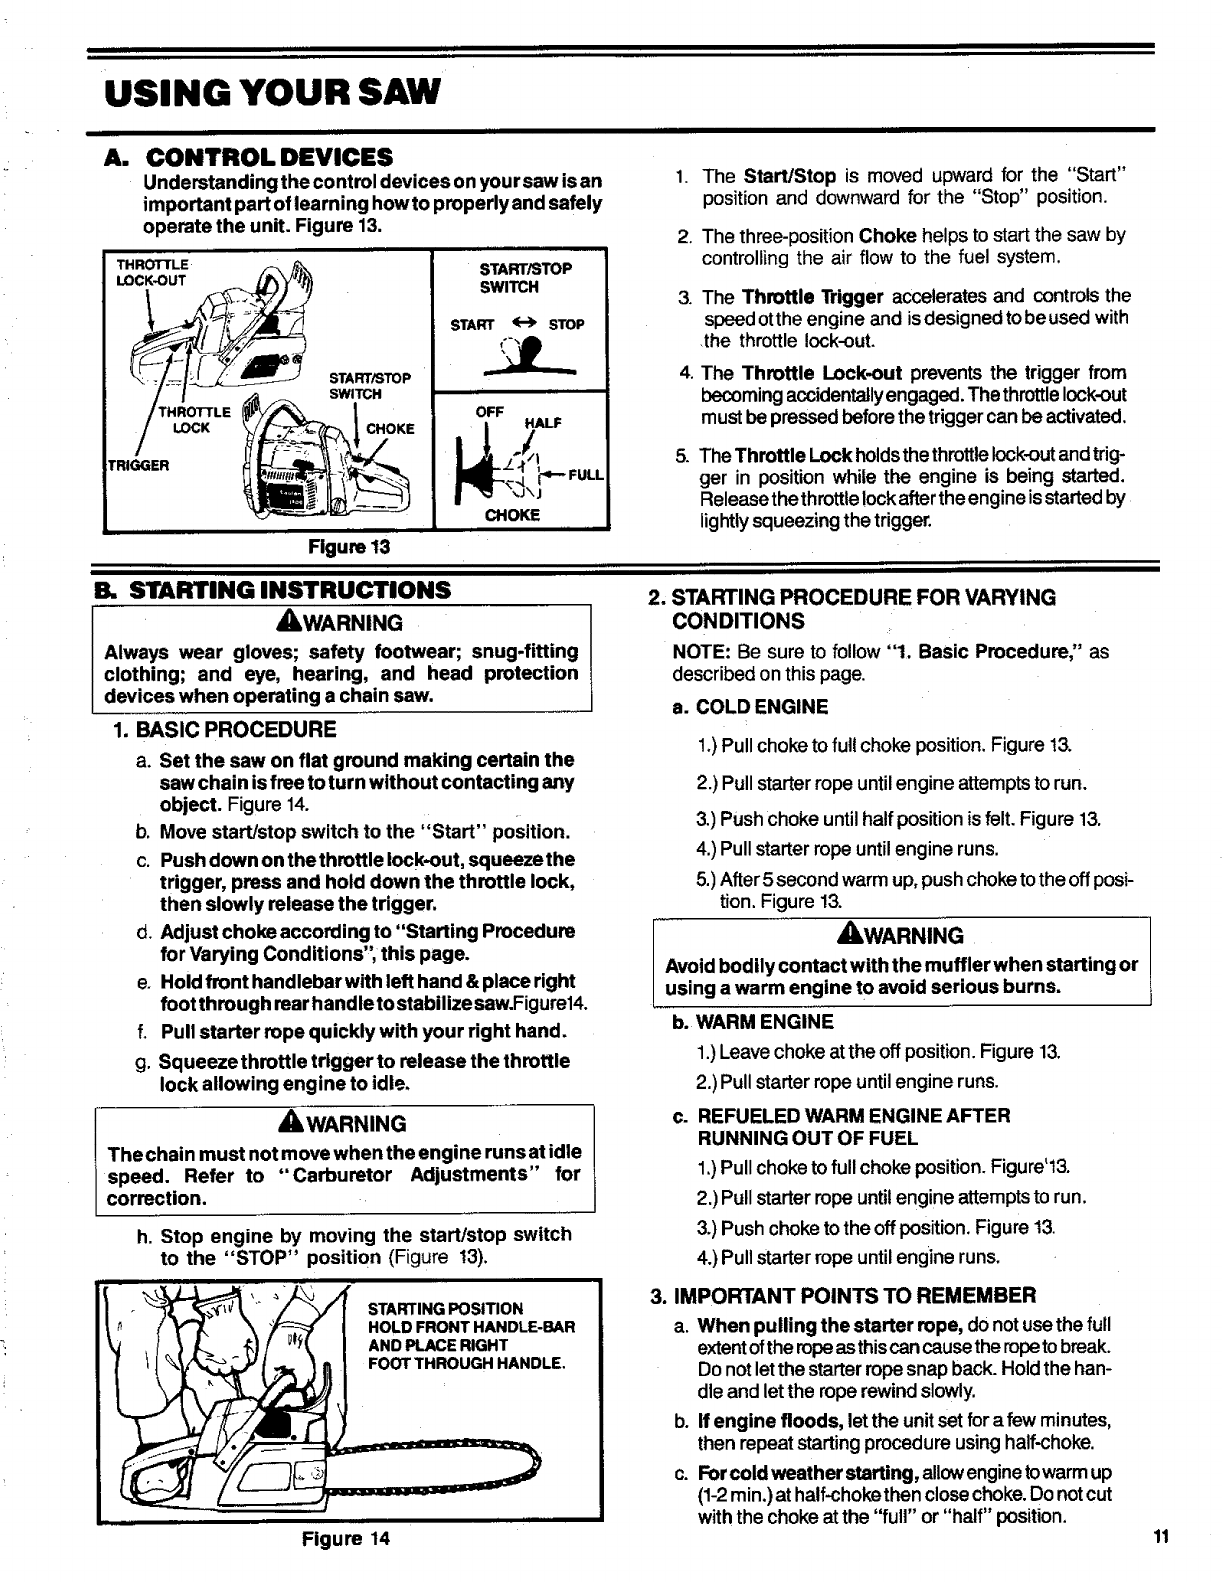
Understanding the control devices on your saw isan
important part of learning howto properlyand safely
operate the unit. Figure 13.
THROTTLE
LOCK
THROTTLE
LOCK-OUT
START/STOP
SWITCH
TRIGGER
Figure 13
START/STOP
SWITCH
START _ STOP
i
OFF
CHOKE
.
3.
,
.
The Start/Stop is moved upward for the "Start"
position and downward for the "Stop" position.
The three-position Choke helps to start the saw by
controlling the air flow to the fuel system.
The Throttle Trigger accelerates and controlsthe
speedotthe engine and isdesignedto be used with
the throttle lock-out.
The Throttle Lock-out prevents the trigger from
becomingaccidentallyengaged.The throttle lock-out
mustbe pressedbeforethetriggercanbeactivated.
The Throttle Lock holdsthethrottle lock-outandtrig-
ger in position while the engine is being started.
Releasethethrottte!ockaftertheengine isstartedby
lightly squeezingthe trigger.
iiii
B, STARTING INSTRUCTIONS
AWARNING
Always wear gloves; safety footwear; snug-fitting
clothing; and eye, hearing, and head protection
devices when operating achain saw.
1. BASIC PROCEDURE
a. Set the saw on flat ground making certain the
saw chain isfree to turn without contacting any
object. Figure14.
b. Movestart/stop switch to the "Start" position.
c. Push down on thethrottle lock-out, squeeze the
trigger, press and hold down the throttle lock,
then slowly release the trigger.
d. Adjust choke according to "Starting Procedure
for Varying Conditions'; this page.
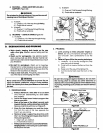
e. Hold front handlebar with left hand & place right
foot through rearhandle tostabilize saw.Figure14.
f. Pull starter rope quickly with your right hand.
g, Squeezethrottle trigger to release the throttle
lock allowing engine to idle,
J ,_WARNING
The chain must not move when the engine runs at idle
speed. Refer to "Carburetor Adjustments" for
correction.
h, Stop engine by moving the startlstop switch
to the "STOP" position (Figure !3).
STARTING POSITION
HOLD FRONT HANDLE-BAR
AND PLACE RIGHT
FOOT THROUGH HANDLE.
Figure 14
ii i
2, STARTING PROCEDURE FOR VARYING
CONDITIONS
NOTE: Be sure to follow "1. Basic Procedure;' as
describedon thispage.
a. COLD ENGINE
!.) Pullchoketo fullchoke position. Figure 13.
2.)Pullstarter rope until engine attempts to run.
3.)Push choke until half position is felt. Figure 13,
4.)Pull starter rope until engine runs.
5.)After 5 second warm up, push choke tothe off posi-
tion, Figure 13.
_WARNING
Avoid bodily contact with the muffler when starting or
using a warm engine to avoid serious burns.
b. WARM ENGINE
1.)Leavechoke at theoff position. Figure13,
2.)Pull starterrope until engine runs.
c. REFUELED WARM ENGINE AFTER
RUNNING OUT OF FUEL
1,)Pullchoke to fullchoke position, Figure'13.
2,)Pull starter rope until engine attempts to run.
3.)Push choke to the off position. Figure 13.
4.)Pull starter rope until engine runs.
3. IMPORTANT POINTS TO REMEMBER
a. When pulling the starter rope, do notusethe full
extentoftheropeasthiscancausetheropetobreak.
Donotletthe starterropesnapback. Holdthe han-
dle and letthe roperewindslowly.
b. Ifengine floods, letthe unitsetfora few minutes,
then repeatstartingprocedureusinghalf-choke.
c. Forcold weather starting, allowenginetowarmup
(1-2rain.)at half-chokethenclosechoke.Donotcut
withthe choke atthe "full" or "half" position.
11


