


REV. F 1-6-05 3 P/N 98748000
NOTE
Retain the gaskets supplied and keep them accessible.
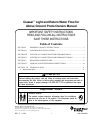
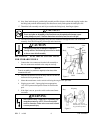
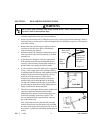
3. Use the Teflon™ tape provided. Snugly wrap the threaded wall
flange in a clockwise direction (as viewed from the back)
starting at the edge of the threads; see Figure 2. Work towards
the flange lip (overlapping 1/2 of the tape width with each
wrap) then back towards the starting point.
• If you have a new pool, move on to step 10.
• If the water level is below the return fitting on an existing pool,
remove the old fitting and move on to step 10.
• If the pool is full of water, follow steps 5 through 9.
NOTE
Steps 4 through 8 require two (2) No. 9 winterizing plugs (not supplied).
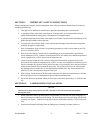
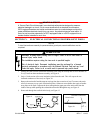
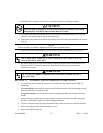
4. Remove the existing eyeball fitting from the return fitting on
your pool wall, see Figure 3.
5. Place a winterizing plug in the front side of the existing return
fitting and disconnect the return hose and clamp from the
existing fitting.
6. Place a winterizing plug in the front side of the Quasar threaded
wall flange
7. While holding the existing return fitting from the inside of the
pool, remove the large nut or the existing fitting body on the
outside of the pool wall.
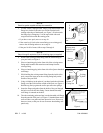
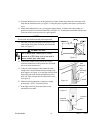
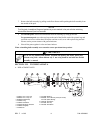
8. Using a folded rag in the palm of your hand, push the old return
fitting out of the wall from the outside of the pool; see Figure 4.
Hold the rag firmly against the wall to prevent water spillage.
9. Insert the flange and gasket from the inside of the pool through
the hole cut out for the inlet fitting. Ensure that the threaded
wall flange is centered on the hole.
10. Take the remaining gasket and put it on the threaded wall flange
from the outside of the pool; see Figure 5. Standard sheet metal
walls will have one gasket and one spacer left over. Do not use
these two items, as they are for use on narrow interlocking wall
panels only.
Liner
Existing
Eyeball
Return
Fitting Nut
Pool wall
Hose
Use a folded rag in the palm of your
hand to hold the water in the pool
while changing fittings.
Figure 3.
Figure 2.
Start at
the edge
Always wrap
Teflon™ tape
clockwise
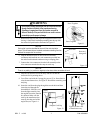
Figure 1.
P
U
S
H
Bulb Retainer
Nut
Figure 4.