


P/N 472235 Rev. E 4-15-05
18
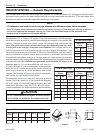
OUTDOOR INSTALLATION
For outdoor installation with an exhaust grill, the heater must be placed in a suitable area on a level, noncombustible surface. Do not
install the heater under an overhang with clearances less than 3 feet from the top of the heater. The area under an overhang must be
open on three sides. Do NOT, under any circumstances, install the heater under ANY deck.
IMPORTANT!
• In an outdoor installation it is important to ensure water is diverted from overhanging eves with a proper
gutter/drainage system. The heater must be set on a level foundation for proper drainage.
• Under certain conditions, “heavy rains or unusually high winds”, it may be necessary to install an outdoors
vent. In this situation, use Outdoor Vent Kit, P/N 460424, (see below).
• This unit shall not be operated outdoors at temperatures below -20
o
F.
CAUTION
If installing the heater next to or near an air conditioning unit or a heat pump, allow a minimum of 36 in.
between the air conditioning unit and the heater.
(Outdoor Shelter Installation in Canada, see page 15)
Section III. Installation
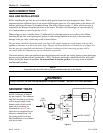
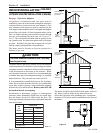
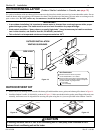
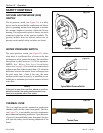
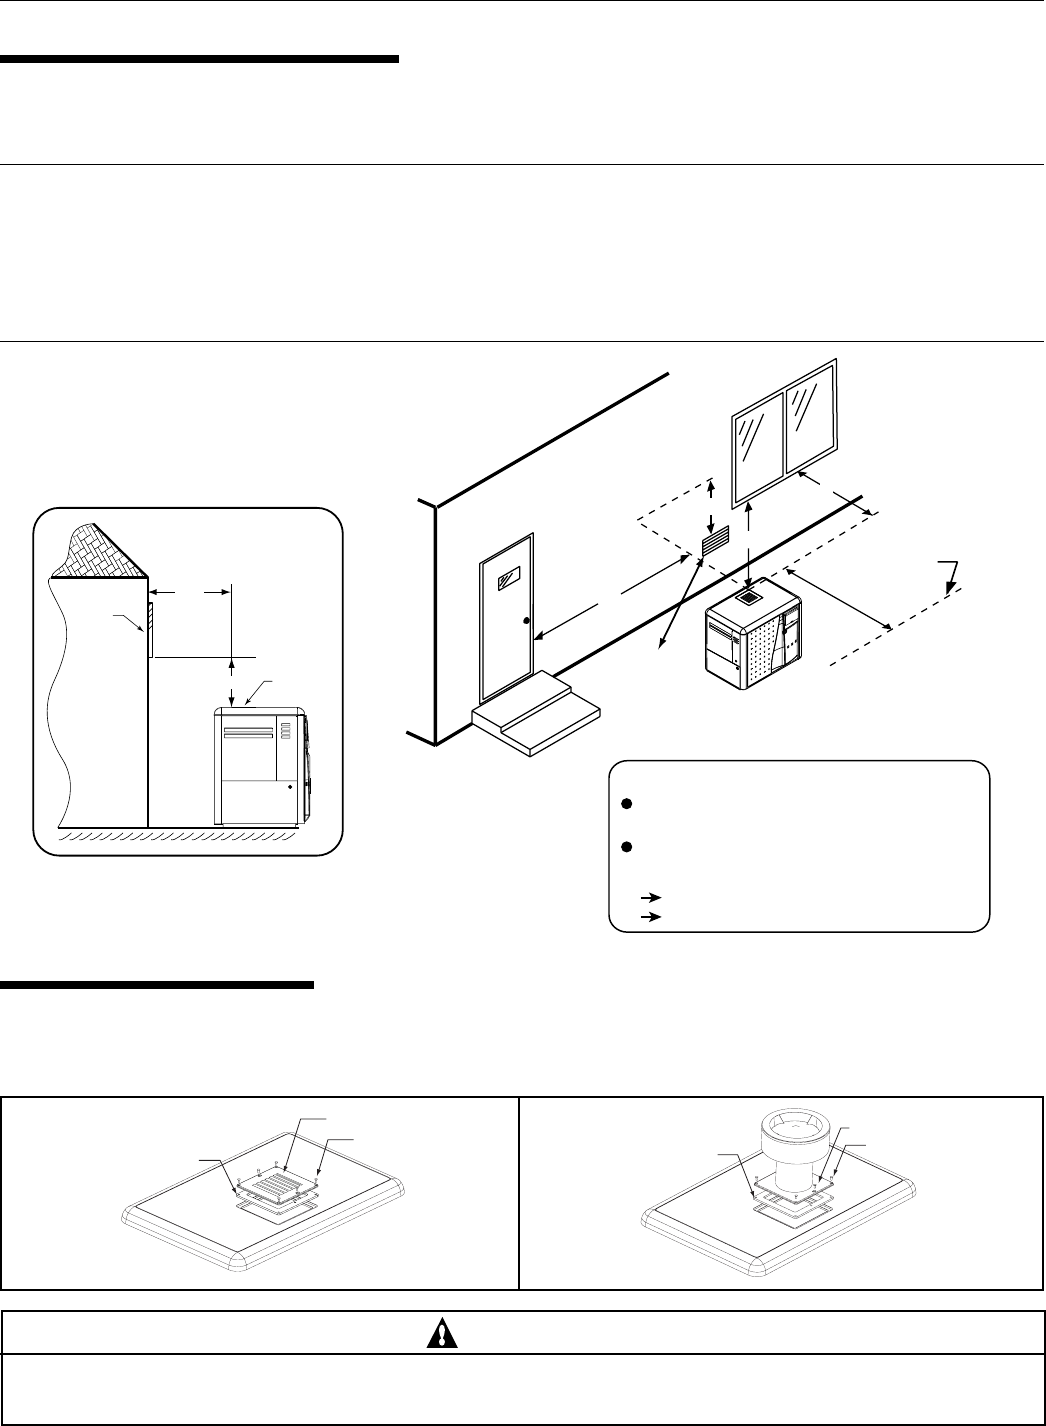
VENTING GUIDELINES
OUTDOOR INSTALLATION
Must be at least 3 ft. above any forced
air inlet located within a 10 ft. radius.
Vent Termination:
Must be located 4 feet away from the building wall
openings, and at the following distances away from
any door, window, or gravity air inlet:
4 ft. below,
4 ft. horizontally
Check local building codes
for setback requirem
ents.
Force
Air Inlet
Property Line
4'
4'
4'
3'
SIDE VIEW
Building
Window
Heater
(side view)
Exhaust Grill
(Vent)
4 ft.
4 ft.
Figure 13.
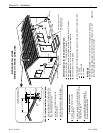
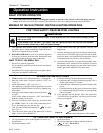
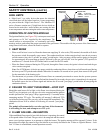
GASKET
SCREWS (6)
METAL FLANGE
SCREWS (6)
GASKET
EXHAUST GRILL
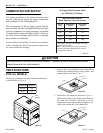
Figure 14.
Figure 15.
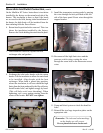
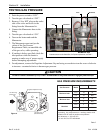
OUTDOOR VENT KIT
1. Remove the six (6) retaining screws from the old exhaust grill and discard the screws, gasket, and exhaust grill as shown in Figure 14.
2. Install the Outdoor Vent Kit, (P/N 460424), as shown in Figure 15. Make sure the holes in the gasket, metal flange of the main vent
assembly, and heater cover are aligned before securing into place using the six (6) screws provided in the Outdoor Vent Kit.